
Locales and languages
Locales
You can configure the global list of locales for your tenant. This list is used in various places in the system.
Add a locale
-
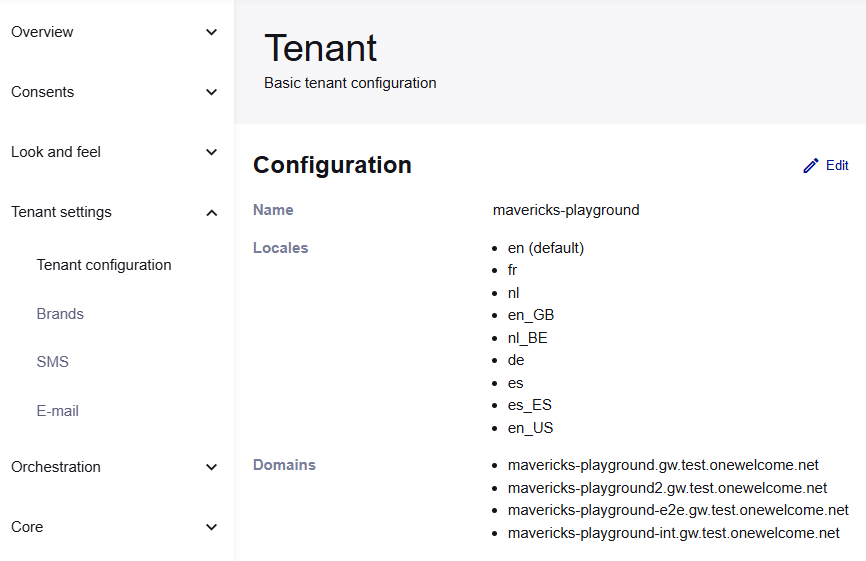
On the OneWelcome Identity Platform console, select Tenant settings > Tenant configuration.
-
Select Edit.
-
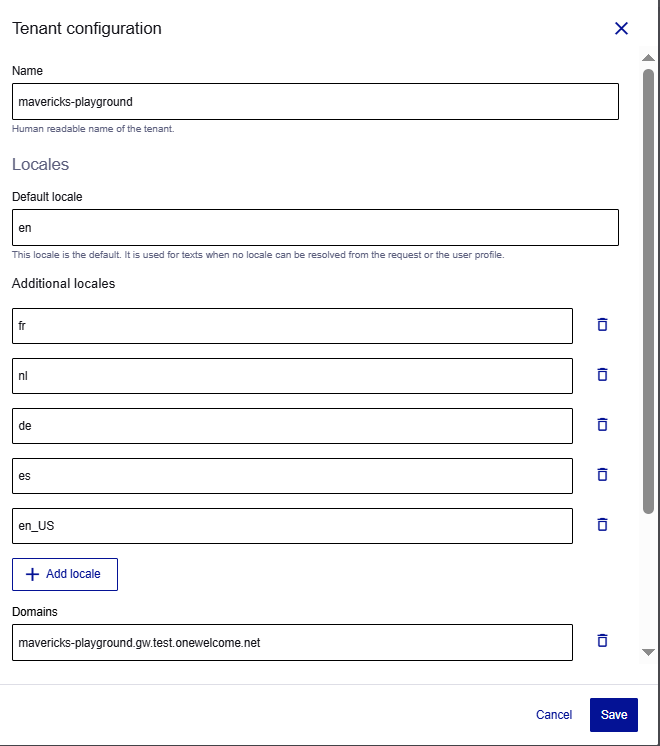
On the Tenant configuration dialog box, select Add locale and enter the locale code, such as en_GB.
-
Add more locales, as needed.
-
Select Save.
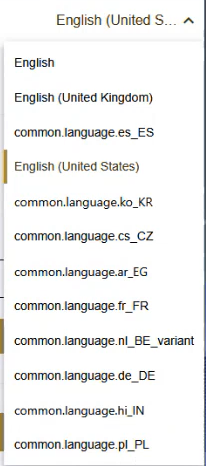
On the user login pages, the new locale is named common.language.<new locale>.
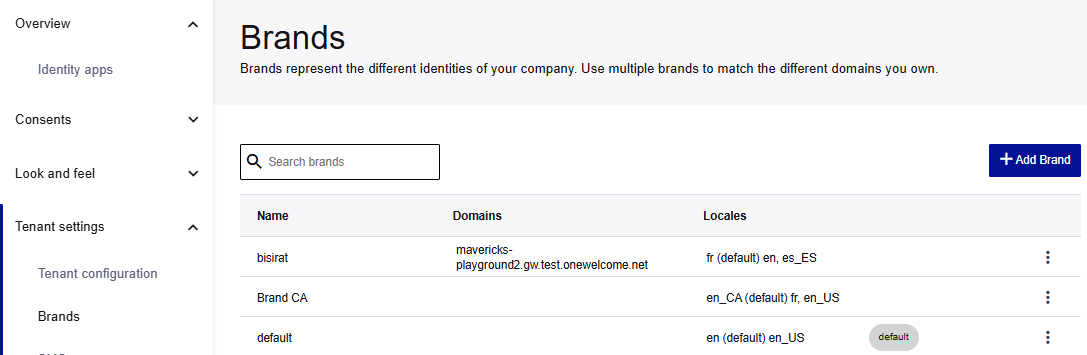
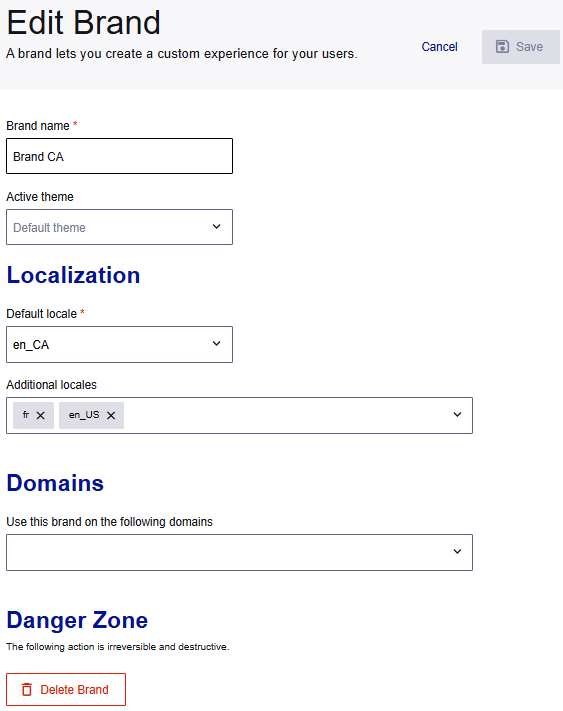
Brands
The brand corresponds to a URL for the user.
In the brand configuration, you connect a brand with the theme that you customized. You also set the default locale.
Add a theme to a brand
-
On the OneWelcome Identity Platform, select Tenant settings > Brands.
-
Select the brand.
-
Select the Active theme.
The list includes the themes that are configured in Look and feel > UI Customization.
-
Under Localization, select the Default locale.
-
Select Save.