
DigiD external IDP
In the OneWelcome Identity Platform, the DigiD identity provider (IDP) is a SAML implementation.
The DigiD IDP implementation is based on the DigiD CombiConnect 1.1 spec. It supports only single connections (LC is not supported). It includes support for authentication with representation (DigiD Machtigen).
DigiD is the digital identity that the Dutch government issues for citizens. It can be used to identify and authenticate citizens for eligible organizations. DigiD is available as a standard identity provider in the Identity Broker and can be used in onboarding processes. Availability is restricted to eligible organizations in the Netherlands.
Request DigiD at Logius
You need to request DigiD for each brand.
Request an OIN
You can can check the OIN register.
Request PKI-overheid certificates
- Request a unique PKI-overheid certificate for each connection. You need a different certificate for production and non-production.
You can use a server certificate with a maximum validity of three years. The OIN is included in the certificate serial number.
Request a DigiD connection
The Identity Broker generates the metadata that you need in this form, as described in the next section.
- To request a new DigiD connection, fill the CombiConnect Aansluitformulier voor één DigiD dienst form.
This form must be signed.
When you request a new connection, Logius provides a link to create some test accounts on the DigiD pre-production environment.
Note
Updating your Combiconnect connection
To make changes to an existing Combiconnect connection, Logius uses another form.
Request a service
-
To request a service, fill the CombiConnect Dienstgegevensformulier voor één DigiD dienst form.
-
The connection and the service can use the same EnitityID.
-
The EntityID follows this pattern:
urn:nl-eid-gdi:1.0:DV:<OIN>:entities:<Index>. -
The
<OIN>is your OIN. -
In pre-production, the
<Index>is an integer value between 9000 and 9999 in pre-production. -
In production, the
<Index>is an integer value between 0000 and 8999 in pre-production.
-
-
-
You can generate a random ServiceUUID via this website
-
The authentication level is no longer decided in the authentication request but instead by the service, so ensure that the right level is requested.
Test DigiD machtigen on pre-production
If you enable Machtigen in the service, it should end up (after a sync of at least 24 hours) on this page. This should allow you to mandate one regular test account to act on behalf of another test account.
Test DigiD app2app on pre-production
The is no DigiD app for the pre-production environment. The only way to (partially) test is to set a regular DigiD app to use demo mode (source):
DigiD app in demostand
De DigiD app kan voor test- en instructiedoeleinden in demostand geactiveerd worden. In de demostand legt de DigiD app geen verbinding met de DigiD backend. Een authenticatie met de DigiD app in demostand is dus slechts een simulatie en leidt niet daadwerkelijk tot inloggen bij (een app van) een dienstaanbieder.

Dienstaanbieders die op app2app willen aansluiten, kunnen deze demostand gebruiken om het inloggen in hun eigen app te testen, zonder dat zij daarvoor een echt DigiD account nodig hebben. Zij zullen daarvoor ook een demostand in hun eigen app moeten introduceren. In het app2app-scenario beantwoordt de DigiD app het authenticatieverzoek van de app van de dienstaanbieder niet met een geldig SAMLart. In plaats daarvan stuurt hij de string "demo" terug. De app van de dienstaanbieder moet daarop kunnen anticiperen.
This is how you use demo mode (source):
Download en activeer de DigiD app
Download de DigiD app via de Apple App Store of Google Play Store. Dit is geen speciale demo app, maar de 'gewone' DigiD app die voor iedereen beschikbaar is. Het verschil is dat u gebruik gaat maken van de demomodus.

Zorg ervoor dat u de DigiD- app nog niet heeft geactiveerd. Open de app en tik vijf keer op het DigiD-logo bovenaan het startscherm. U wordt vervolgens gevraagd of u de demomodus van de app wilt activeren en of u de app opnieuw wilt starten. Tik op 'Ja' en open de app opnieuw. Hierna  ziet u een blauwe balk bovenaan het startscherm met de tekst 'Demo-Mode'. Dit geeft aan dat de demomodus van de app is gestart.

Als u de app al heeft gedownload en geactiveerd met uw eigen DigiD, of met een ander demo-account dan dat u nodig heeft, dan moet u de DigiD app eerst deactiveren via 'Instellingen'. Ga hiervoor naar het menu linksboven in de app.
Configure DigiD in the Identity Broker
Typically, you provide these identity provider details for DigiD:
- Display name: DigiD (for example)
- Active: Select the check box
- Environment: This setting determines which environment is used at Logius, production or pre-production.
- Entity ID: Entity ID of the connection
- Signing key pair: Your PKO-o certificate (both private and public part)
- Next signing key pair: Only used when rotating the PKI-o certificate
- Encryption key pair: Your PKO-o certificate (both private and public part)
- Next encryption key pair: Only used when rotating the PKI-o certificate
- Single logout: Select the check box
Variants
You always need at least one variant. If you also use DigiD Machtigen, you need two variants. You can add as many variants as you need, as long as they have unique names.
Variant for a regular DigiD service
- Variant name: Authentication (for example)
- Expected DigiD Level of Assurance: Matched with the authentication level indicated in the service. The identity broker uses this setting to check that DigiD handles the request on this level or higher
- ServiceUUID: The UUID you generated for the service
- Attribute consuming service name: The name of the connection (for example,
<customername> mijn portaal) - Representation: Do not select the check box
- Force authentication: Select the check box
Variant for DigiD eenmalig inloggen
- Variant name: SLO (for example)
- Expected DigiD Level of Assurance: Matched with the authentication level indicated in the service. The identity broker uses this setting to check that DigiD handles the request on this level or higher
- ServiceUUID: The UUID you generated for the service
- Attribute consuming service name: The name of the connection (for example,
<customername> mijn portaal) - Representation: Do not select the check box
- Force authentication: Do not select the check box
Variant for DigiD machtigen (representation flow)
- Variant name: Authentication (for example)
- Expected DigiD Level of Assurance: Matched with the authentication level indicated in the service. The identity broker uses this setting to check that DigiD handles the request on this level or higher
- ServiceUUID: The UUID you generated for the service
- Attribute consuming service name: The name of the connection (for example
<customername> mijn portaal) - Representation: Select the check box
- Force authentication: Select the check box
Service provider metadata
After you save the DigiD IDP configuration, the Identity Broker generates the SAML service provider (SP) metadata.
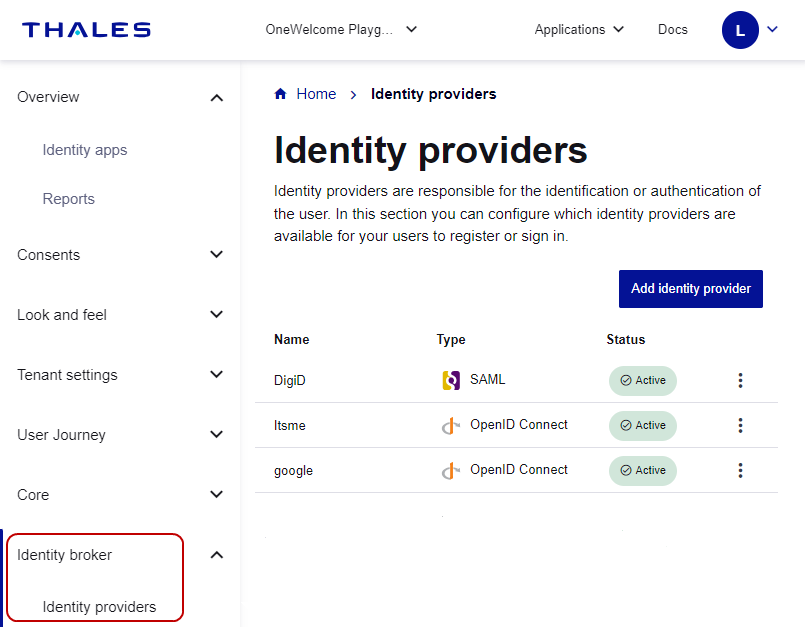
To access the metadata file, click the kebab menu next to the DigiD IdP on the overview page with all external IDPs and open View details.
On this details page, you can see the key: Metadata URL (service provider) with a bunch of URLs behind it.
Always use the metadata that is hosted under the custom domain of the customer because these URLs will be whitelisted by Logius (this needs to be set up in the Tenant Setting).
Configure a DigiD IDP
On the OneWelcome Identity Platform console, you can access the identity broker, where you can configure DigiD IDPs.
Configure the following information in the identity broker module:
Configure Basic DigiD information
-
Log in to your OneWelcome Identity Platform and select your tenant, if required.
-
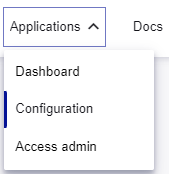
In the top-right of your browser, in the Applications menu, select Configuration.
-
On the left, select Identity broker and then select Identity providers.
-
On the Identity providers page, select Add identity provider, and then select DigiD.
-
Enter a Display name.
The display name is used in the OneWelcome Identity Platform, but is not visible to your users.
-
(Optional) Add a Description.
-
Set the state of the IDP:
-
To make the IDP available to users after you save it, select the Active check box.
-
To allow you to save an incomplete configuration or to prevent the IDP from being available to users after you save it, clear the Active check box.
-
Connection details for a DigiD IDP
-
In the Connection details section, select the Environment:
-
Production
-
Pre production
-
-
Enter the Attribute consuming service name, which is the name of the connection (Naam van de aansluiting) as it is registered at Logius.
-
Enter the Entity ID (service provider). It's a good practice, but not required, for the Entity ID to be unique.
-
Enter the ServiceUUID of the service catalog that the assertions are intended for.
-
Select the Signing key pair and optional Next signing key pair that your organization uses to sign messages from the OneWelcome Identity Platform to SAML. To generate a key pair, upload the certificate.
-
Select the Encryption key pair and optional Next encryption key pair that your organization users to sign messages from the OneWelcome Identity Platform to SAML.
-
To ensure that logout requests are propagated to the identity provider to end the user's session, select Single logout.
At DigiD variants
-
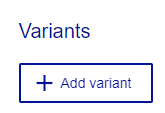
Under Variants, select Add variant.
-
Enter a Variant name that is unique for this DigiD identity provider.
-
Select the Expected DigiD Level of Assurance:
- Unspecified
- Basic
- Low
- Substantial
- High
The authentication response that the OneWelcome Identity Platform receives must meet this level, at a minimum.
-
To make the variant active when you save the IDP, select the Active check box.
-
To force users to authenticate at the identity provider, even if they have an existing session, select Force authentication.
-
To add another variant, select Add variant and repeat the steps above.
Map attributes for a DigiD IDP
The identity provider sends user attributes as claims in the authentication response. Configure the attribute mapping from the IDP to your organization. Only mapped attributes are stored and sent to your services.
-
(Optional) Select Return original assertion.
-
Under Attribute mappings, select Add attribute mapping.
-
Enter the Claim from IDP and select the corresponding OneWelcome attribute.
Repeat this procedure for each identity provider claim that you want to map to a OneWelcome Identity Provider attribute.
-
Save your IDP configuration:
-
To save an incomplete IDP configuration or a draft that is not available to users, select Save draft.
-
To save the IDP configuration that is available to users, select Submit.
-