
OpenID Connect external IDPs
To configure the two-way communication between the OneWelcome Identity Platform and the external IDP, you need to configure settings in both the OneWelcome Identity Platform and the external IDP.
For the OneWelcome Identity Platform, you configure the settings on the console. For each IDP, you need to configure the following information in the identity broker module:
-
Basic information
-
Connection details
-
Variants
-
Attribute mappings
Configure OpenID Connect basic information
-
On the Identity providers page, select Add identity provider, and then select OpenID Connect.
-
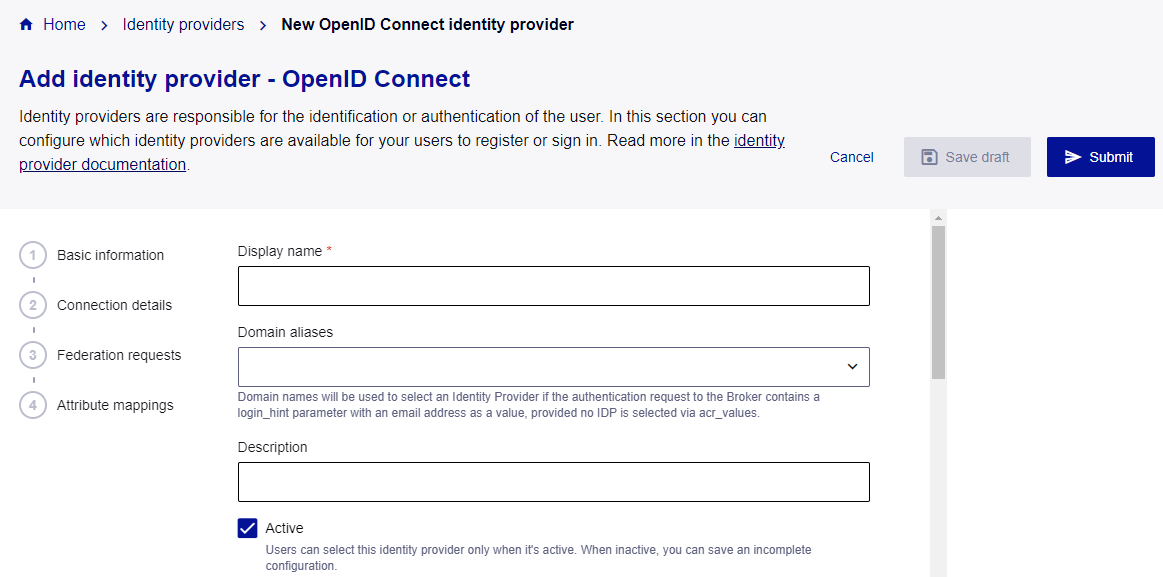
In the Basic information section, enter a Display name.
The display name is used in the OneWelcome Identity Platform.
-
(Optional) Enter any Domain aliases.
Domain names are used to select an IDP when
acr_valuesare not used to select the IDP and the authentication request to the identity broker contains alogin_hintparameter with an email address as a value. -
(Optional) Enter a Description.
-
Set the state of the IDP:
-
To make the IDP available to users after you save it, select the Active check box.
-
To allow you to save an incomplete configuration or to prevent the IDP from being available to users after you save it, clear the Active check box.
-
Configure OpenID Connect connection details
Before you can configure the connection details, you need to get the following information from the external IDP:
-
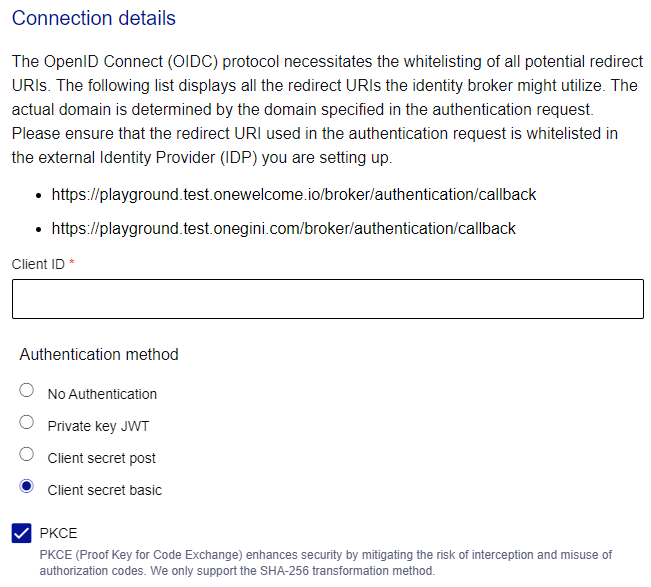
Client ID: This is the OIDC application (client) ID that identifies the external IDP.
-
Client secret: The OneWelcome Identity Platform sends the OIDC shared secret to authenticate the request with the external IDP. This secret is required only for the client secret basic and client secret post authentication methods. The OneWelcome Identity Platform uses the client secret towards the token endpoint of the external IDP. All other requests are unauthenticated.
-
Well-known configuration endpoint: This URL can have different names in different IDPs, such as the OpenID Provider Configuration Document, Discovery Document URL, or simply Endpoint. If this URL doesn't exist in the external IDP, you manually configure the other endpoints in the OneWelcome Identity Platform.
The OpenID Connect protocol requires that all potential redirect URIs are specified in an allowlist. The console lists all the redirect URLs that the identity broker might use. The domain specified in the authentication request determines the actual domain. Ensure that the redirect URI used in the authentication request is included in the allowlist in the external IDP that you are configuring.
-
In the Connection details section, enter the Client ID.
-
Select an Authentication method:
-
No Authentication
-
Client secret basic
-
Client secret post
-
Client secret JWT
-
Private key JWT
-
Client TLS
-
-
To enhance security with Proof Key for Code Exchange (PKCE), select the PKCE check box.
If the authentication method is No Authentication, PKCE is required and you cannot clear the check box.
PKCE mitigates the risk of interception and the misuse of authorization codes. The OneWelcome Identity Platform supports only the SHA-256 transformation method.
-
If the authentication method is either Client secret basic or Client secret post, enter the Client secret.

-
Enter the Well-known configuration endpoint and select Load.
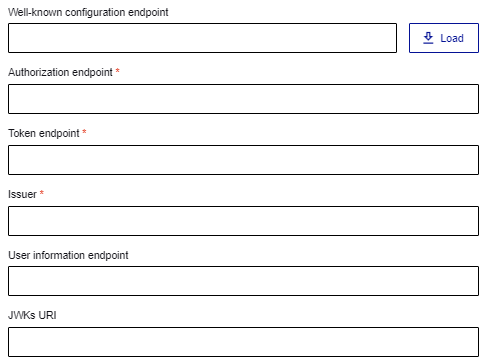
When you load the well-known configuration endpoint, the following fields populate automatically. If the external IDP doesn't offer a well-known configuration endpoint or discovery endpoint, enter the following information:
-
Authorization endpoint: The user is redirected to this URL to authenticate.
-
Token endpoint: When authentication is successful, an authorization code is sent to this URL to obtain an ID token and an access token.
-
Issuer: The issuer string is used to validate the keys for the ID token signature.
-
(Optional) User information endpoint: This is a protected resource that provides information about a user. In an access token that was issued by your token endpoint, the scopes specify the user attributes that are returned in the response of the user information endpoint.
-
Signature type: Symmetric signatures use the same secret for both encryption and decryption. Asymmetric signatures use two secrets, a public secret for encryption and a private secret for decryption.
-
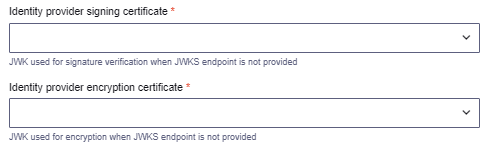
(Optional) JWKs URI: Returns the JWK when you use JWK for signature verification or encryption. If you do not specify the JWKs URI, you must use certificates. It is a good practice to use JWKS, so that the OneWelcome Identity Platform automatically rotates the keys.
-
-
To use certificates instead of the JWKs URI, select the Identity provider signing certificate and Identity provider encryption certificate. To upload a new certificate, select Create new and upload the certificate.
-
To enable support for encrypted JWT, select the Encrypted JWT check box, and select the type of key pairs to use:
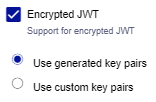
-
Use generated key pairs
-
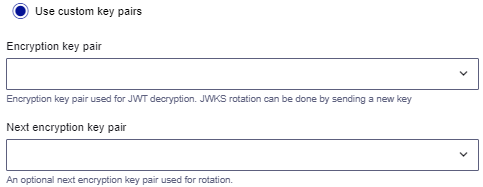
Use custom key pairs: Enter the Encryption key pair and optionally the Next encryption key pair.
-
-
If you're using encrypted JWT, select the JSON web encryption algorithm for the identity provider to use:

- RSA_OAEP_256
- RSA_OAEP
- ECDH_ES
-
If you're using Authentication request parameters as JWTs using the
requestparameter, select JWT-Secured Authenrication Request:
-
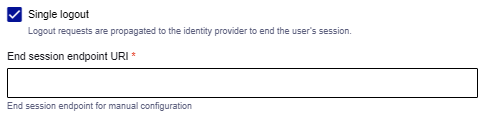
To ensure that logout requests are propagated to the identity provider to end the user's session, select Single logout, and then enter the End session endpoint URI.
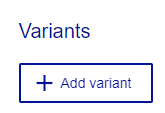
Add OpenID Connect variants
You must add at least one variant. Variants allow you to send different authentication requests, with different scopes, claims, and ACR values, to an IDP.
You might use variants for several reasons:
-
Multiple services: If you manage several services through one connection, such as in case of representation or delegation, variants help you send specific requests for each service.
-
Different purposes: Whether you need to authenticate users, identify them, or just verify that they are over 18, variants allow you to adjust the requested attributes accordingly.
-
Levels of assurance: If your portal requires different levels of assurance, variants enable you to customize the authentication request to meet these requirements.
-
Under Variants, select Add variant.
-
Enter a Variant name that is unique for this OIDC identity provider configuration.
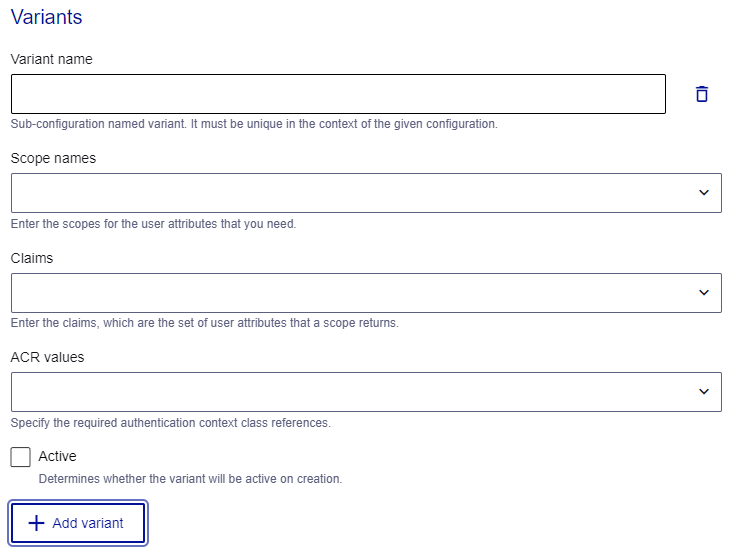
-
To use scopes, enter the Scope names for the user attributes that you need.
-
To use claims, enter the Claims, which are the set of user attributes that a scope returns.
-
To use authentication context class references (ACR), enter the ACR values.
-
To add another variant, select Add variant and repeat the steps above.
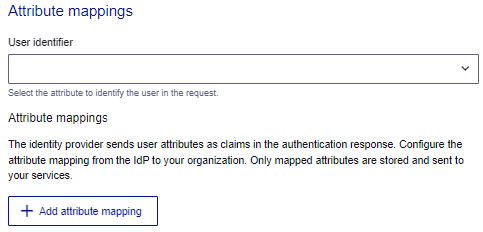
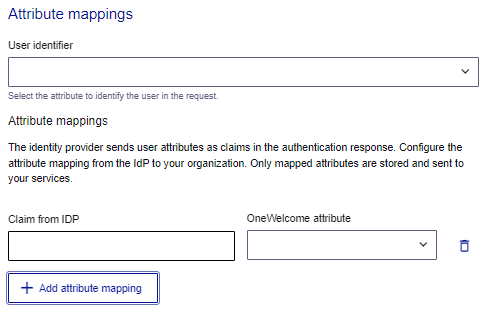
Map OpenID Connect attributes
Map the user attributes from the IDP to the equivalent user attributes in the OneWelcome Identity Provider. Attribute mapping allows you to map external attributes to other claims in the ID token.
The IDP sends user attributes as claims in the authentication response. Only mapped attributes are sent to your services.
When you map attributes, you can rename them. For example, you can rename surname to family_name. However, you cannot split or combine attributes.
-
(Optional) Select Return original assertion.
-
Under Attribute mappings, select the User identifier that identifies the user in the request.
-
To map additional claims from the IDP to user attributes in the OneWelcome Identity Platform, select Add attribute mapping.
-
Enter the Claim from IDP and select the equivalent OneWelcome attribute. To create an attribute, start typing the name in the field and select Create new.
Unmapped attributes are omitted in all responses.
-
Repeat to add additional mappings.
-
Save your IDP configuration:
-
To save an incomplete IDP configuration or a draft that is not available to users, select Save draft.
-
To save the IDP configuration that is available to users, select Submit.
-