
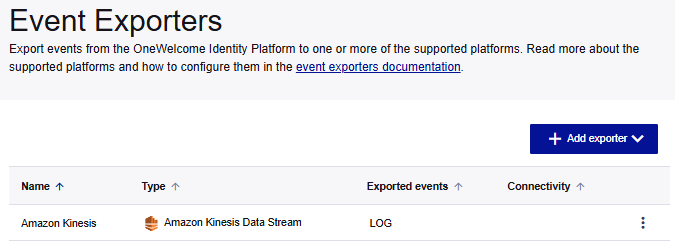
Export events
The OneWelcome Identity Platform uses event exporters to publish your tenant's public and log events to your environment.
The OneWelcome Identity Platform includes the following exporters:
- Amazon Kinesis Data Stream
- Amazon Data Firehose
- Amazon S3
- Splunk HTTP Event Collector
- Generic HTTP exporter
You can configure multiple instances of each exporter for every tenant. For example, you can configure an exporter for public events and another exporter for log events.
Access the event exporter
-
Log in to your OneWelcome Identity Platform configuration console and select your tenant, if required.
-
On the left, select Core and then select Event exporters.
Amazon Kinesis Data Stream exporters
Amazon Kinesis prerequisites
Before you begin, you need to get the following authentication information for your Amazon Kinesis deployment:
- Amazon Kinesis region
- Amazon Kinesis access key identifier
- Amazon Kinesis secret key
- Amazon Kinesis data stream name
Add an Amazon Kinesis Data Stream exporter
Configure an event exporter instance to enable the OneWelcome Identity Platform to push events to Amazon Kinesis data streams. The exporter pushes each event separately to the Amazon Kinesis stream.
To support different scenarios, such as different event categories or different data streams, you can add multiple instances of the Amazon Kinesis Data Stream exporter.
-
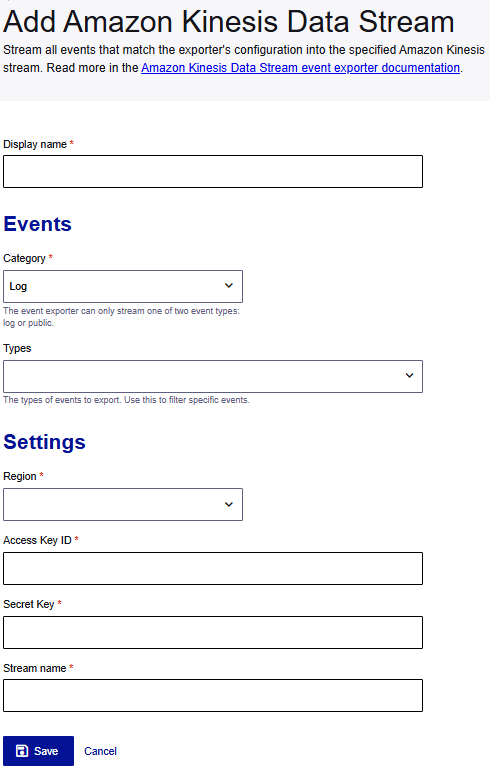
On the OneWelcome Identity Platform console, on the Event Exporters page, select Add exporter and then select Amazon Kinesis Data Stream.
-
On the Add Amazon Kinesis Data Stream page, enter a Display name for this exporter configuration.
-
Under Events, select the event Category
For every exporter, you select a category of events, Log or Public. Log events include audit and configuration events. Public events include communication events between the applications in the OneWelcome Identity Platform.
-
Enter the event Types to include. To include all events, leave the Types empty. To include only specific events, list each type, such as
ApplicationUpdatedEvent.Next, enter the authentication information for your Amazon Kinesis deployment.
-
Under Settings, select the Amazon Kinesis Region.
-
Enter the Access key ID (for example,
AKIAIOSFODNN7EXAMPLE) and the Secret key (for example,wJalrXUtnFEMI/K7MDENG/bPxRfiCYEXAMPLEKEY) for the AWS stream. -
Enter the Amazon Kinesis Stream name.
-
Select Save.
Amazon Data Firehose exporters
Amazon Data Firehose prerequisites
Before you begin, you need to get the following authentication information for your Amazon Data Firehose deployment:
- Amazon Data Firehose region
- AWS access key identifier
- AWS secret key
- Amazon Data Firehose stream name
Add an Amazon Data Firehose exporter
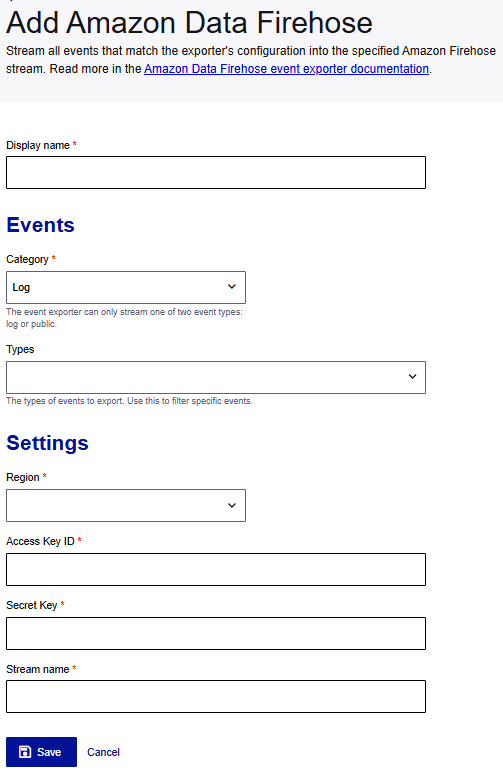
All messages matching the criteria that you configure in the exporter (such as tenant, event category, or event type) are exported in the original JSON format, from the OneWelcome Identity Platform to the Amazon Data Firehose stream that you specify.
-
On the Event Exporters page, select Add exporter and then select Amazon Data Firehose.
-
On the Add Amazon Data Firehose page, enter a Display name for this exporter configuration.
-
Under Events, select the event Category
For every exporter, you select a category of events, Log or Public. Log events include audit and configuration events. Public events include communication events between the applications in the OneWelcome Identity Platform.
-
Enter the event Types to include. To include all events, leave the Types empty. To include only specific events, list each type, such as
ApplicationUpdatedEvent.Next, enter the authentication information for your Amazon Data Firehose deployment.
-
Under Settings, select the Amazon Data Firehose Region.
-
Enter the Access key ID (for example,
AKIAIOSFODNN7EXAMPLE) and the Secret key (for example,wJalrXUtnFEMI/K7MDENG/bPxRfiCYEXAMPLEKEY) for the Amazon Data Firehose stream. -
Enter the Amazon Data Firehose Stream name.
-
Select Save.
Amazon S3 exporters
For information about the permissions and policies that are needed for setting up an Amazon S3 bucket, see AWS QA section.
Amazon S3 prerequisites
Before you begin, you need to get the following authentication information for your Amazon S3 environment:
- Amazon S3 region
- AWS access key identifier
- AWS secret key
- Amazon S3 bucket name
For information about configuring the Amazon S3 bucket, refer to the Amazon S3 documentation.
Add an Amazon S3 exporter
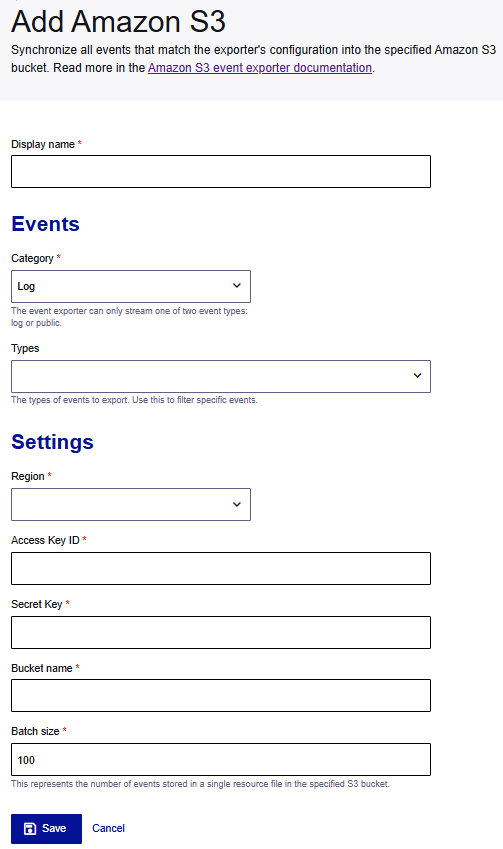
Configure an event exporter to enable the OneWelcome Identity Platform to push events to your Amazon S3 bucket.
You can specify the batch size to determine the number of events that are aggregated and stored in a single resource file. The Amazon S3 exporter writes to the bucket directly.
To support different scenarios, such as different event categories or different Amazon S3 buckets, you can add multiple instances of the Amazon S3 exporter.
-
On the OneWelcome Identity Platform console, on the Event Exporters page, select Add exporter and then select Amazon S3.
-
On the Add an Amazon S3 exporter page, enter a Display name for this exporter configuration.
-
Under Events, select the event Category
For every exporter, you select a category of events, Log or Public. Log events include audit and configuration events. Public events include communication events between the applications in the OneWelcome Identity Platform.
-
Enter the event Types to include. To include all events, leave the Types empty. To include only specific events, list each type, such as
ApplicationUpdatedEvent.Next, enter the authentication information from your Amazon S3 bucket.
-
Under Settings, select the AWS Region.
-
Enter the Access key ID (for example,
AKIAIOSFODNN7EXAMPLE) and the Secret key (for example,wJalrXUtnFEMI/K7MDENG/bPxRfiCYEXAMPLEKEY) for your Amazon S3 bucket. -
Enter the Amazon S3 Bucket name and Batch size.
The batch size is the number of events that are store in a single resource file in the Amazon S3 bucket.
-
Select Save.
Splunk HTTP Event Collector exporters
The HTTP Event Collector (HEC) lets you send data and application events to a Splunk deployment (Splunk Enterprise or Splunk Cloud Platform) over the HTTP and Secure HTTP (HTTPS) protocols.
The HTTP Event Collector (HEC) HEC uses a token-based authentication model. You generate a token in HEC and use that token to configure the HEC event exporter.
Each token has a unique value that is represented as a 32-character globally unique identifier (GUID) or opaque HEX value. Each character can be a number from 0-9 or a letter from a-f, and the token is case insensitive. For example, the following is a valid HEC token: B5A79AAD-D822-46CC-80D1-819F80D7BFB0.
Splunk HEC exporter prerequisites
Before you begin, you need to get the following authentication information for your Splunk HEC deployment:
- Index name
- Splunk HEC token
- HEC URL
(https://domain:port) - Source type (if used)
Add a Splunk HEC exporter
Configure an event exporter instance to enable the OneWelcome Identity Platform to push events to your Splunk HEC deployment.
To support different scenarios, such as different event categories or different data streams, you can add multiple instances of the Splunk HEC exporter.
-
On the Event Exporters page, select Add exporter and then select Splunk HTTP Event Collector.
-
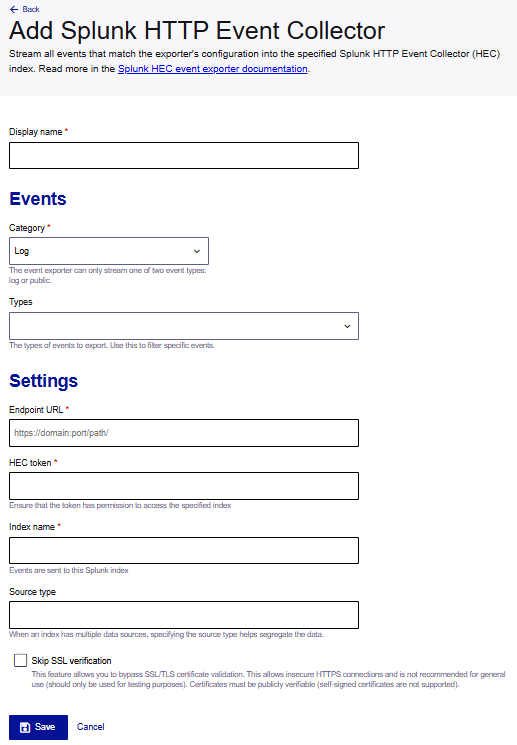
On the Add Splunk HTTP Event Collector page, enter a Display name for this exporter configuration.
-
Under Events, select the event Category
For every exporter, you select a category of events, Log or Public. Log events include audit and configuration events. Public events include communication events between the applications in the OneWelcome Identity Platform.
-
Enter the event Types to include. To include all events, leave the Types empty. To include only specific events, list each type, such as
ApplicationUpdatedEvent.Next, enter the authentication information from your Splunk HEC deployment.
-
Under Settings, enter the Endpoint URL in the format:
https://domain:port/path/.HEC runs on a specific, non-default port, which means that the URL must include the port number. The Splunk HEC URL must use the HTTPS protocol.
-
Enter the HEC token.
The token must have permission to access the HEC index where you are sending the event data.
-
Enter the HEC Index name where you want to send the event data.
The index is equivalent to a Splunk database.
-
Enter the Source type. It must match a source type configured in your Splunk HEC deployment.
If there are multiple data sources for a particular index, specifying the source type helps to segregate the data, such as when multiple exporters are used against the same Splunk HEC instance.
-
To bypass SSL/TLS certificate validation during testing, select the Skip SSL verification check box.
This allows insecure HTTPS connections and is not recommended for general use (use only for testing purposes). Certificates must be publicly verifiable (self-signed certificates are not supported).
-
Select Save.
Generic HTTP exporters
Configure a generic HTTP exporter to send all messages that match the exporter's configuration to a specific HTTP endpoint.
Messages are sent as a JSON array of events.
Generic HTTP exporter prerequisites
-
The HTTP endpoint must accept a POST request with a JSON body.
-
The HTTP endpoint must respond with an HTTP status in the 2xx range after each request, preferably 202 Accepted.
-
The HTTP endpoint must be protected with an OAuth 2.0 access token. You can use the OneWelcome Identity Platform as the authorization server for the access token.
Before you begin, you also need the following authentication information about the HTTP endpoint where you want to export data:
-
URL
-
Token endpoint
-
Client ID
-
Client credentials type
-
Client secret, required only if the credentials type is basic
-
Audience, required only if the credentials type is private key JWT
-
Scope
Add a generic HTTP exporter
Configure an event exporter instance to enable the OneWelcome Identity Platform to push events to your HTTP endpoint.
To support different scenarios, such as different event categories or different data streams, you can add multiple instances of the Generic HTTP exporter.
-
On the Event Exporters page, select Add exporter and then select Generic HTTP.
-
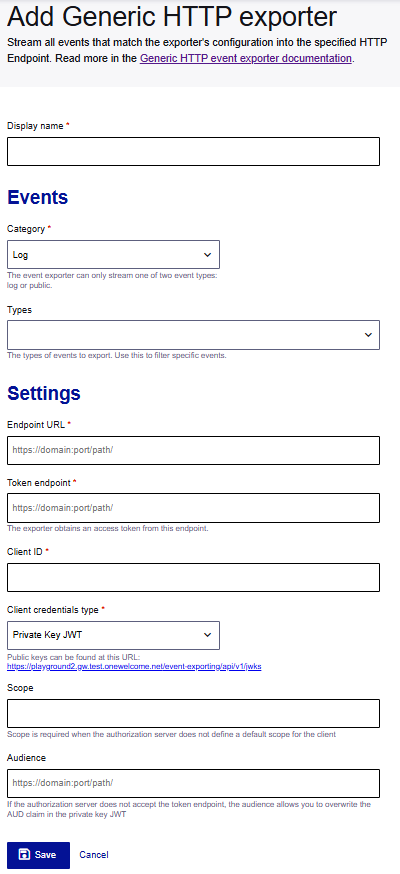
On the Add Generic HTTP page, enter a Display name for this exporter configuration.
-
Under Events, select the event Category
For every exporter, you select a category of events, Log or Public. Log events include audit and configuration events. Public events include communication events between the applications in the OneWelcome Identity Platform.
-
Enter the event Types to include. To include all events, leave the Types empty. To include only specific events, list each type, such as
ApplicationUpdatedEvent.Next, enter the authentication information for the HTTP endpoint.
-
Under Settings, enter the HTTPS Endpoint URL where you want to send the event data.
-
Enter the Token endpoint for obtaining the token.
-
Enter the Client ID.
-
Select the Client credentials type.
The type of client credentials can be either Basic or Private Key JWT:
-
If the type is Basic, enter the Client secret.
-
If the type is Private Key JWT, enter the Audience.
If the authorization server does not accept the token endpoint, the audience can overwrite the AUD claim in the private key JWT.
-
-
(Optional) Enter the Scope of permissions.
-
Select Save.