User management
In Delegated User Management v2, a user is any person whose access rights it controls. A user can also be an administrator in Delegated User Management.
Delegated User Management uses access roles to govern access to external applications and administrator roles to govern access to functions within the Delegated User Management application.
A user is granted authorization to access an application or perform an action in the application if all the following criteria are met:
-
The user is assigned adequate permission, either directly or through a role.
-
All involved objects have active status: user, organization, application, permissions, and role.
-
All involved objects meet the start and end date criteria: user, organization, application, permissions, and role.
-
All applicable relationships meet the start and end date criteria (for example, the start and end date of the user's membership in the organization, or the start and end date of the access role's assignment).
Note
From the standpoint of authorization, the OneWelcome Identity Platform acts as the policy decision point, but not as the policy enforcement point. In other words, the actual enforcement of whether the user can access the external application and take the desired actions inside the application is not provided by the OneWelcome Identity Platform, but rather by an external gateway or by the application itself.
Sort or filter the list of users
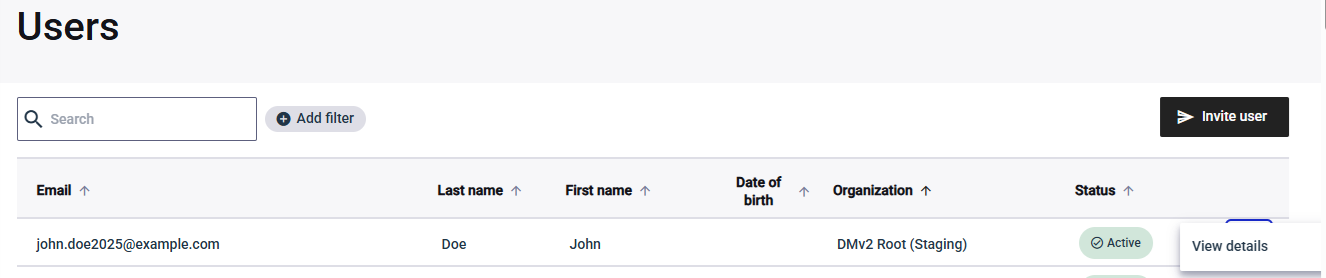
On the Users page, a configurable table lists the users in the organizations that you manage, and provides access to their account details.
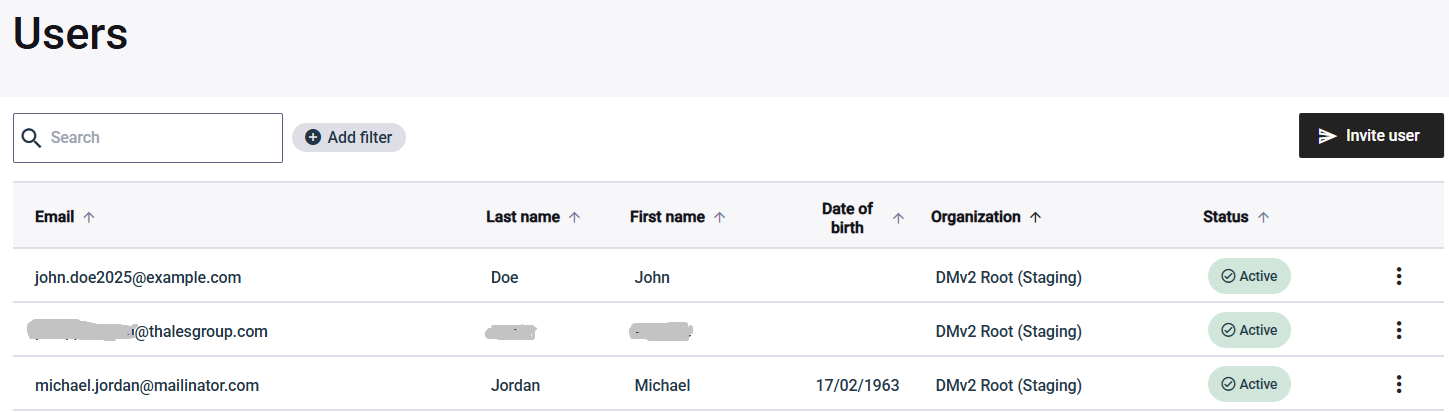
By default, the table is sorted on the first column. You can sort the columns in alphabetical ascending order, and filter the table by organization, status, or access role.
The table is not paginated. If the number of users exceeds 500, the system prompts you to apply filters to reduce the number of users in the table.
The table can include up to six columns. If you have access to users in multiple organizations, the fifth column displays the name of the user's organization. The sixth column displays the user status (Active, Blocked, Invited, and so on).
Note
Thales can configure the first four columns in the table for your tenant. To request changes, contact Thales Support.
User status
| User status | Description |
|---|---|
| Active | The user is activated and can log in to access the system. |
| Inactive | The user hasn't completed enrollment or hasn't enrolled their authenticator. The user cannot access the system. |
| Authentication blocked | The user is temporarily blocked, such as when a password is compromised. |
| Invited | The user was invited but has not yet accepted the invitation. |
| Invitation withdrawn | The invitation was withdrawn and can no longer be accepted. A withdrawn invitation cannot be re-activated. To invite the user, send a new invitation. |
| Invitation accepted | The user accepted the invitation and has been added to the organization that the invitation was sent from. The system filters out accepted invitations. An invitation with the Accepted status can no longer be used. |
| Invitation expired | The invitation is past its expiry date and can no longer be accepted. An invitation expires automatically when the expiration date and time is reached while the invitation has the Invited (pending) status. An expired invitation cannot be re-activated. To invite the user, send a new invitation. |
User schema
The user details page includes a customizable list of attributes. The list of attributes on the user details page is not the same for all tenants. The attributes come from your tenant's user schema, and can be configured in the Identity Store.
Invite a user to an organization
You can invite a user to an organization that you are assigned to administer. You identify the user by their email address and additional information (such as phone number, first name, and last name,) according to your organization's configuration.
A user can have multiple invitations within the same organization or across multiple organizations. Different invitations are independent from one another and can have different statuses.
By default, the system does not allow you to invite a user who already exists in the organization, or for a user who already has an active invitation (in the Invited status) in the target organization. This restriction can be removed through backend tenant-level configuration setting.
You can include access and administration roles in the invitation, or assign them later.
The root organization configures which fields are included in an invitation.
-
Switch to the organization that you want to invite the user to join.
-
In the left pane, select Users.
-
Select Invite user.
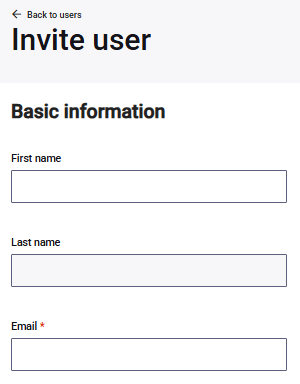
-
On the Invite user page, enter the Email and any other required information.
-
(Optional) To specify a Validity period for the user in the organization, select the Start date. It defaults to today's date.
The validity period determines when the user is authorized to access applications. This validity period does not affect the status or membership of the user in the organization. This validity period is also completely independent from the expiry date of the invitation that defines when the user can no longer accept the invitation.
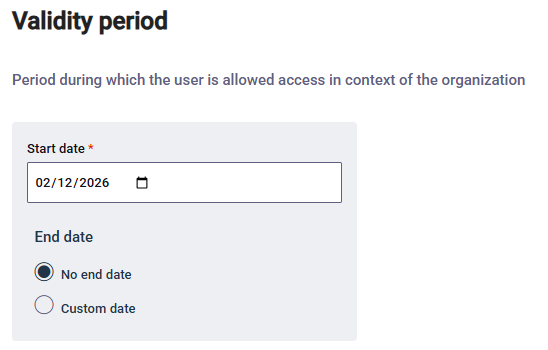
-
(Optional) Set the End date. The default is No end date.
-
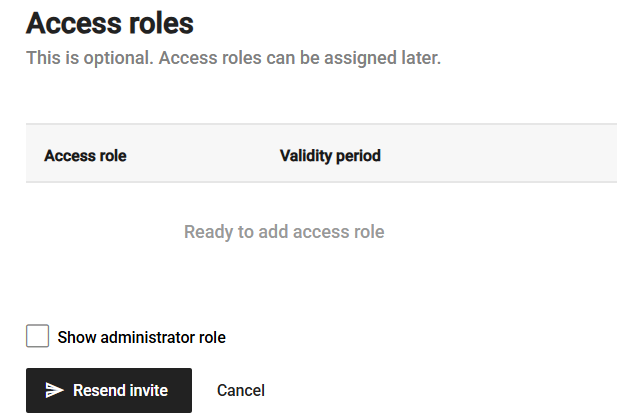
(Optional) To assign an access role when the user accepts the invitation, select Assign access role.
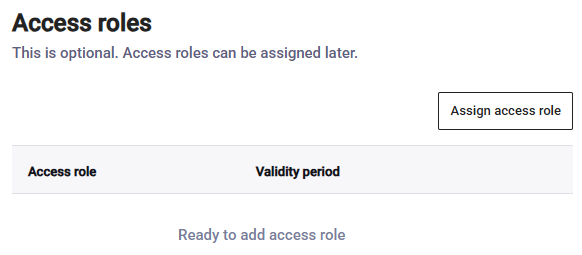
-
On the Access role page, select an Access role.
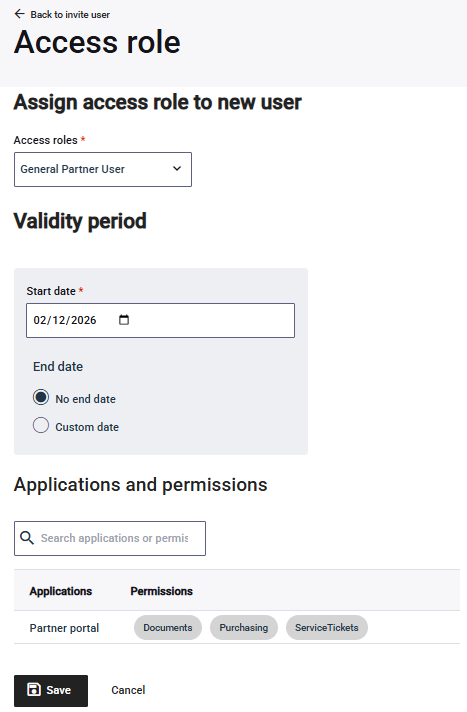
The Applications and permissions lists the associated applications and permissions for the selected role.
-
(Optional) To specify a Validity period, select the Start date. It defaults to today's date.
The validity period determines when the user is authorized to access resources through this access role. It applies only to the access role, and doesn't affect the status or membership of the user in the organization.
-
(Optional) Set the End date.
-
Select Save.
-
-
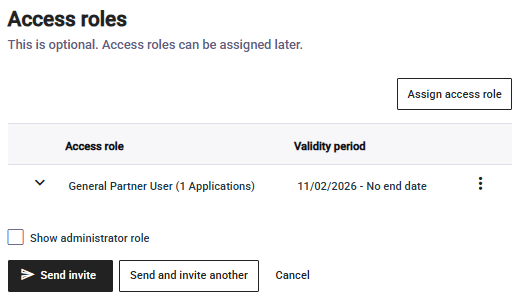
Send the invitation:
-
To send the invitation and return to the Users page, select Send invite.
-
To send the invitation and invite another user, select Send and invite another.
-
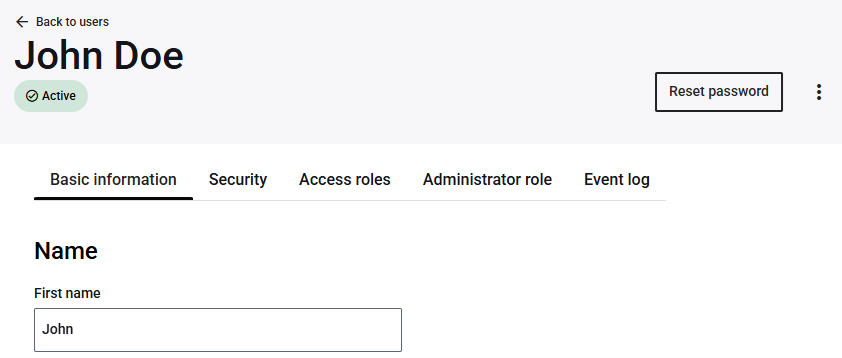
View user details
Thales configures which details and fields are available for users in your organizations.
On the Users page, select the menu for the user whose details you want to view, and select View details.
Assign an access role to a user
You can assign an access role to a user so that resources in a specific organization are available to them. Each access role assignment applies to only one organization, even if the user is a member of multiple organizations.
You can only select from the access roles that are available for the organization.
-
Switch to the organization that the user belongs to.
-
In the left pane, select Users.
-
Search for the user.
-
In the menu for the user, select View details.
-
On the user details page, select the Access roles tab.
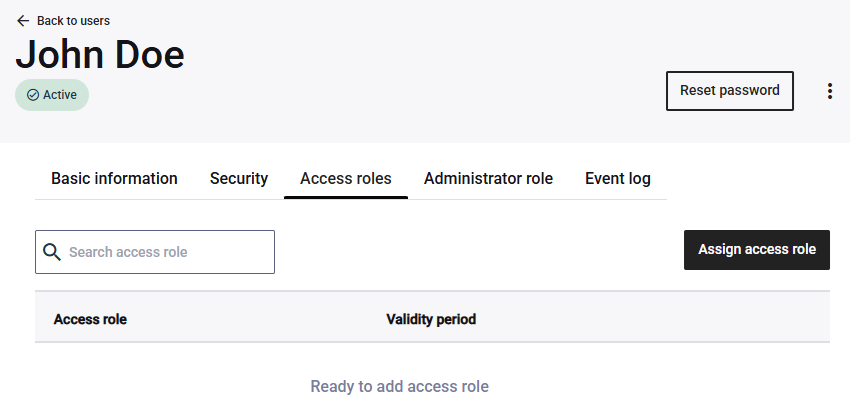
-
Select Assign access role.
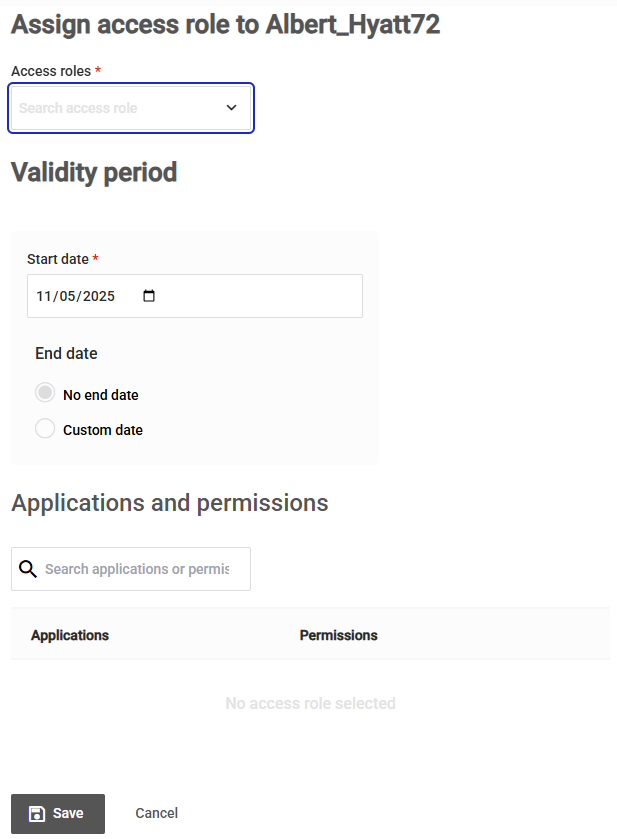
The Applications and permissions lists the associated applications and permissions for the selected role.
-
On the Access role page, select an Access role.
-
To specify a Validity period, select the Start date. It defaults to today's date.
The validity period determines when the user is authorized to access resources through this access role. It applies only to the access role, and doesn't affect the status or membership of the user in the organization.
-
(Optional) Set the End date.
-
Select Save.
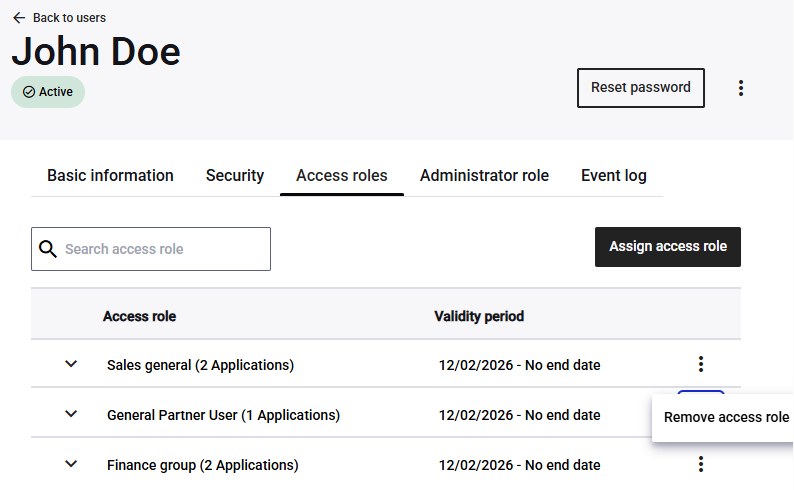
Remove an access role from a user
On the user details page, select the menu for the access role, and then select Remove access role.
Assign an administrator role to a user
Administrator roles grant users with entitlements to manage organizations, users, access roles, applications, or application permissions in the Delegated User Management application.
Each administrator role is a collection of permissions that define the access rights for a user and give granularity to the administrative functions that the user is allowed to perform in Delegated User Management v2.
Administrator roles also include a scope that determines which organizations the role applies to. By default, the scope includes the current organization and all of its child organizations.
The role and scope that you have determine which administrator roles you can assign, and who you can assign them to:
-
If you have the super administrator role, you can assign any administrator role. However, you can only assign the super administrator role to users in the root organization.
-
If you have different administrator roles, then you can only assign the roles that are assigned to you with the cascade option. This ensures that users are never able to assign administrator roles that have greater capacity than their own.
Similarly, you can only assign roles that have the same or fewer organizations in scope. You cannot assign administrator roles beyond the scope that was provided to you for the same administrator roles.
-
Switch to the organization that the user belongs to.
-
In the left pane, select Users.
-
Search for the user.
-
In the menu for the user, select View user details.
-
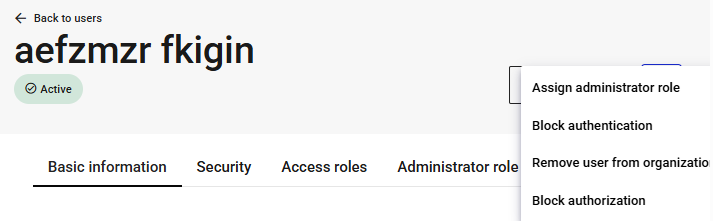
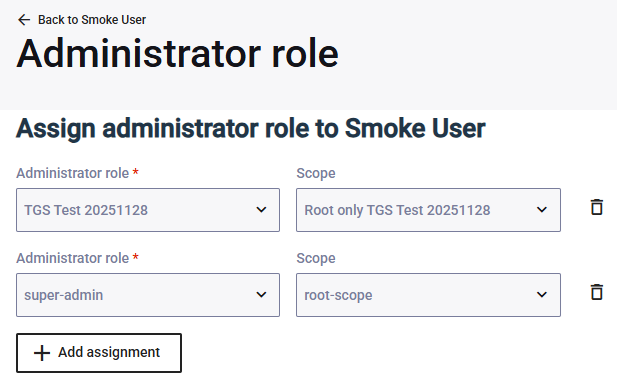
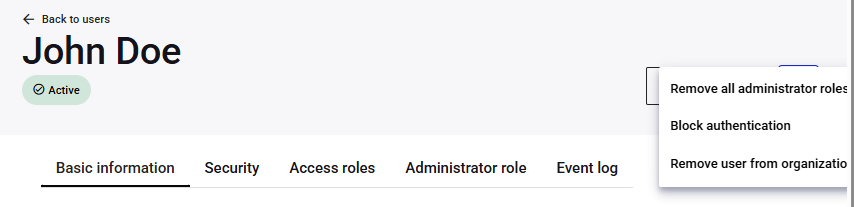
On the user details page, in the top-right menu, select Assign administrator role.

-
On the Assign administrator roles page, select the Administrator role and a Scope restriction.
When you assign an administrator role, you can specify whether the user is allowed to cascade (assign) the same administrator role to another user.
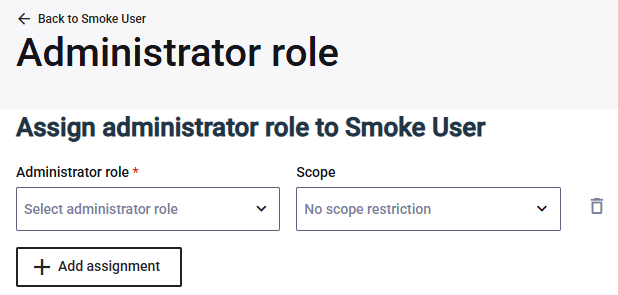
-
To add another role, select Add assignment.
-
Select Save.
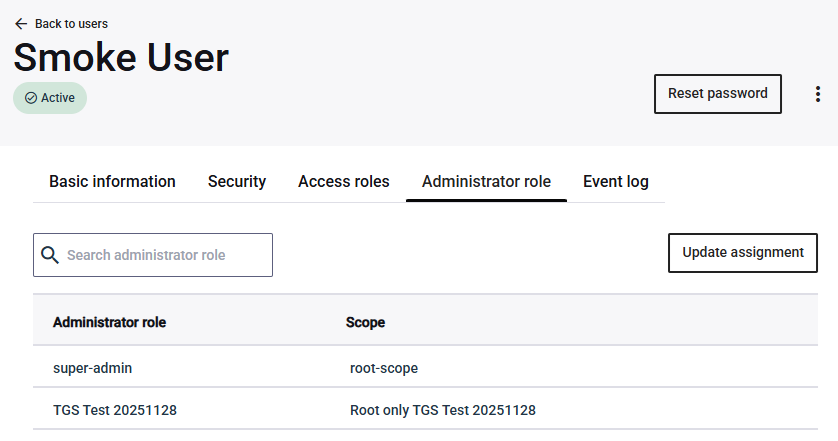
The user details page lists the administrator roles.
Remove an administrator role from a user
-
On the user details page, select the Administrator roles tab.
-
Select Update assignment.
-
On the Administrator roles page, select the delete icon next to the role that you want to remove.
Reset a user password
-
In the top-right of the user details page, select Reset password.
-
When prompted, select Reset password.
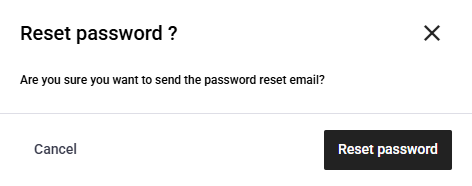
The system sends a password reset email to the user.
Block or unblock authentication for a user
Blocking authentication means that the user is no longer able to log in and access resources. For example, you might want to block authentication when a user's password is compromised.
You can also unblock authentication that was blocked, which allows the user to log in and access resources again.
Block or unblock authentication for a user from the user details page.
-
On the user details page, in the top-right menu on the user details page, select Block authentication or Unblock authentication.
Check the status of an invitation
After you send an invitation, you can check the invitation status on the Users page, to determine if the invitation is pending acceptance, accepted, expired, or was withdrawn by an administrator.
A user can have multiple invitations within the same organization or across multiple organizations. Different invitations are independent from one another and can have different statuses.
-
Switch to the organization that invited the user, or to that organization's parent.
-
In the left pane, select Users.
-
To filter the list of users so that it includes only certain invitation statues, select Add filter.
Filter on Status an select the status Value that you want to include:
-
Invited: The invitation is pending acceptance. The invitation was sent, but the user has not yet accepted it.
-
Invitation accepted: The user accepted the invitation.
-
Invitation expired: The user did not accept the invitation within the specified period, and the invitation is no longer valid.
-
Invitation withdrawn: An administrator cancelled the invitation, and the user can no longer accept it.
If you are in a parent organization, it can be useful to filter on the organization that the user was invited to join.
After you find the invitation, check the Status field.
-
Resend an invitation
You can resend an invitation email that a user did not accept. You can only resend invitations with the Invited status.
Resending the invitation does not change its content or expiry date.
-
Switch to the organization that invited the user, or to that organization's parent.
-
In the left pane, select Users.
-
Search for the invitation.
If you are in the parent organization, you can filter on the organization that the user was invited to join, because a user can be invited to multiple organizations.
-
At the bottom of the invitation details page, select Resend invite.
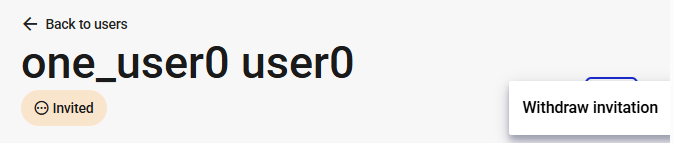
Withdraw an invitation
You can withdraw an invitation with the Invited status. For example, you can withdraw an invitation that was sent to the wrong email address or that contains incorrect information.
Withdrawing the invitation cancels it and makes it invalid. A withdrawn invitation cannot be changed to another status.
-
Switch to the organization that invited the user, or to that organization's parent.
-
In the left pane, select Users.
-
Search for the invitation.
If you are in the parent organization, you can filter on the organization that the user was invited to join, because a user can be invited to multiple organizations.
-
In the menu for the invitation, select View details.
-
On the Review the invitation information. In the top-right menu on the invitation details page, select Withdraw invitation.
Remove a user from an organization
Thales technical personnel can configure system behavior for your tenant. You can request one of the following possible behaviors when a user is removed from their last organization:
- Don't change anything to the user status. The user remains in the system and is simply no longer linked to any organization.
- Leave the user in the system, but change their status to Pending removal.
- Immediately delete the user form the system.
Remove a user from an organization on the user details page.
-
On the Users page, search for the user.
-
In the menu for the user, select View details.
-
In the top-right menu on the user details page, select Remove user from organization.