
Identity broker
One of the developing elements in the security landscape is the need for external identity providers (IDP) for both authentication (login) and identification (registration). This might be required by law, by your business unit, or by user expectations.
Analysts have been predicting that Bring Your Own ID (BYOID) will surpass IDs that are provided by organizations. Digital wallets are relatively new to this spectrum. Both external IDs and digital wallets have the underlying principle that the user registers at the external IDP, has both authentication and identification taken care of once, and then can use this ID to quickly access your organization.
Regulators might also demand that businesses provide users with the option of using government or bank IDs.
For prospect logins, a social ID is often used, because users initially don’t want to provide strong identification. A social ID is a quick way to create a prospect login.
Organizations using homegrown solutions often struggle to integrate with external IDPs and incorporate them into their customer journeys. The challenge is not just technical. To be compliant and to continue using the external ID, organizations need a level of maturity and must provide compliance evidence annually.
Integrations with external IDPs
Due to the growing trend to allow users to choose their authentication method, it has become complex to maintain single-sign-on for users. The provider must individually integrate and manage every integration, which is cumbersome.
By acting as an intermediary service, the identity broker connects apps with different identity providers (IDP), so that administrators don't have to integrate every IDP into their apps.
The identity broker allows you to federate to an external IDP. In the OneWelcome Identity Platform, you configure which IDPs are available for user registration and login.
Examples of these federated logins include:
-
Social IDPs: Facebook, Google, X (formerly known as Twitter)
-
Known IDPs: IDIN, eHerkenning, DigiD, Itsme, FranceConnect, Apple, Finnish Trust Network
-
IDPs using open protocols: Security Assertion Markup Language (SAML), OpenID Connect
-
Government-issued IDs or wallets (eIDs)
-
Enterprise IDPs: Microsoft Entra ID
When federating to an external IDP, the OneWelcome Identity Platform issues and signs the token as the main IDP.
To simplify the integration task, the OneWelcome Identity Platform provides out-of-the box integrations with several external IDPs.
The Identity Broker supports only one active authentication request at a time within the same browser session (including multiple tabs or windows). If you initiate multiple authentication requests in the same browser, only a single request succeeds. Different browsers or incognito windows are treated as separate sessions and work independently. Additionally, all authentication requests must be completed within 10 minutes of initiation, because the Identity Broker stores request information for a maximum of 10 minutes before expiring the request. Any attempts outside these limitations results in a mismatch callback with original request error for the user after they return from the external identity provider.
Just-in-time user creation
User accounts are created in the identity store with the data that is received from the external IDP when a user requests access to a protected resource or application.
For example, when a user logs in via an external IDP, the OneWelcome Identity Platform uses the information that it received from the IDP to create the user account in the identity store. If updates to the user account are allowed, then each time the user logs in via the external IDP, their data is updated in the identity store.
Access the identity broker
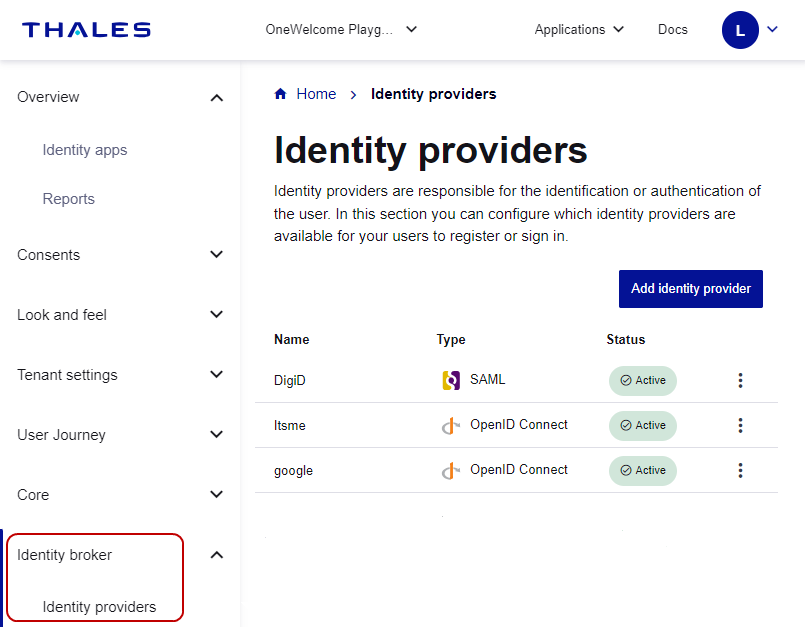
On the OneWelcome Identity Platform console, you can access the identity broker. In the identity provider, you can access the Identity Providers page, where you can see a list of configured external IDPs and add an IDP. In the list of configured IDPs, you can view details, edit, or delete a configured IDP.
-
Log in to your OneWelcome Identity Platform configuration console and select your tenant, if required.
-
On the left, select Identity broker and then select Identity providers.
Add IDPs
The Identity providers page lists any IDPs that have already been configured, and includes their name, type, and status. From here, you can add a new IDP, or edit, delete, or view the details of an existing IDP.
You can add the following types of external IDPs:
-
Authentication protocols:
-
Social IDPs:
-
Government or national IDPs:
-
Enterprise IDPs:
Customize IDP buttons on the login pages
You can customize the appearance of the IDP buttons on your login pages.
-
To customize the text on the IDP button, edit the name of the IDP from identity broker authentication method in the authentication journey.
-
To customize the look and feel, edit the colors or logo in the theme that is linked with the brand.
Note
Ensure that the colors and logo follow the trademark and branding guidelines for each external IDP.
Edit an IDP configuration
-
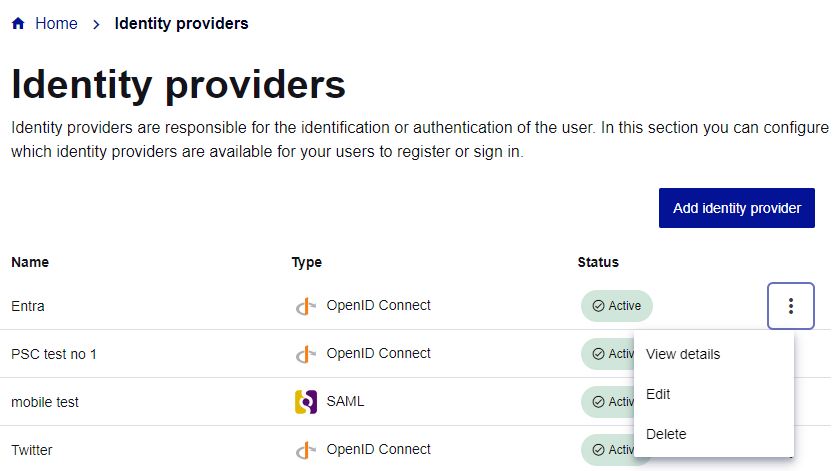
On the Identity providers page, select the menu for the IDP that you want to edit, and then select Edit.
The selected IDP configuration opens in an editable page.
-
Update the configuration as needed.
-
Save your IDP configuration:
-
To save an incomplete IDP configuration or a draft that is not available to users, select Save draft.
-
To save the IDP configuration that is available to users, select Submit.
-
View an IDP configuration
-
On the Identity providers page, select the menu for the IDP that you want to view, and then select View details.
The selected IDP configuration opens in a read-only details view.
-
To switch to an editable view, select Edit.
Delete an IDP configuration
-
On the Identity providers page, select the menu for the IDP that you want to edit, and then select Delete.
The select IDP configuration opens an edit page.
-
To permanently delete the IDP configuration, on the confirmation message, select Yes, delete it.