



Set up Mobile FIDO SDK for iOS
This section describes the necessary steps to set up and run the sample app provided. The sample codes provide the steps to execute the use cases.
Clone the source code
The source code of this sample app is available on GitHub.
Obtain the source code at https://github.com/ThalesGroup/fido2-sample-ios and clone a copy of the source code, or just download the zip to your desired location.
You can either clone the whole repository or choose the Download ZIP option.
Note
To simplify the use of the sample code, the features are categorically separated into individual files.
Set up the Xcode project
The steps to set up this project are minimal.
1. Integrate the Mobile FIDO SDK using SPM
This project requires the necessary SDK dependencies in order to compile. The best approach is to use the SDK via Xcode's Project menu Package Dependencies.
Then run:
swift package-registry set --global https://thalescpliam.jfrog.io/artifactory/api/swift/swift-public
swift package-registry login
Next, enter your artifactory token:
Enter access token: {YOUR_TOKEN}
Login successful.
Credentials have been saved to the operating system's secure credential store.
Registry configuration updated.
Then go to the app's directory and run:
xcodebuild -resolvePackageDependencies
2. Configure the development team
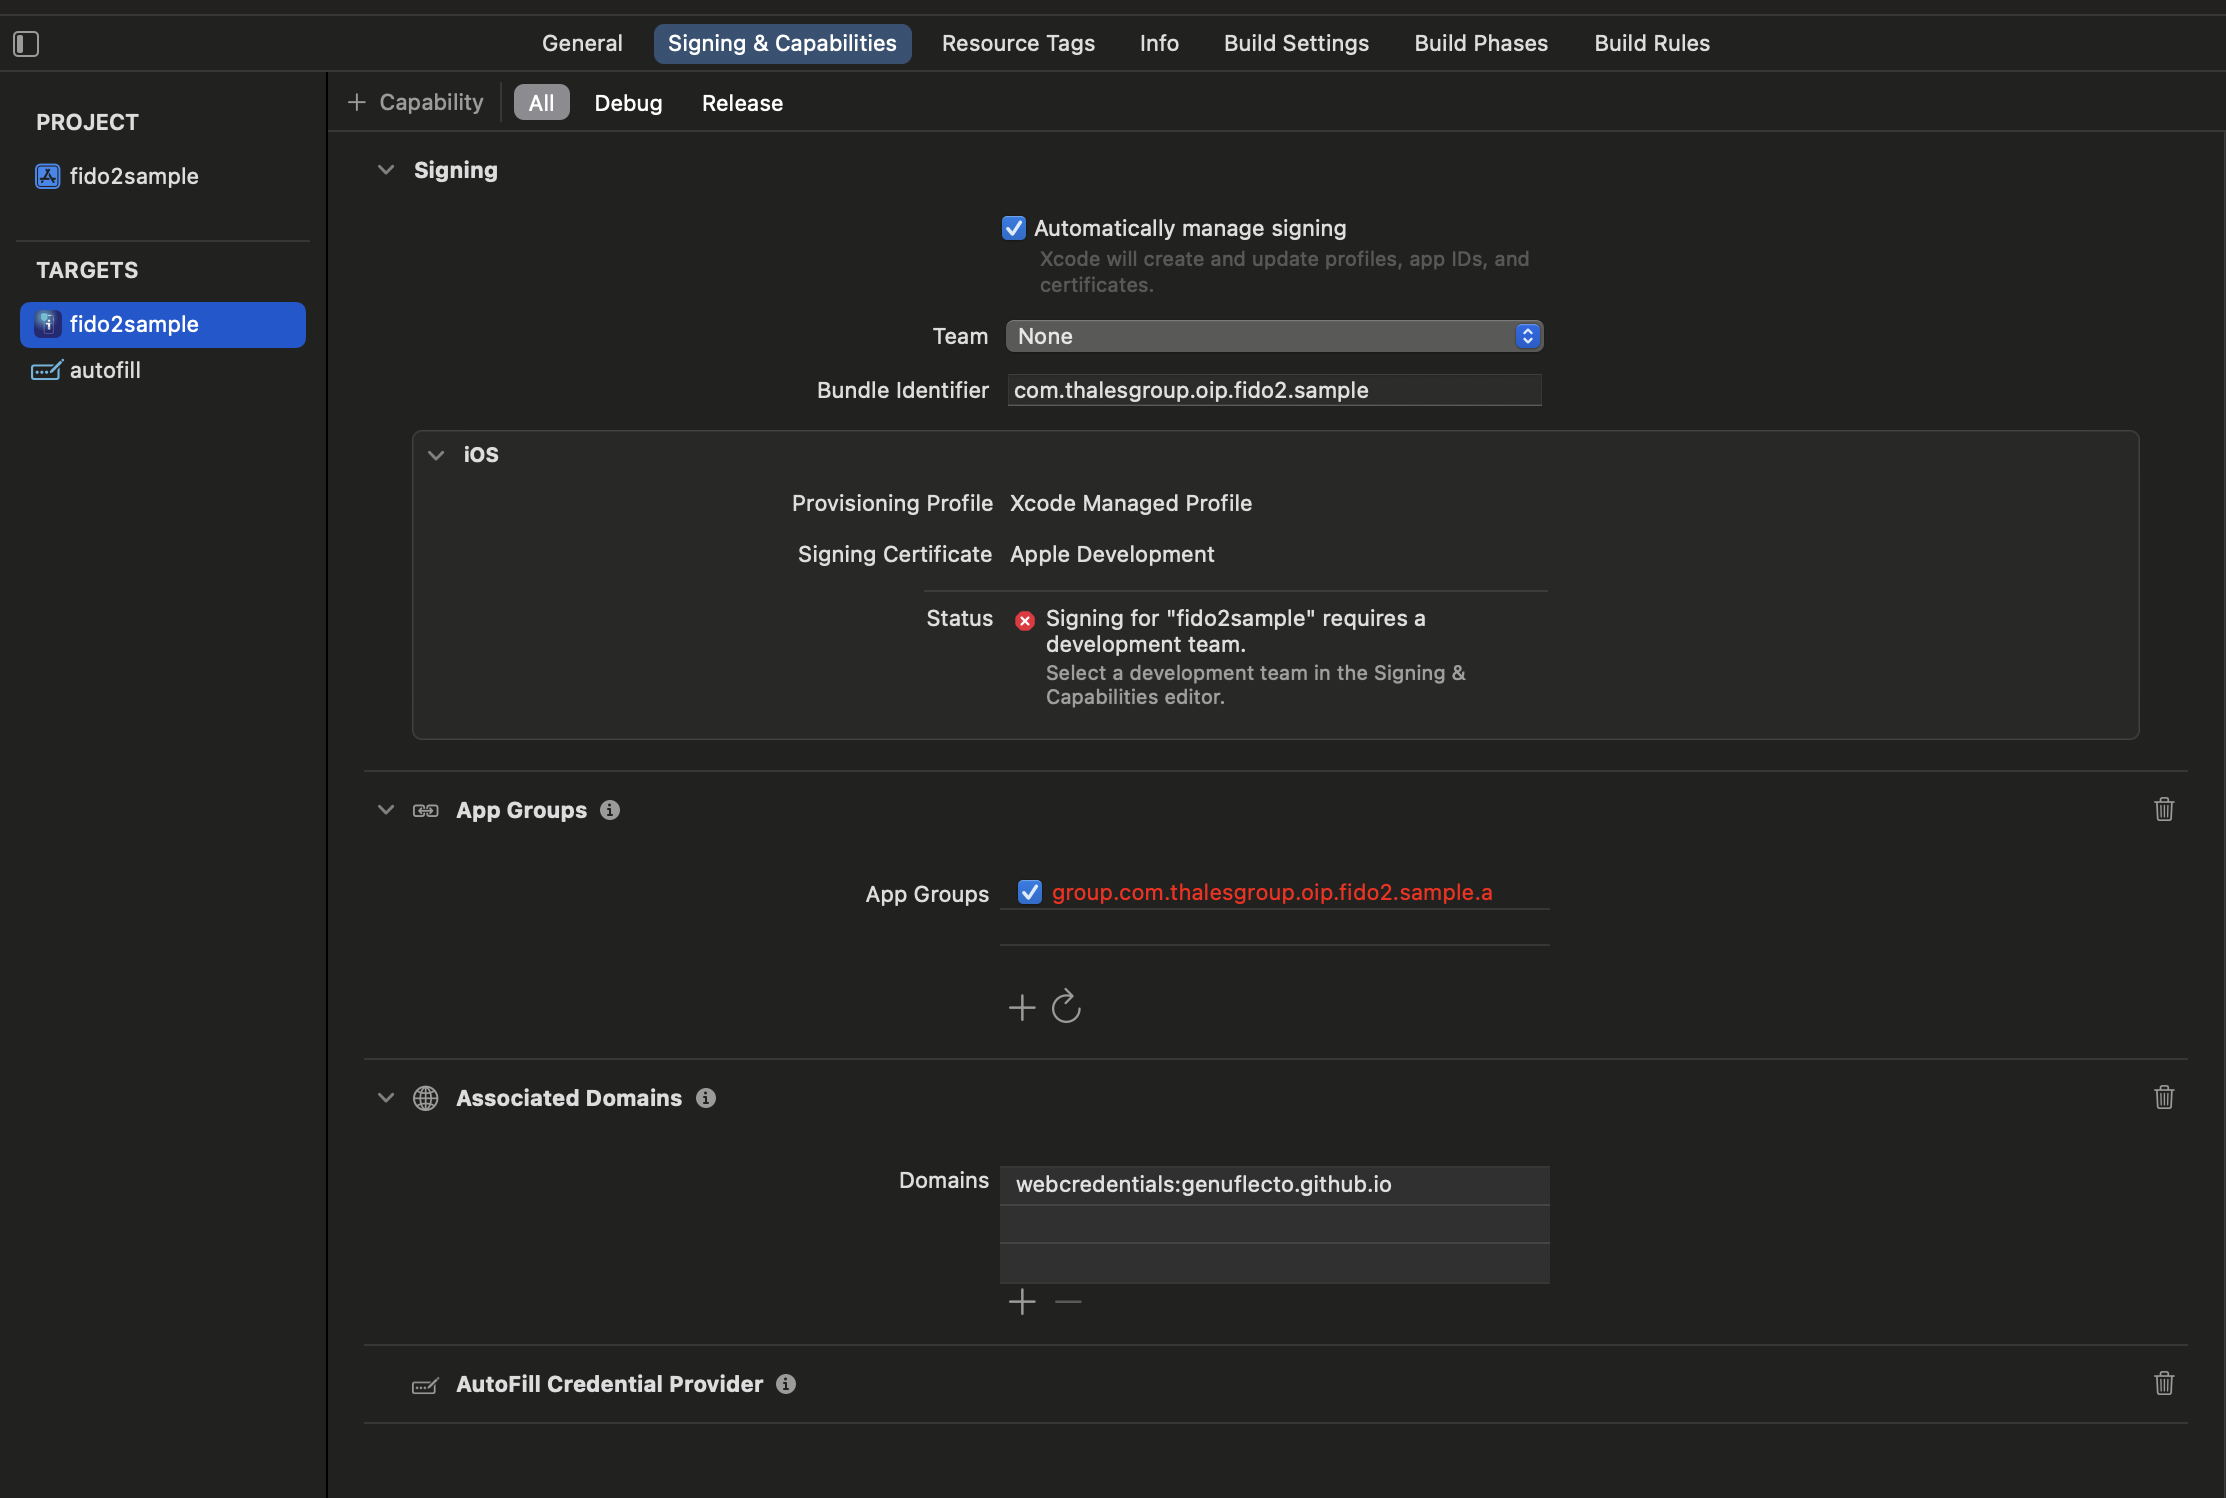
To configure this project with your team profile, navigate to Project Settings > Signing & Capabilities > Signing. If you are setting up the hybrid authentication in your app, make sure your profile has the necessary capabilities.
3. Set up certificate pinning
To set up the certificate pinning of this app, add the certificate file to the app bundle and load it as shown:
private func setupCertPinning() {
    if let certPath = Bundle.main.path(forResource: ## fill your certificate name ##, ofType: "cer"),
       let certData = try? Data(contentsOf: URL(fileURLWithPath: certPath)) {
        TGFFido2Config.setTlsCertificates([certData])
    }
}
For more details, refer to certificate-pinning.
4. Set up the configuration fields
You need to configure the project for the following fields:
-
Your public key for the encryption of SDK secure logs: To generate this key, refer to the instructions. The key contains:
-
publicKeyModules -
publicKeyExponent
To configure the required information, refer to the Configuration.swift file.
Note
For additional information about how to set up secure logs, refer to the SDK guides.
5. Build your project
Launch the fido2sample.xcodeproj project.
The sample application prompts you to fill in the missing codes. To provide the necessary codes in order to compile and run the app successfully, refer to the respective use cases.
6. Insert the missing code snippets
Refer to the implementation of registration and authentication, where the section describes the steps within the context of the aforementioned function.
- Create the registration and authentication request providing the required credentials.
let fidoRequest = try TGFFido2RequestFactory.request(jsonString)
- Set up
TGFFido2RespondArgsBuilderwith UI delegates:
let respondArgsBuilder = TGFFido2RespondArgsBuilder(request: fidoRequest, uiDelegate: clientConformer)
respondArgsBuilder.uiBiometricAuthenticatorDelegate = clientConformer
respondArgsBuilder.uiPasscodeAuthenticatorDelegate = clientConformer
respondArgsBuilder.passcodeAuthenticator = TGFPasscodeAuthenticator(delegate: clientConformer)
let respondArgs = respondArgsBuilder.respondArgs()
- Retrieve the FIDO2 registration and authentication response.
let client = try TGFFido2ClientFactory.client()
client.respond(with: respondArgs) {(response, error) in
  if let error = error {
    completion(error)
    return
  } else {
    let responseString: String = response!.raw()
    completion(nil)
  }
}
7. Set up app groups for hybrid authentication
If your app supports hybrid authentication (cross-device authentication), you MUST configure app groups:
// Configure app groups before initializing the FIDO2 client
TGFFido2Config.setAppGroup("group.com.example.appgroup")

// Then initialize the client
let client = try TGFFido2ClientFactory.client()
For detailed setup instructions and data migration guidance, refer to the supporting app groups page.
For more information about implementing hybrid authentication, see the hybrid transport documentation.
8. Successful setup
You should now be able to run and explore the features of Mobile FIDO SDK.

