
IDP orchestration
STA can integrate with one or more external identity providers (IDP), to redirect traffic from STA to other IDPs for user authentication.
STA remains the primary IDP, orchestrating the use of secondary, external IDPs, such as SAS PCE or Microsoft Entra ID. Each external IDP can be either the only authentication method or the second factor of authentication. It cannot be the first factor in multi-factor authentication. For example, the external IDP could be a legacy IDP that you need to support following an acquisition or during migration to STA, or it could be another IDP that you use as a second factor of authentication.
For example, you can implement the STA Hybrid Access Management Add-On to integrate STA with SAS PCE. With this add-on, you configure SAS PCE as the external IDP in STA.
You can configure one or more external IDPs in each virtual server. You need to set up the two-way communication between STA and each external IDP:
-
In the external IDP, configure STA as an OIDC application.
-
In STA, configure the external IDP settings.
-
In STA, add the external IDP as an authentication method in a policy or scenario.
External IDPs in policies or scenarios
The configured external IDP becomes an authentication method that you can select in STA policies and scenarios. STA redirects authentication to another IDP through policies or scenarios, based on group membership, application, or context. STA can redirect access requests that come from any of the following types of applications that are integrated on the Applications tab:
-
Agent applications that are configured on the Applications tab, such as SafeNet Agent for Microsoft Outlook Web App or SafeNet Agent for Windows Logon.
IDP orchestration and subscription plans
IDP orchestration is available in the STA and STA Premium subscription plans. It is not available in the STA Basic plan.
If you configure an external IDP and then later downgrade to the STA Basic plan, the external IDP becomes unavailable:
-
When you remove the external IDP from a policy or scenario, then you cannot select it again until you upgrade the virtual server to the STA or STA Premium plan.
-
When you disable the external IDP, you cannot enable it again until you upgrade the virtual server to the STA or STA Premium plan.
Login interface and language for the external IDP
The external IDP is entirely responsible for the login UI that it presents. This responsibility also includes any language selection logic that you must manage independently of STA, on the external IDP.
Configure communication with the external IDP
You can configure one or more external IDPs in each virtual server.
To configure the two-way communication between STA and the external IDP, you need to configure settings in both STA and the external IDP.
The configuration steps are different for different IDPs, so those steps are only summarized here. Consult the IDP documentation for specific configuration details and procedures.
In STA, after you configure the external IDP, you must enable it before you can select it as an authentication method in policies or scenarios. To enable a disabled policy or scenario that refers to the external IDP, you must first enable the external IDP.
-
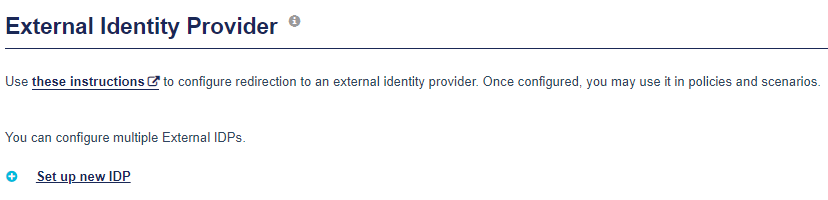
On the STA Access Management console, select Settings > External Identity Provider. If this is the first external IDP that you are adding, select Setup.

-
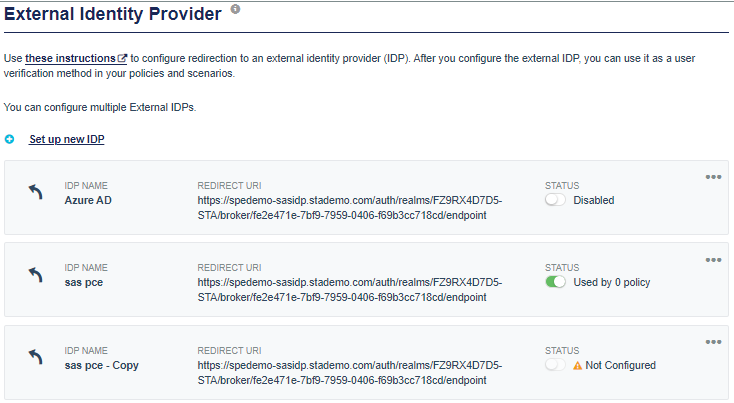
On the External Identity Provider page, select Set up new IDP.
-
Under Redirect URI, select Copy. You need to use this URI when you configure an OIDC application for STA in the external IDP.

-
Keep STA open, and go to the external IDP. In the external IDP, create an OIDC application for STA, using the Redirect URI that you copied from STA.
-
In the external IDP, find and copy the following information, so that you can use in STA:
-
Client ID: This is the OIDC application (client) ID that identifies the external IDP.
-
Client secret: STA sends the OIDC shared secret to authenticate the redirection request with the external IDP.
-
Well-Known Configuration Endpoint: This URL can have different names in different IDPs, such as the OpenID Provider Configuration Document, Discovery Document URL, or simply Endpoint. If this URL doesn't exist in the external IDP, you configure other endpoints in STA.
-
-
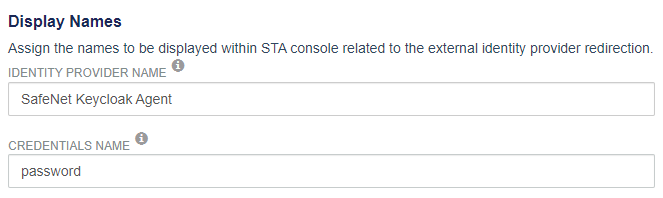
Go back to the External Identity Provider page in STA, and enter the Display Names information:
-
Identity Provider Name: Enter a friendly name for the IDP. The identity provider name is used in the access logs, policies, and scenarios on the STA Access Management console, but is not visible to your users.
-
Credentials Name: Enter the authentication method that the external IDP uses. For example, the authentication method might be FIDO, OTP, push, bio, password, context, and so on.
In policies, the display name identifies the external IDP in the format [Identity Provider Name] ([Credentials Name]), such as SAS PCE (OTP).
-
-
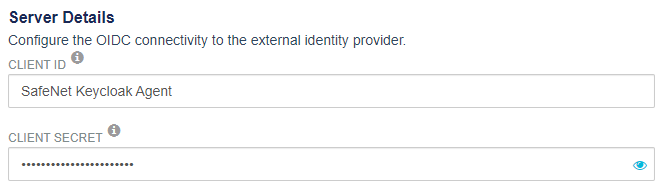
Under Server Details, enter the Client ID and the Client Secret from the external IDP.
-
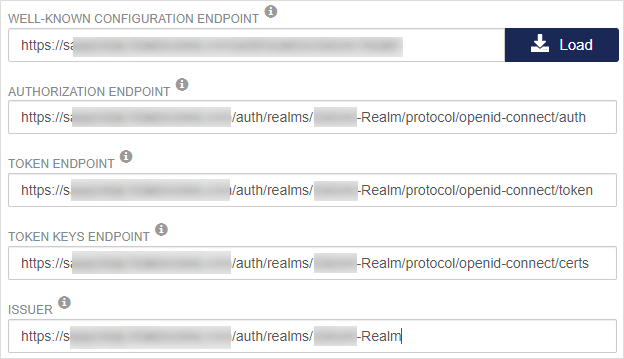
Paste the Well-Known Configuration Endpoint URL from the external IDP, and then click Load to populate the endpoint URLs and the Issuer field.
If the external IDP doesn't have this URL, enter the following endpoints URLs and the Issuer:
-
Authorization Endpoint: This is the URL to which the user is redirected to authenticate.
-
Token Endpoint: When authentication is successful, an authorization code is sent to this URL to obtain an ID token and an access token.
-
Token Keys Endpoint: This is the URL that is used to retrieve the key that is needed to validate the ID token signature.
-
Issuer: This is the issuer string that is used to validate the keys for the ID token signature.
-
-
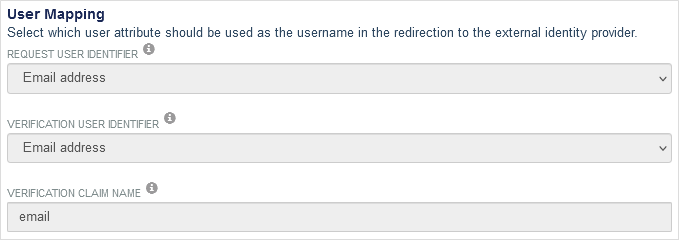
Under User Mapping, select the user attributes to represent the user ID in the redirection to the external IDP:
-
Request User Identifier: This is the STA user attribute that is sent in the authentication request to the external IDP.
-
Verification User Identifier: This identifier is usually identical to the request user identifier. It is the STA user attribute to match with the content of the specified ID token claim.
-
Verification Claim Name: This is the claim in the returned ID token that contains the user identifier to verify.
-
-
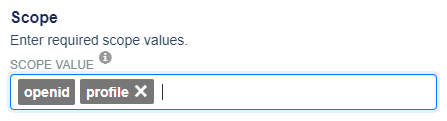
Under Scope, enter the scope parameters. You can enter multiple scope values. OpenID is the default scope value and it cannot be removed.
STA, as an OIDC client, uses scope values to specify which access privileges are requested for access tokens. For OpenID Connect, scopes are used to request that specific sets of information are made available as claim values.
Setting the scope supports redirection to more IDPs with specific claim restrictions, such as Google IDP (using email), Microsoft Entra ID (using Profile for UPN), or Pro Sante Connect (using scope_all).
-
Click Save.
The External IDP page lists the new IDP, including the Name, Redirect URI, and Status, and indicates how many policies use the IDP (none if you just added the IDP). After you save a new IDP, the status is enabled.
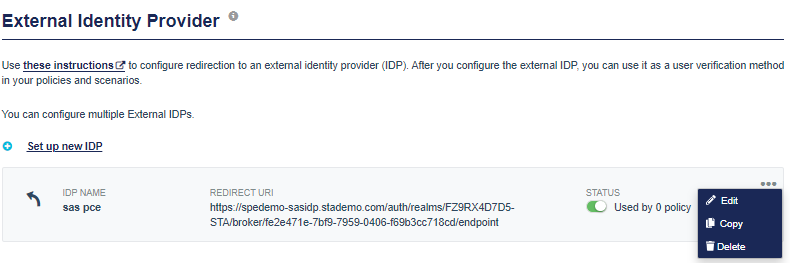
The menu includes options to edit, copy, and delete the IDP.
-
You can Edit any of the external IDP settings.
-
When you Copy an external IDP, the IDP name is
- Copy and the Status is Not Configured. When you Edit and save the copied IDP, the Status becomes Disabled. -
Before you can Delete an external IDP, you must remove it as an authentication method in any policies or scenarios.
-
Add the external IDP in a policy
The configured external IDP becomes an authentication method that you can select in STA policies and scenarios. The redirection to the external IDP becomes part of the decision about whether to grant access, based on group membership, application, or context.
-
On the STA Access Management console, select Policies.
-
Select the policy or scenario and then select Edit.
Alternatively, you can create a new policy or scenario.
-
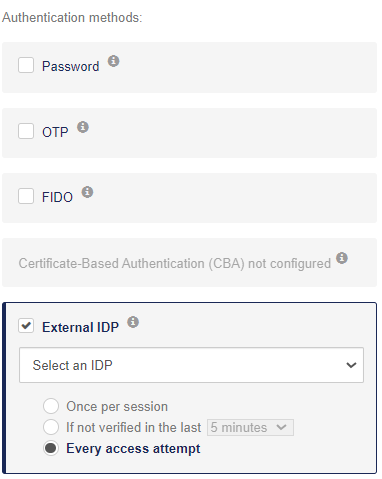
Under Decision, in the Authentication Methods section, select External IDP, and then Select an IDP from the list.
The external IDP is identified using the IDP name and credentials name that are configured in Settings > External Identity Provider and use the format [IDP Name] ([Credentials Name]), such as SAS PCE (OTP).
-
Select how often users must authenticate:
-
Once per session: Prompt the user to authenticate once per STA SSO session within a browser.
-
If not verified in the last [number of minutes or hours]: Prompt the user to authenticate at least every N minutes or hours. Select the value that meets your organization's requirements. The values supported by STA are: 5, 10, 15, 30, 45, or 60 minutes; as well as 2, 3, 4, 5, 6, 7, 8, 9, 10, 11, or 12 hours.
Use this option to provide a presence check for sensitive applications by requiring users to re-authenticate if the specified number of minutes or hours have elapsed since they last accessed the application.
Between this setting and the single sign-on session timeout, the shortest setting takes precedence.
- Every access attempt: Prompt the user to authenticate regardless of whether they previously authenticated in the current STA SSO session.
If you use CBA, some certificates and their drivers might have their own session, apart from the STA SSO session, and might not prompt a user for authentication. For example, the user might not be prompted to authenticate as long as a smart card is inserted in a computer.
-
-
Select Save.
External IDP status
On the External Identity Provider settings page, the status of the external IDP indicates whether it is available to use in a policy or scenario:
-
Enabled means that the IDP is available.
-
Disabled means that the IDP is not available.
-
Not Configured means that the IDP has not been set up, and is not available in policies and scenarios.
IDP orchestration in the logs
IDP orchestration is logged in the authentication and access logs.
IDP orchestration in the authentication logs
On the STA Token Management console, the authentication logs are available in Snapshot > Authentication activity.
The logs use the Identity Provider Name and Credentials Name that are specified in Settings > External Identity Provider.
Each type of activity includes different log entries:
-
Initiation of the redirection: The initiation of the redirection by STA includes the following information in the logs:
-
Timestamp: The time when the redirection initiated.
-
Result: Redirection
-
Credential Type: [Credentials Name]
-
Message: Redirection to [Identity Provider Name] for [Credentials Name] authentication.
-
-
Success: The successful response from the external IDP is logged:
-
Timestamp: The time when the response was returned, or the timeout time in case no response was received.
-
Result: Success
-
Credential Type: <Credentials name >
-
Message: Redirection to [Identity Provider Name] for [Credentials name] authentication.
-
-
Failure: The failure in redirection to the external IDP is logged:
-
Timestamp: The time when the response was returned, or the timeout time in case no response was received.
-
Result: Failure
-
Credential Type: <Credentials name >
-
Message: Timing out without response from <Identity Provider Name>.
-
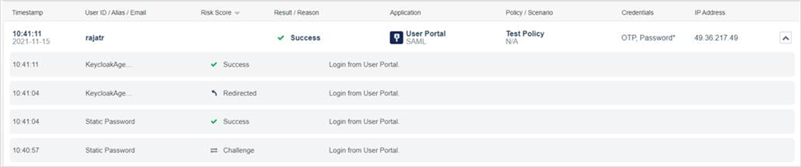
IDP orchestration in the access logs
The redirection to the external IDP is recorded in the access logs:
-
The Credentials field includes the Credentials Name that is configured in Settings > External Identity Provider.
-
When there is a failure due to timing out without a response from the external IDP, the Reason is Redirection timeout.