
OIDC applications
You can configure STA as the OIDC provider (OP) that provides authentication services for your OIDC application service providers, such as Amazon API Gateway and Microsoft Entra Conditional Authentication Factors.
To be suited for OIDC integration in STA, the applications should be web-based. At a minimum, the applications must offer web-based user login initiation, and redirection or response endpoints.
When a user accesses an OIDC application through STA, they are in a STA single sign-on (SSO) session for applications. This SSO session is bound by the regular STA SSO timeout rules.
About application templates
You set up and manage your OIDC integrations on the Applications tab.
STA includes templates that you use to add and configure an OIDC application.
-
Approved templates are based on a review of publicly available documentation, but are untested. Support for approved templates is provided on a best-effort basis.
-
Verified templates are based on lab-testing of the integration and are fully supported. Verified templates are distinguished by the shield !shield icon]({static}/images/operator/verifiedIcon_18x18.png){style="vertical-align: top;width: 18;height: 18;"} icon that displays next to them in the template list.

Most templates include the configuration options that the service provider requires, as well as application-specific instructions. You can view the list of integration templates and find help for each template in the Thales Application Catalog.
If there is no template for your application, use the generic template. For example, you can use the generic template to integrate custom OIDC applications. The generic template includes advanced configuration settings to allow you to integrate a broad range of OIDC applications.
Configure an application
After you add an application, you configure it so that your users can access it through STA. First you go to the relying party (RP) and configure the OIDC application to use STA as the OIDC provider (OP). The RP is the application that connects to STA for the purpose of authentication and authorization. Then, you configure STA to authenticate the application. Finally, you assign the application to users and groups.
To add an OIDC application, follow these steps:
Select a template
You can view the list of integration templates and find help for each template in the Thales Application Catalog.
-
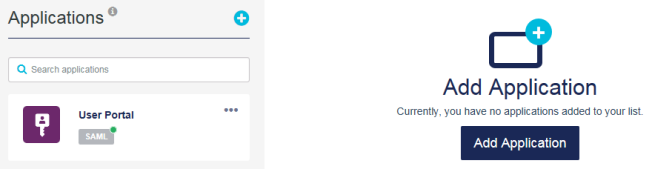
On the STA Access Management console, select the Applications tab.
-
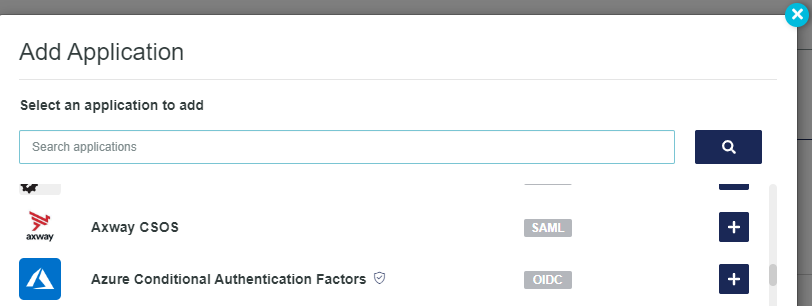
Click Add Application. The Add Application window lists all known applications.
-
Select the application that you want to add.
-
To change the application name, edit the name in the Display Name field.
This is the name that is displayed in the list of applications.
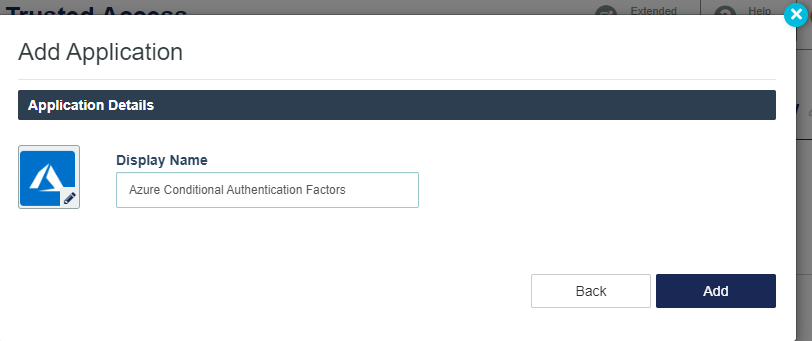
You can replace the system-generated application icon with a custom icon.
-
Select Add.
The application is added in the inactive state.
Note
If this is the first OIDC application that you have added, setup instructions are displayed. The instructions explain that the first step is to configure the SAML service provider to use STA as the IdP, and the next step is to configure the application in STA.
Click the next
 icon, and then click Begin Setup.
The Configure tab displays the options for configuring the application. You need to configure the application to activate it.
Configure the OIDC application
After you add the application in STA, you go to the relying party (RP) and configure the OIDC application to use STA as the OIDC provider (OP).
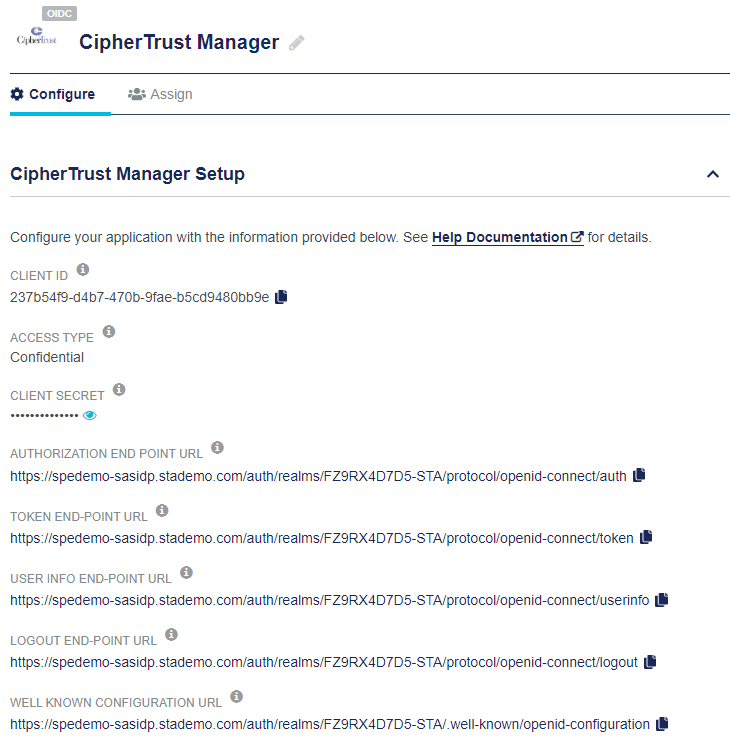
Before you can perform the configuration, you need to gather some information from STA and use that information to configure the SAML service provider.
The configuration details are different for each application. For application-specific details, refer to the instructions in STA.
-
Click the link to display the detailed instructions.
The application-specific instructions open in a new browser tab, so that you can refer to them while you configure the application.
-
Go to the relying party for the OIDC application, and complete the steps in the [application name] Setup section of the instructions.
Use the information on the STA Step 01: [application name] Setup screen as described in the instructions.
-
On the STA Step 01: [application name] Setup screen, click Next Step.
The Step 02: STA Setup section opens and displays the options for configuring the application in STA.
Configure the OIDC application
To configure the application in STA, you need to gather information from the relying party for the OIDC application and enter the information in STA.
For specific instructions, refer to the help documentation that is linked from the application page on the STA console.
-
Complete the information in the Step 02: STA Setup section.
You need to use information from the relying party for the OIDC application.

-
Select the ALLOWED FLOW TYPE.
The flow type determines how an OIDC application authenticates users, and receives authorization codes and access tokens.
Access type Allowed flow type Description Public
(native and single-page applications)
Authorization code flow Offers good security but is susceptible to authorization code interception attacks. The possible attacks are described in the PKCE document. Authorization code + PKCE Offers the best security. It provides mitigation for all known interception attacks. It is recommended to use S256 mode instead of plain. Implicit flow Not recommended because token access token leakage can occur. Refer to Implicit Grant in the OIDC best practices document. Authorization code flow and implicit flow Offers similar security as authorization code but can also be used in implicit mode. Should be avoided. Confidential
(server-side applications where the source code is not publicly exposed, like cloud services)
Authorization code flow Offers good security. Authorization code interception attacks are prevented using a shared secret that needs to be stored securely by the client. Implicit flow Not recommended because access token leakage can occur. Refer to Implicit Grant in the OIDC best practices document. Not suitable for applications that cannot securely store a secret. Authorization code flow and implicit flow Offers similar security as authorization code but can also be used in implicit mode. Provides some performance enhancements over authorization code flow because tokens are immediately available. Note
If you are using the implicit flow, be aware of the security trade-offs. Ensure that there is no way the access token can be stolen, by employing general good security practices:
Use short-lived web sessions on single page apps to defend against session hijacking. Ideally, set web sessions to a value less than or equal to the access token lifetime. STA expires an issued token after 5 minutes.
Unless the application has a secure method of storing the secret, use the public access type, not the confidential access type.
If the OIDC application uses JavaScript libraries, the application should regularly check whether the session with STA is active.
-
Gather configuration information from the OIDC application and enter it here:
-
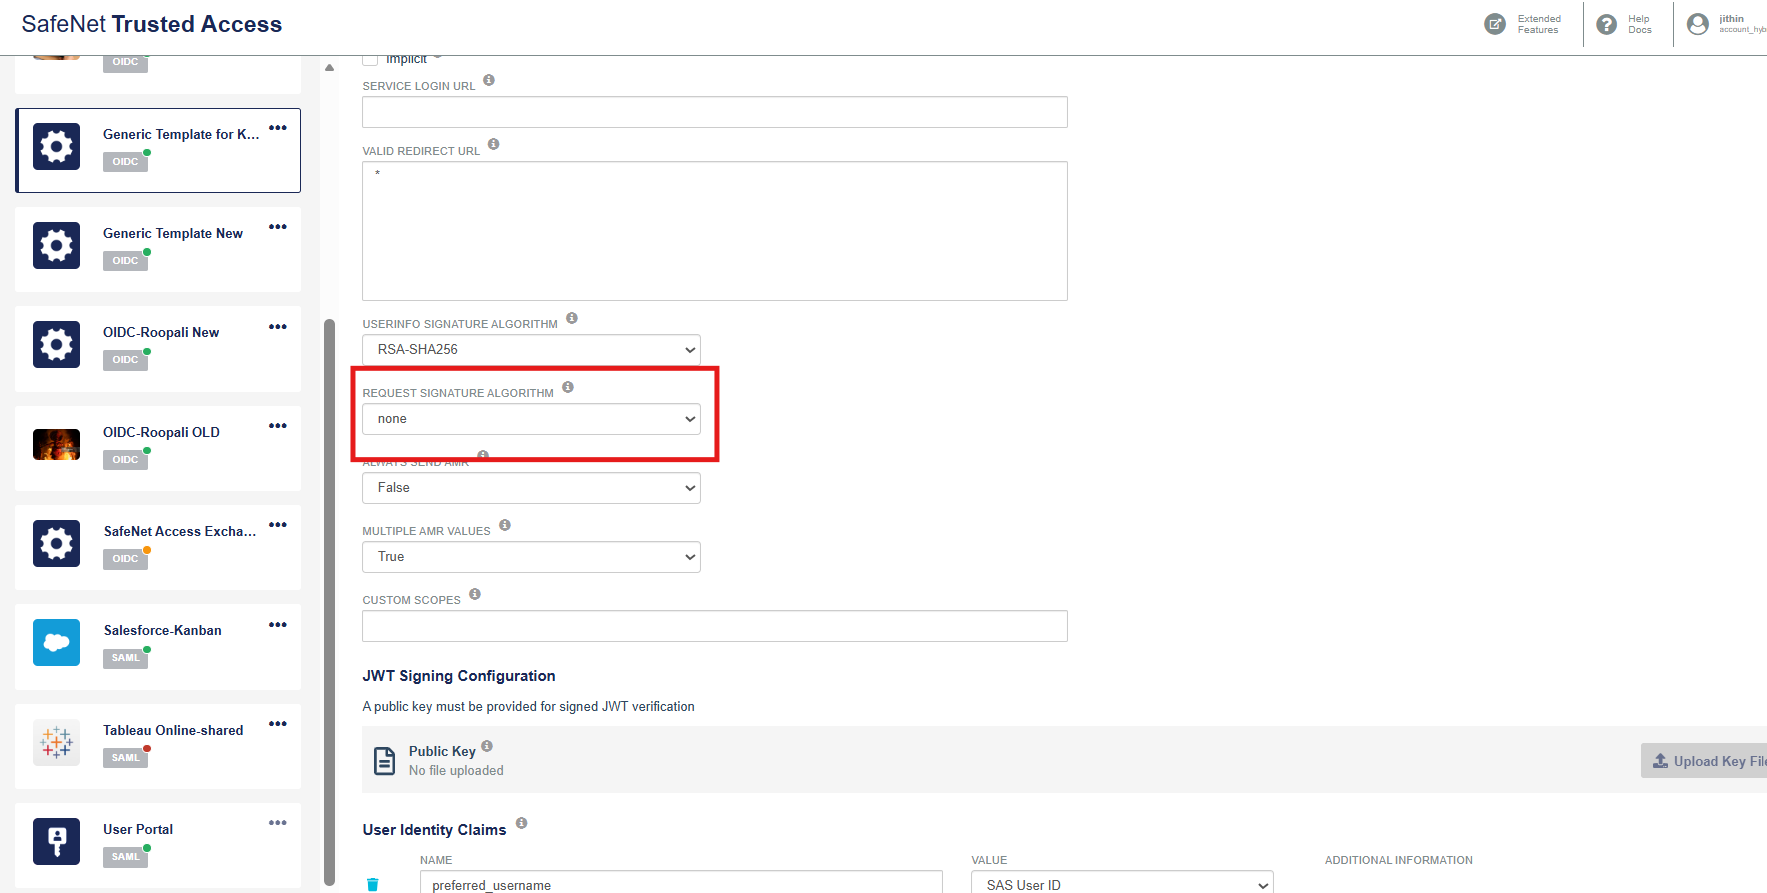
SERVICE LOGIN URL: The sign-on URL of an OIDC application. STA uses this URL to invoke the application when access to it is initiated from the User Portal. As such, if you plan to use the User Portal, it is important that you enter a proper URL in this field.
-
VALID REDIRECT URL: The URL where the user is directed, after successful authorization. An asterisk (*) is supported as a wildcard character at the end of this field to accept redirection to any URL that fits the same base pattern. For example, you can enter https://example.com/*.
Multiple redirect URLs are supported for a single OIDC application. STA supports POST binding and redirect binding authentication flows, depending on the service provider’s compatibility.
The OIDC application specifies the redirect URLs to use, and STA is responsible only for validating the application URL.
Choose redirect URLs that are not easy to find and not too general. When configuring the VALID REDIRECT URL field, if you need to include a wild card character, make the URL path as granular as possible.
-
USERINFO SIGNATURE ALGORITHM: The JSON Web Algorithm (JWA) used for signed UserInfo-endpoint responses.
Possible values: RSA-SHA256 or unsigned
-
REQUEST SIGNATURE ALGORITHM: The JWA that the application needs to use when sending the OIDC request.
Possible values: RSA-SHA256, any, or none
The value any allows for any or no signature algorithm to be used. In other words, any includes the none value.
The Any option is not available for applications created using the latest Generic Template version and is supported only for applications created with earlier versions.
-
User Identity Claims: Allow STA to convey information identifying the user to the application. This ensures that the application knows who has authenticated and is authorized the rightful access.
To add a claim, select Add Claim and configure a value mapping. The system supports the following scenarios:
-
Create claims with a user attribute mapping.
-
Create single-value claims with custom text mapping.
-
Create multi-value claims, such as AMR claims, with custom text mapping that return an array of custom values.
-
Create claims with group mapping to return the user groups (including nested groups) in an array of groupnames.
To remove a claim, select Delete
 next to the claim name.
 -
-
-
Select Save.
The application is now active and available to be assigned to groups and users.
You can replace the system-generated application icon with a custom icon.
Note
When configuring the Password Grant flow in the Generic template, ensure that the Request Signature Algorithm is set to "None". This is a required setting for the flow to function correctly.
Assign the application to users and groups
You assign an application to users to grant those users with the authorization to access the application. If an application is not assigned to a user, then STA blocks access to the application.
You can assign an application to all users or to specific user groups. An individual user can access the applications that are assigned to all users, or to groups that they are a member of.
If a user is authorized to access an application, the STA authentication flow that is dictated by the applicable policy, scenario, and state of the Single Sign-On (SSO) session applies.
Ensure that users who need access to web applications can use single sign-on (SSO).
-
On the STA Access Management console, select the Applications tab.
-
In the Applications list, select the application.
-
In the application details panel, click the Assign tab.
-
Under Assign to Users, select one of the options:
-
No users (Default)
-
All users
-
Users from any of these user groups: Enter the group names in the text box.
-
-
Click Save.
The application becomes active.
An Application Assignment entry is added to the audit log each time an application assignment is saved.