
User portal
The user portal is a predefined application that is active and assigned to all users by default. It includes a URL that is unique for every virtual server. All you need to do is share the user portal URL with your users. If required, you can restrict access to the user portal on the Applications tab. You can also configure authentication requirements for the user portal in access policies.
The user portal provides your users with a single web page where they see a list of the applications that they are authorized to access through STA. The authorized applications are determined by the application assignments and the user portal settings that are configured in STA.
To log in to the user portal, users provide the following information:
-
their STA user ID, or any of their aliases
-
their authentication credentials, as required by the applicable application policy
When they log in, they are in a STA single sign-on (SSO) session for applications. This SSO session is bound by the same SSO timeout rules as any other SSO sessions.
What can users do in the user portal?
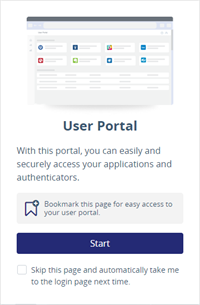
Bookmark the portal
To bookmark the portal, users must bookmark the start page, not the login page. The start page is the first page that is displayed when they access the link that you share with them.
Access applications
In the user portal, users see a tile view of the applications that are authorized to access. They can search or sort their applications, and they can move applications to their favorites list. Favorites are saved only in the browser and don't persist if the user accesses the user portal in private mode.
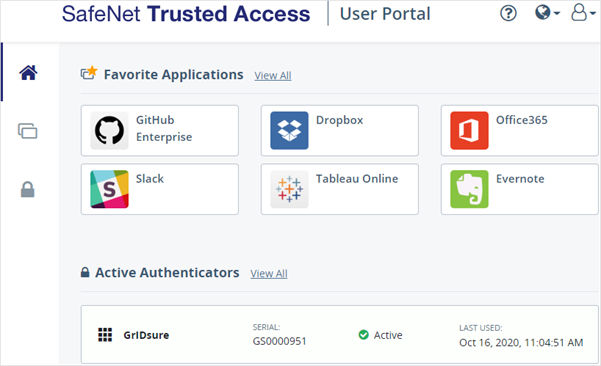
They can open any of the applications in the user portal with a simple click. Each application opens in a new tab. The policies that are configured in STA determine whether they are prompted for additional credentials.
When users log out of the portal, the SSO session ends and the login screen displays. Any applications that they opened from the portal remain active.
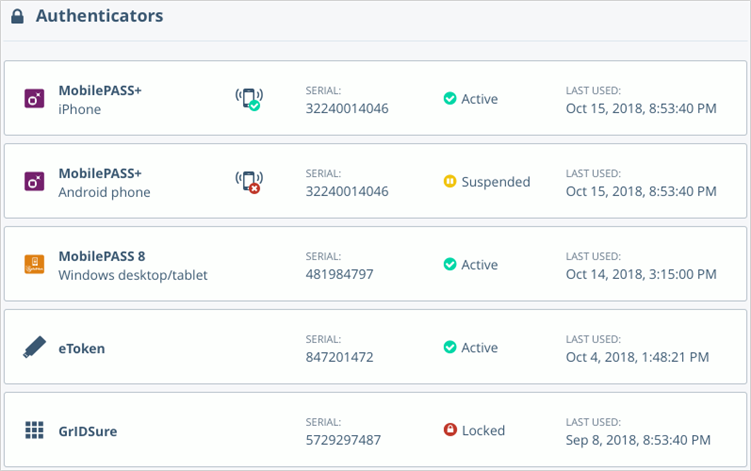
View authenticators
Users can also see a list of their authenticators that identifies the token type and the device on which a software token is activated. The list also includes the serial number, the state, and when the token was last used.
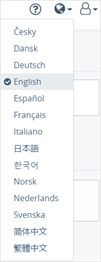
Set language
Users can also select the language for the user portal interface. The languages supported by STA include English, French, German, and several other languages. You can customize these text on the user portal login pages and the user portal.
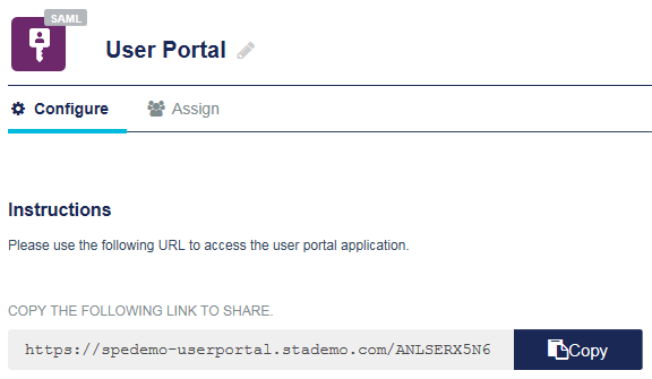
Grant access to the user portal
The user portal includes a URL, and it is active and assigned to all users by default. Each virtual server has a unique user portal URL. To grant your users access to the user portal, all you need to do is copy the URL and share it with them. You cannot edit the URL.
You need to change the assignment only if you want to restrict access to specific groups, or if you don't want to make it available.
You can also use policies or scenarios to define the access requirements for the user portal.
-
Copy the user portal link and send it to your users:
-
On the STA Access Management console, select the Applications tab, and then select the User Portal in the left pane.
The user portal page displays the Configure tab.
-
Click Copy and share the copied link with your users.
-
-
To restrict access to specific groups, click the Assign tab. Select Users from any of these groups and enter the group names.
-
Click Save Configuration.
When you view user details on the Users page, the user portal is first in the list of assigned applications. You can view access logs for the user portal on the Home tab.
Restrict access to the user portal
You cannot delete the user portal application. To ensure that nobody can access the user portal, assign it to no users.
-
On the STA Access Management console, select the Applications tab, and then select User Portal in the left pane.
-
On the user portal page, click the Assign tab.
-
Under Assign User Portal to the following users, select No users.
-
Click Save Configuration.