
Integrating Microsoft OWA with SafeNet Access Exchange
This section describes how to integrate Microsoft OWA with SafeNet Access Exchange to enable OWA functionality for SAS PCE.
In this integration, SafeNet Access Exchange is configured as the identity provider to support authentication and user management, enabling users to securely access Outlook Web App through a multi-factor authentication workflow.
The integration is a three-step process:
Prerequisites
Before you proceed with the integration, ensure that the following instances are operational and accessible:
- SAS PCE
- SafeNet Access Exchange (SAE)
- OWA Agent
Install SafeNet Agent for Microsoft OWA for SAS Cloud integration via Applications
To install SafeNet Agent for Microsoft OWA for use with SafeNet Access Exchange:
-
Log in to the Microsoft Exchange server.
-
Locate and execute the following installation file:
SafeNet Agent for Microsoft Outlook Web App.exe -
On the Welcome to the InstallShield Wizard for SafeNet Agent for Microsoft Outlook Web App window, click Next.
-
On the License Agreement window, read the software license agreement and to proceed, select I accept the terms in the license agreement, and click Next.
-
On the Authentication Server Pairing window, select the Authentication Server type as SAS Cloud (integrated via Applications) and click Next.

-
Continue with the remaining installation steps as prompted by the installation wizard.
Configure SafeNet Access Exchange
To configure SafeNet Access Exchange:
Create a Client for Microsoft Outlook Web App
-
Open the following URL in a web browser and log in to the SafeNet Access Exchange as an administrator.
https://<host>:8443/orhttps://keycloak.example.com/. -
On the administrator console, select your realm (for example, OWA-Dev).
This realm contains the authentication flow configuration required for SAS PCE integration.
-
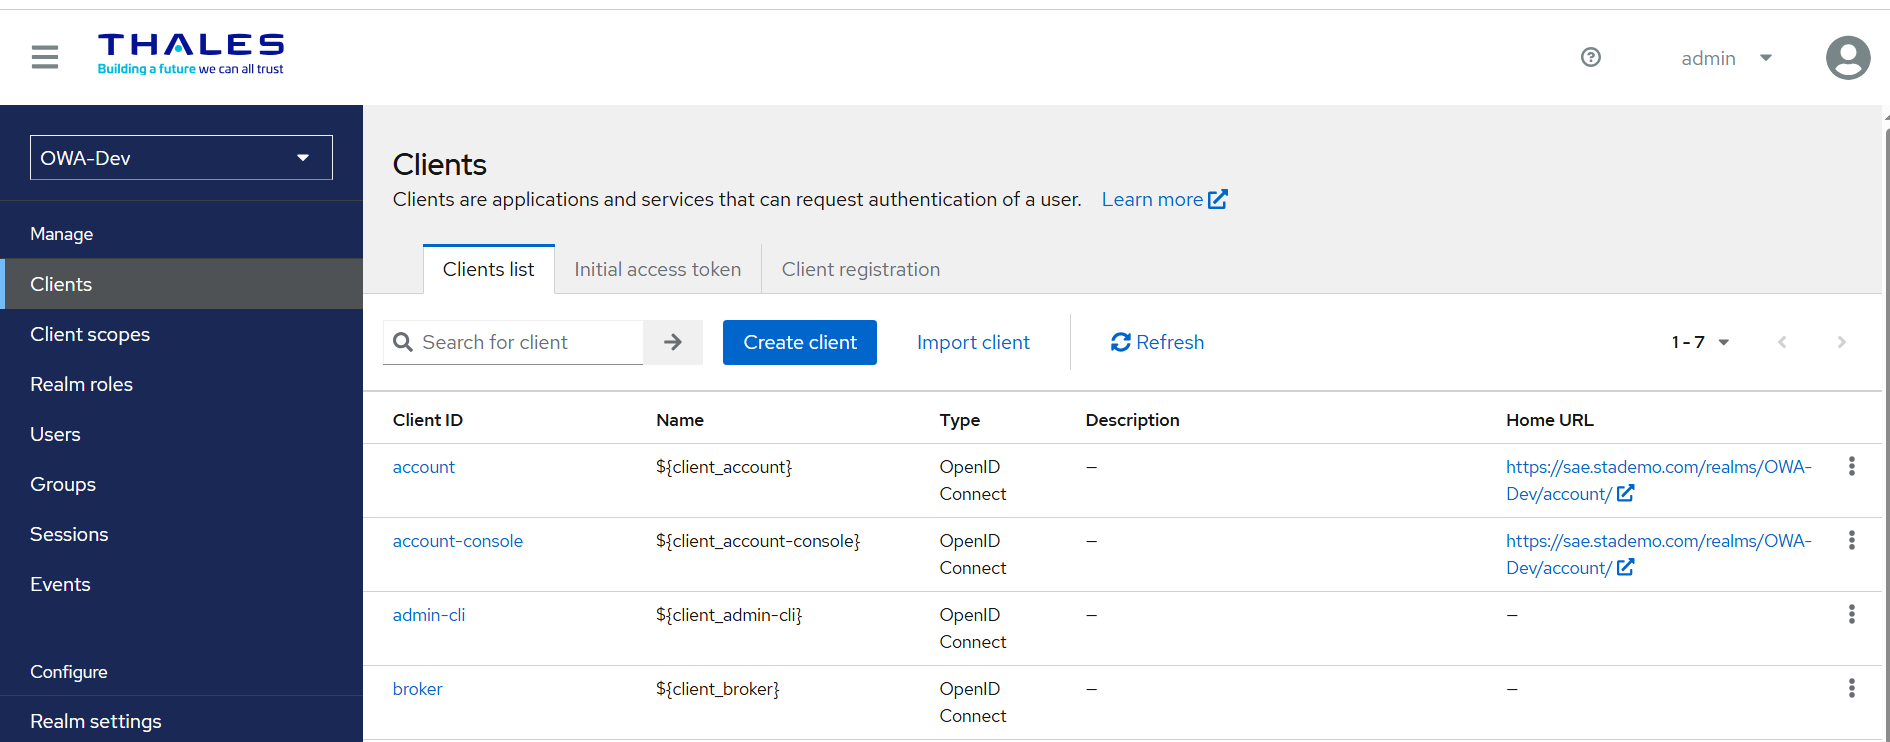
In the left navigation menu, click Clients.
-
Click Create client.
-
In the Client ID field, enter a client ID (for example, Outlook-Web-App-demo).
You can use a different client ID based on your naming conventions.
-
Under Create Client, perform the following steps:
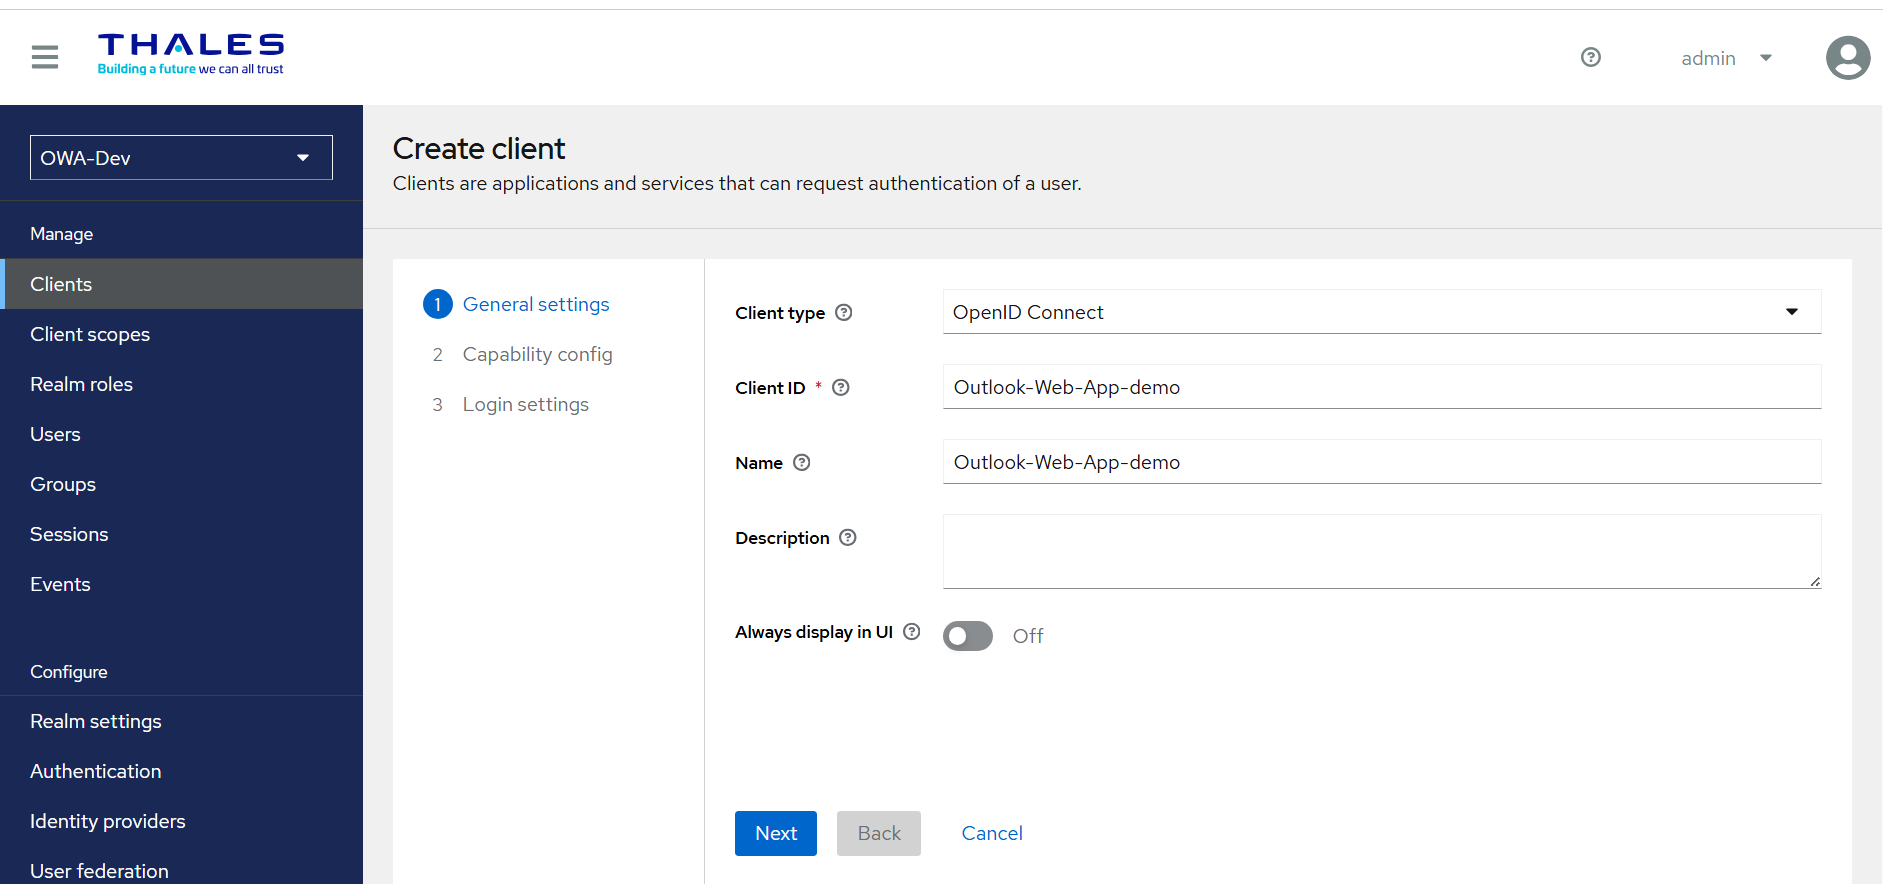
a. Under General Settings, perform the following steps:
-
In the Client type field, select OpenID Connect.
-
In the Client ID field, enter a client ID (for example, Outlook-Web-App-demo).
This ID is an alphanumeric string used to identify the client in OIDC requests.
-
(Optional) In the Name field, enter a name of your choice (for example, Outlook-Web-App-demo).
- Click Next.
b. Under Capability config, perform the following steps:
-
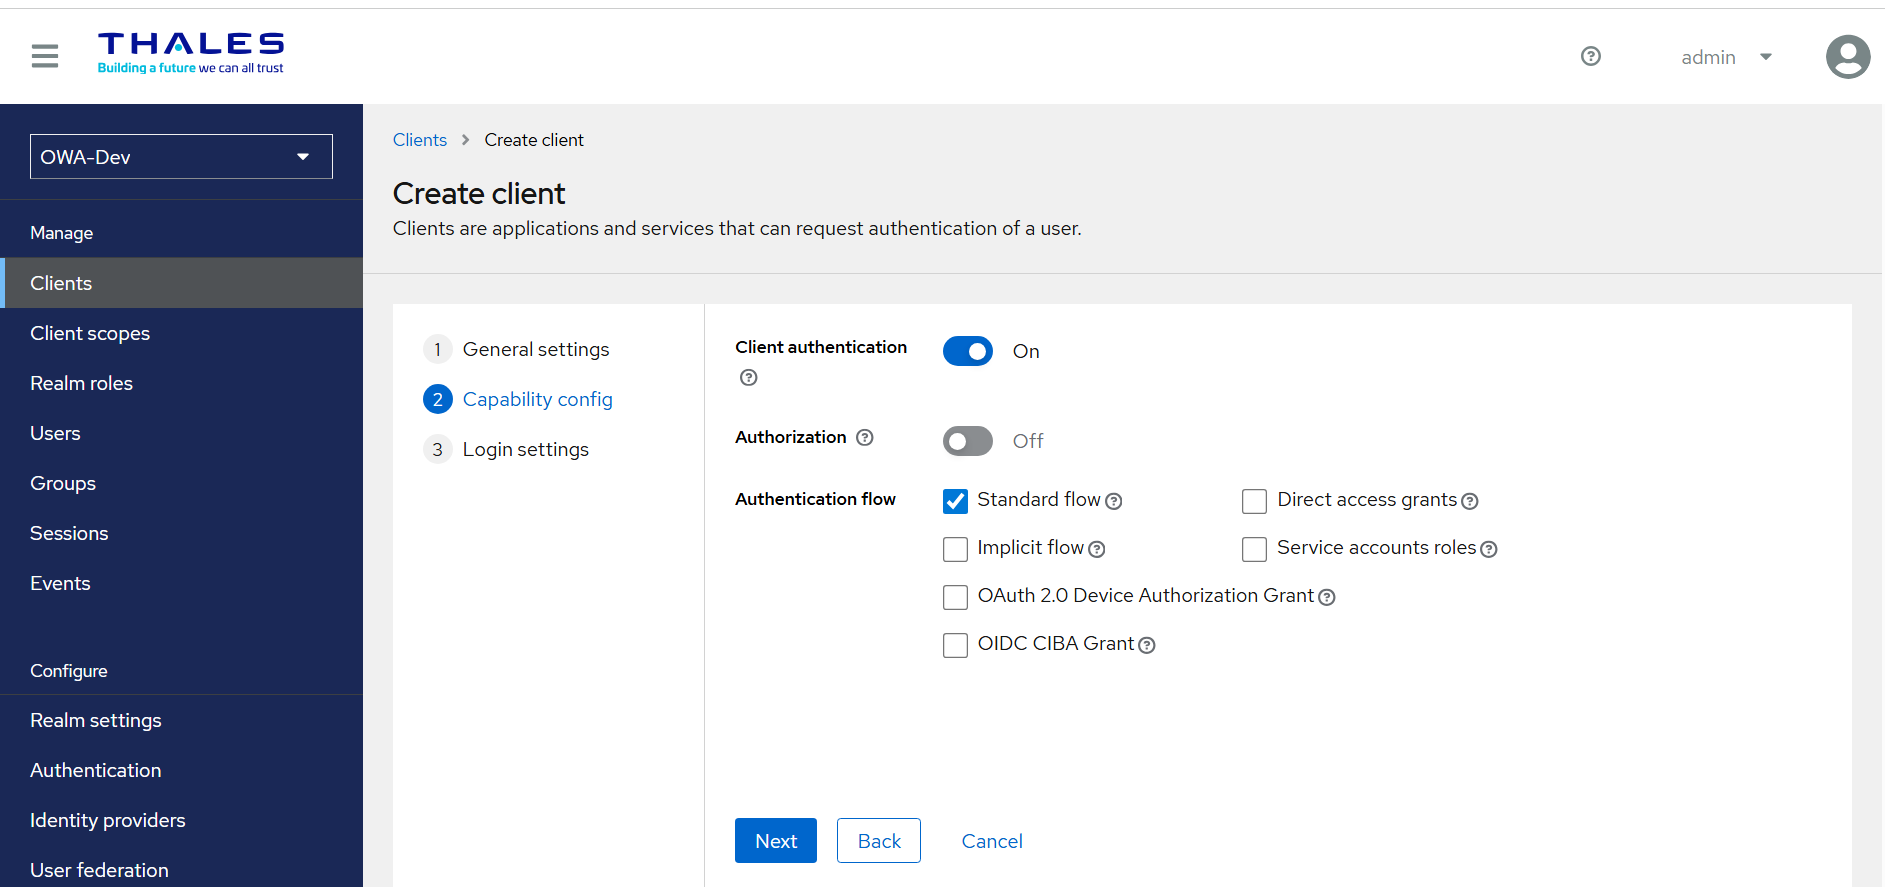
Turn on the Client authentication toggle.
-
Turn off the Authorization toggle.
-
Under the Authentication flow, select the Standard flow checkbox and clear the Direct access grants checkbox.
-
Click Next.
c. Under Login settings, perform the following steps:
-
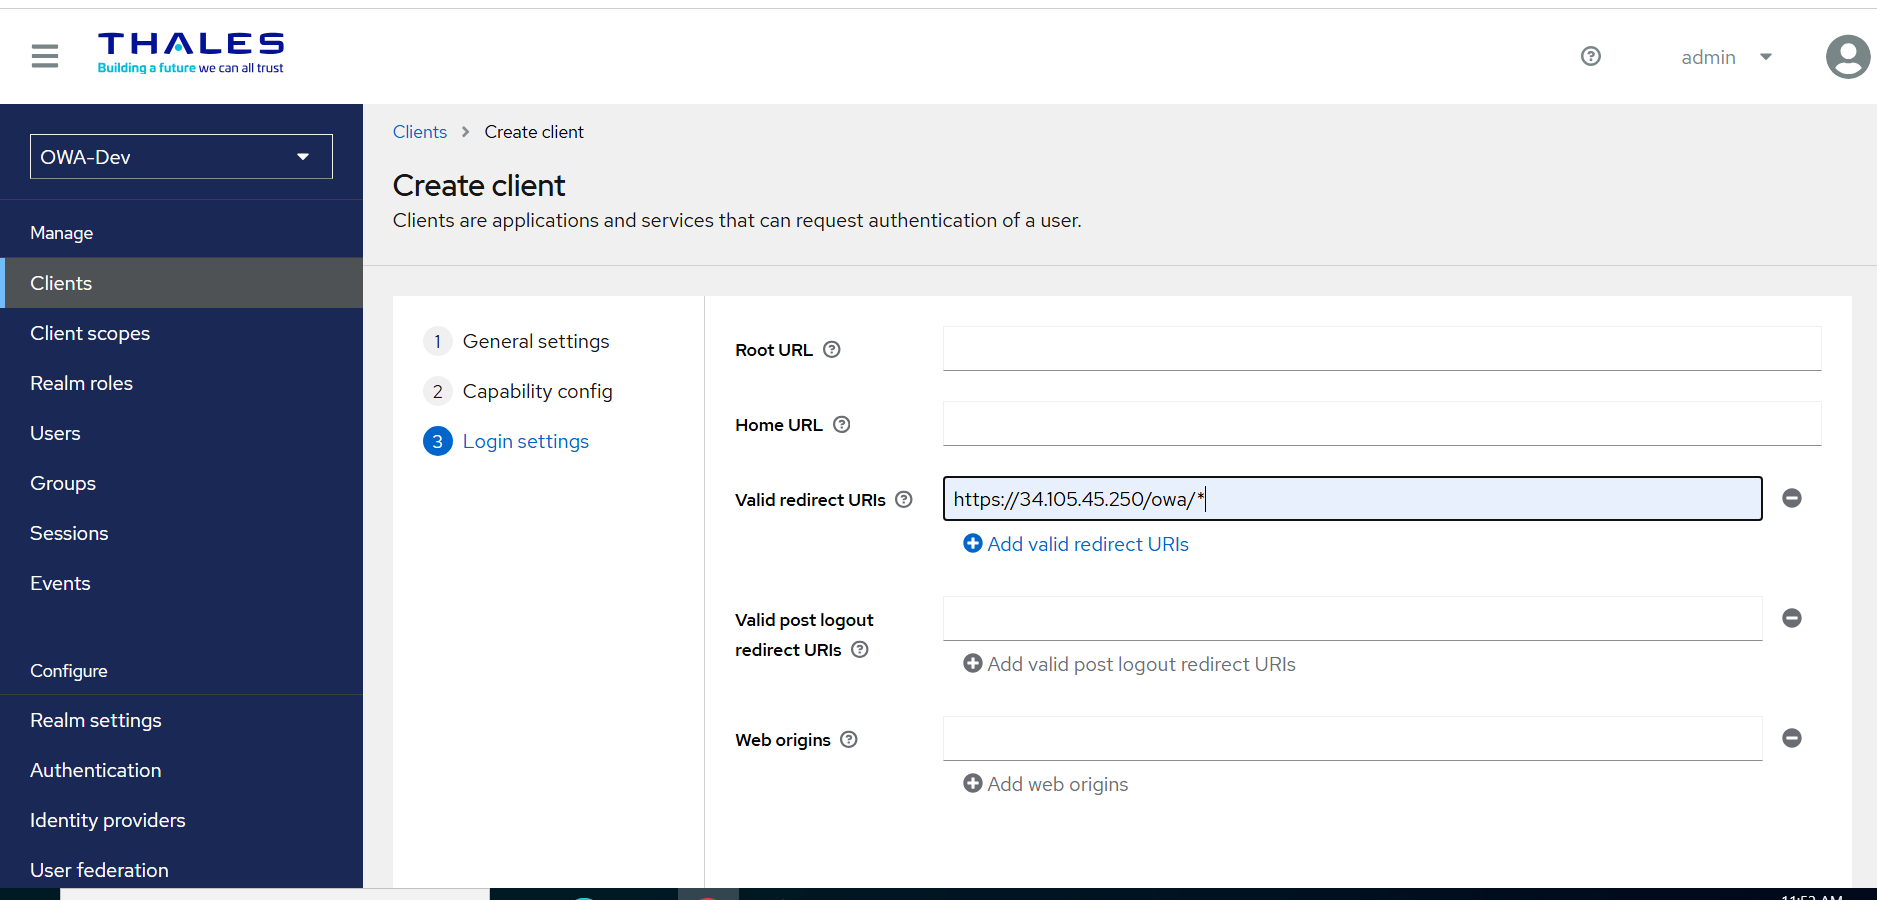
In the Valid redirect URIs field, enter
https://<owa_agent_server_fqdn>/owa/*.Where
<owa_agent_server_fqdn>is the FQDN of your OWA Agent server. -
Click Save to complete the client configuration.
-
Generate a Private Key and Configure Credentials
Refer to the Generating a Private Key and Selecting the Credentials Type for the Client section for detailed instructions.
Configure and Update the Agent File
The Agent file (.agent) contains details of IdP (SAE) and non-SAML/OIDC web applications. Configuring the agent file requires:
Obtain Values for the Agent File
Before configuring the Agent file, it is required to obtain certain values. Perform the following steps:
-
Go to the administrator console of your SAE instance.
-
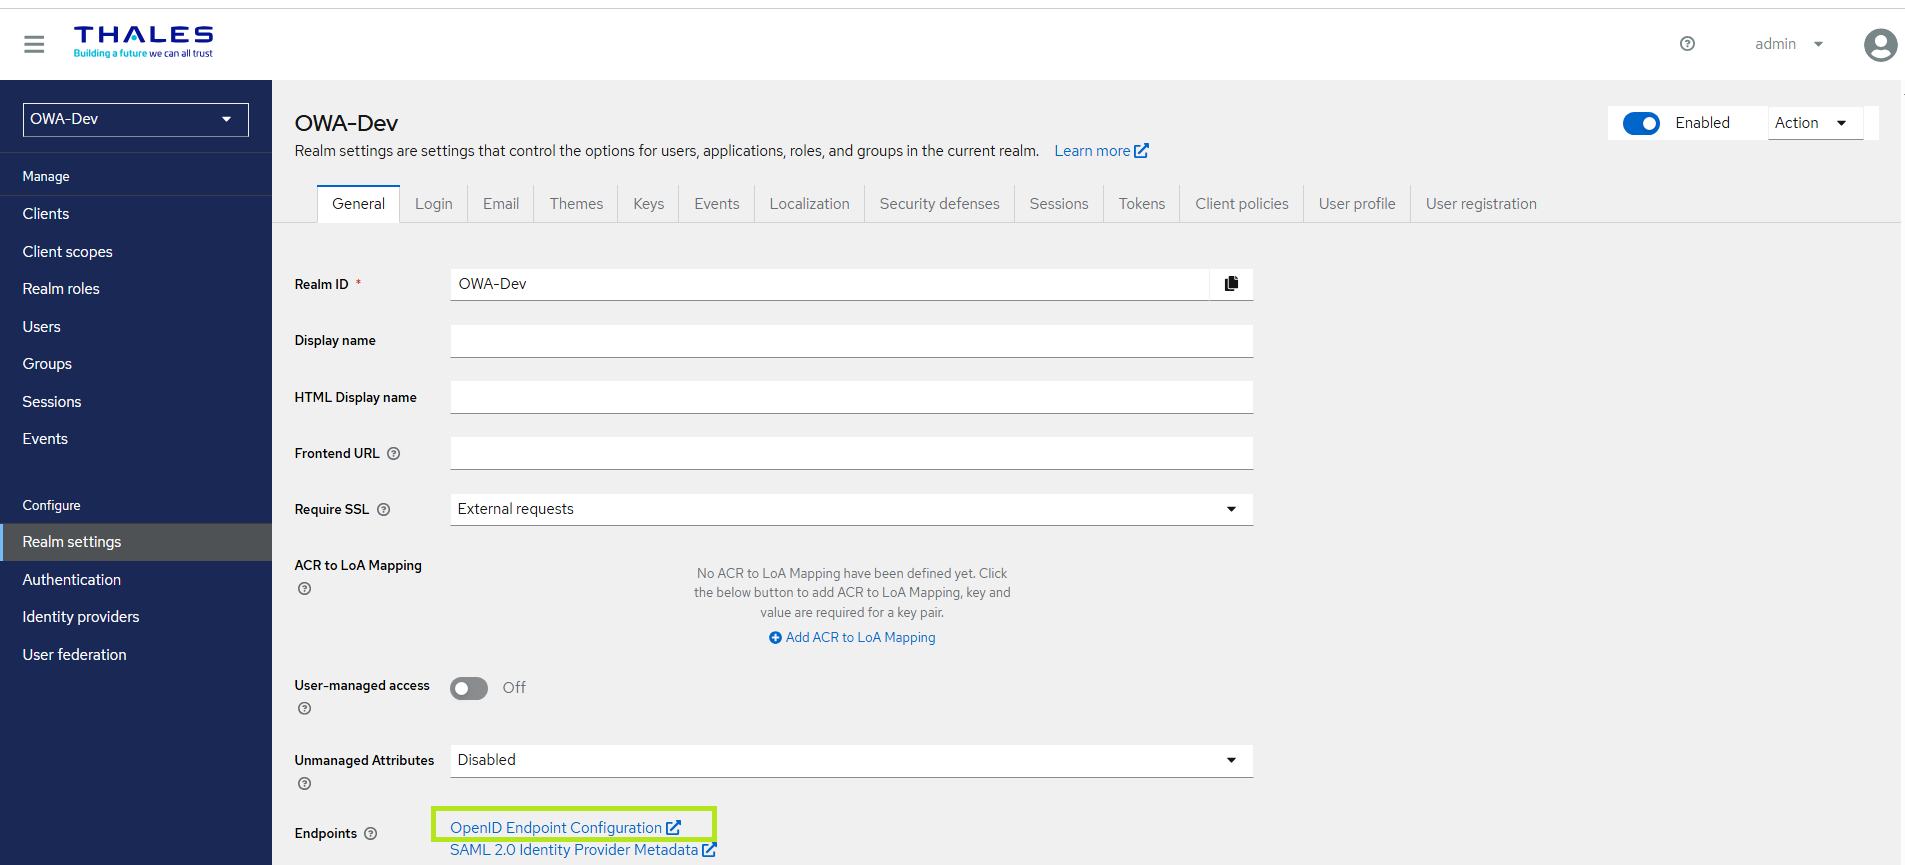
In the left pane, under Configure, select Realm Settings, and in the right pane, on the General tab, perform the following steps:
-
Copy the Realm ID field's value and paste it into a text editor.
-
In the Endpoints field, click OpenID Endpoint Configuration, and you will be redirected to another window. Copy the Issuer URL and paste it into the text editor.
-
-
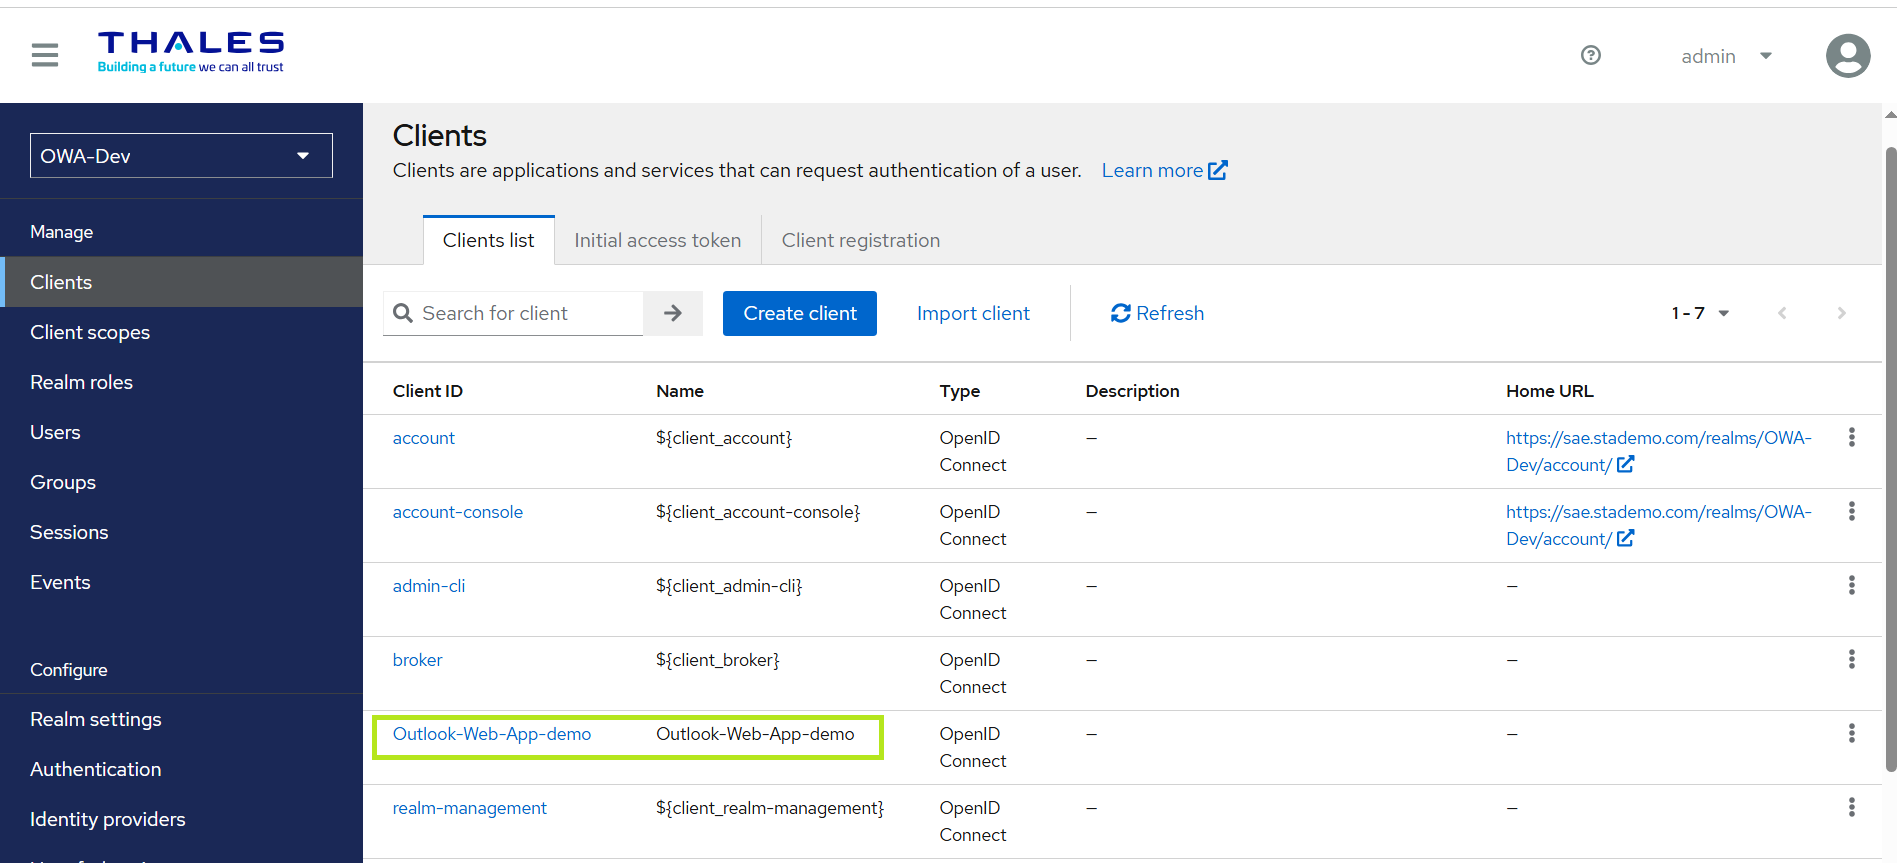
In the left pane, click Clients, and copy the Client ID (for example, Outlook-Web-App-demo) of the client you created earlier. Paste the value into the text editor.
Update the Agent File
Perform the following steps to update the Agent file:

-
Open the .agent file in a text editor such as Notepad++.
-
Next to the VirtualServer field, paste the Realm ID field's value you obtained in step 2(a) of the Obtaining Values for the Agent File section.
"VirtualServer":"OWA-Dev" -
Next to the IssuerUrl field, paste the Issuer URL you obtained in step 2(b) of the Obtaining Values for the Agent File section.
"issuerurl":"http://your-sae-url/realms/OWA-Dev" -
Next to the ApplicationName field, paste the Client ID you obtained in step 3 of the Obtaining Values for the Agent File section.
"ApplicationName":"Outlook-Web-App-demo" -
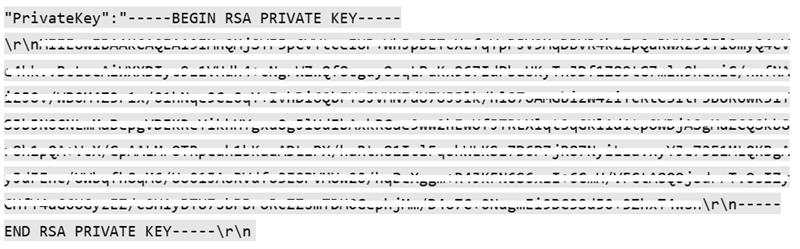
Replace the value of PrivateKey with the key you generated in the Generating a Private Key and Selecting the Credentials Type for the Client section (see the sample private key below).
-
Replace the value of RedirectUrl with the redirect URL (for example, https://owa_agent_server_fqdn/owa) that you used while creating the client.