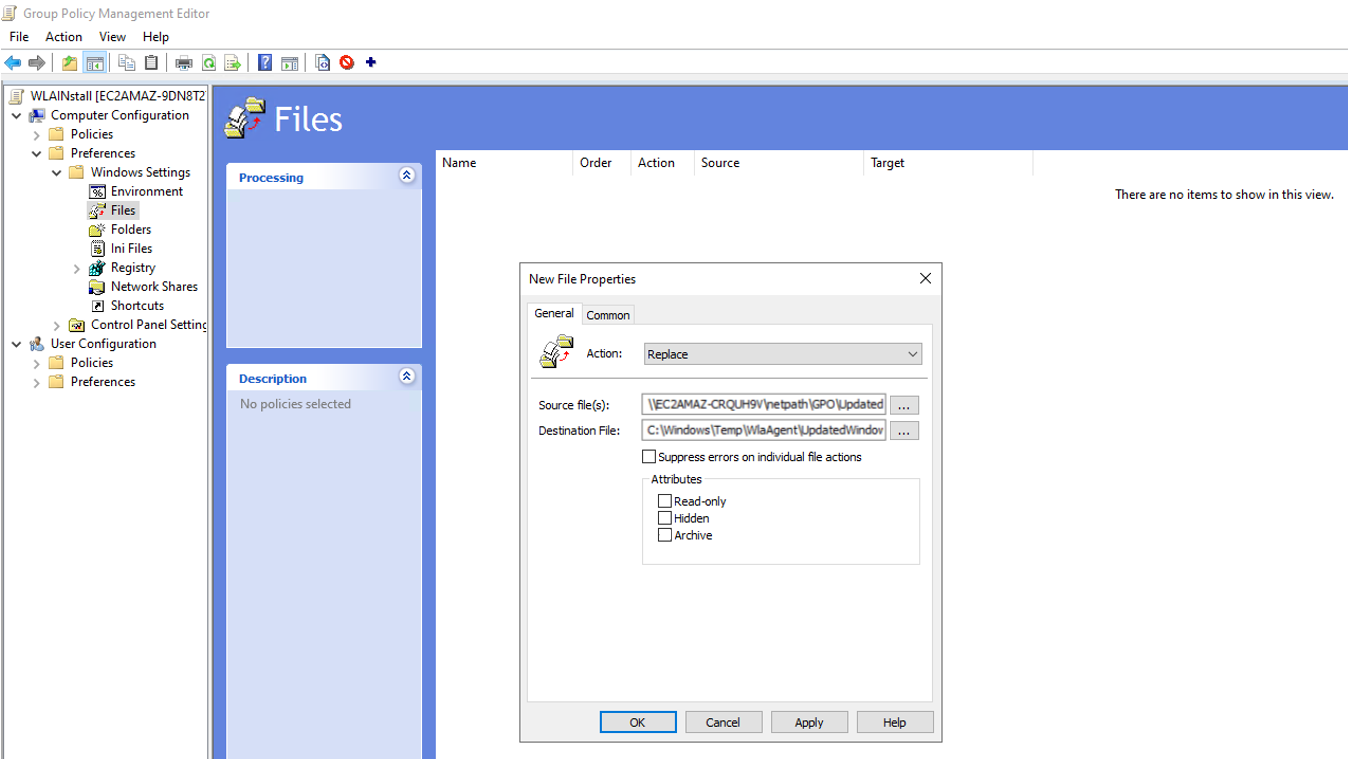
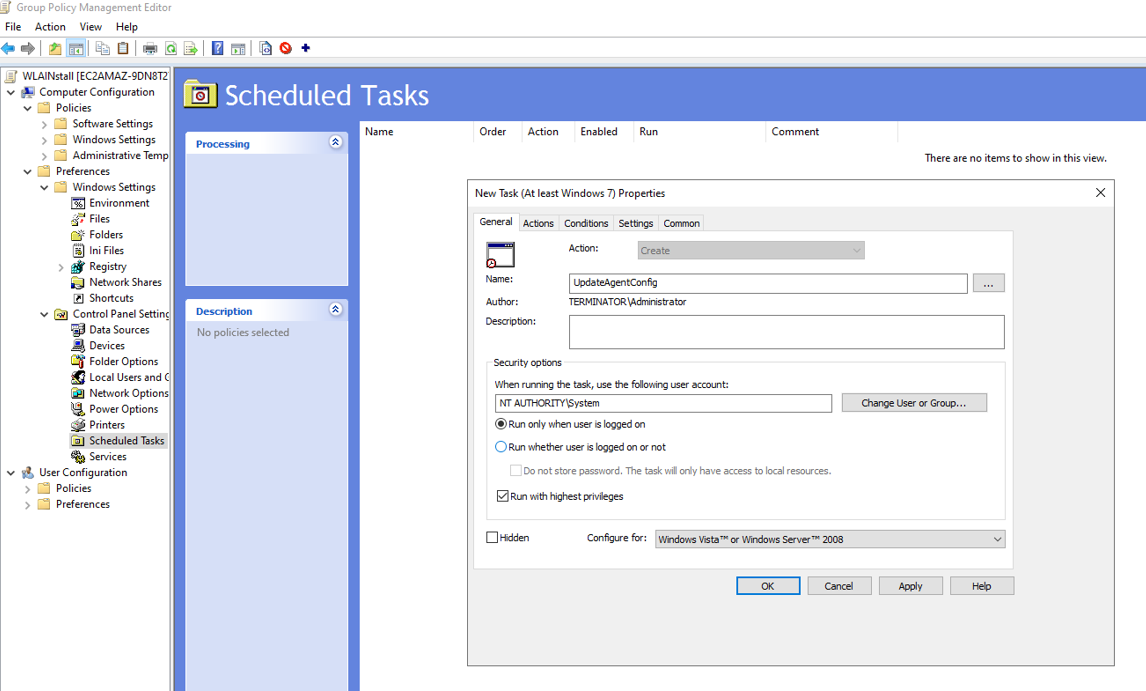
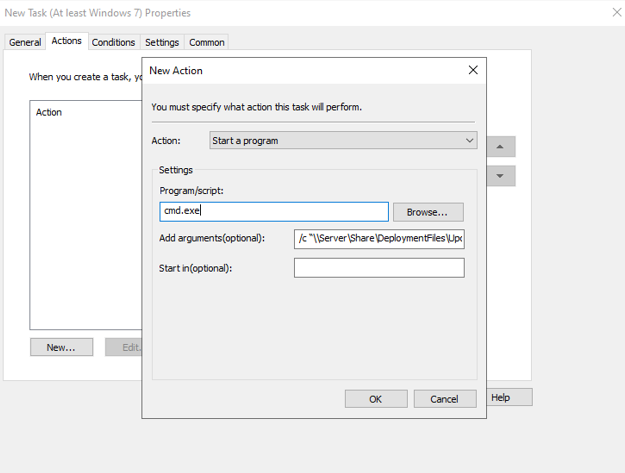
Deploying the agent via Group Policy Object
The use of Microsoft Group Policy or Group Policy Objects (GPO) enables the SafeNet administrator to centrally manage the agent configuration for users and computers in an Active Directory environment. It allows to configure many important policy settings to provide flexibility and support extensive configuration information.
For more details about the Group Policy and Group Policy Objects, see Group Policy Overview.
Configuring the ADMX and ADML settings
The SafeNet Agent for Windows Logon policy settings are stored in a Windows Administrative Template (ADMX) file. The settings can be edited using the Windows tools. It can be propagated to the entire domain, or be applied to the local computer and domain controllers only.
Open the administrative template and perform the following steps to configure the settings:
-
From the Windows taskbar, select Start > All Programs > Accessories > Run.
-
Enter
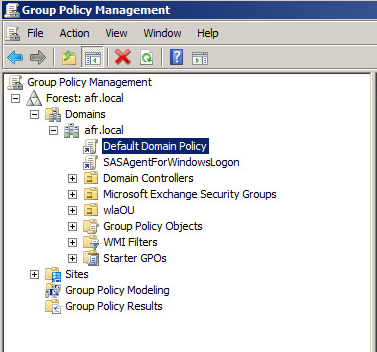
gpmc.mscand click OK. The Group Policy Management window is displayed.
-
Perform one of the following actions:
- To propagate the settings to all clients in the domain, right-click Default Domain Policy or newly created GPO under the domain node.
- To apply the settings to the local machine and any other domain controllers in this domain, go to the Domain Controllers node and right-click Default Domain Controllers Policy.
From the drop down menu, select Edit. The Group Policy Management Editor window is displayed.
-
In the left pane, navigate to Computer Configuration > Policies > Administrative Templates > WLA Policies > AuthGINA. The settings are displayed in the right pane.
-
Enable all the setting as per your requirement, if not already enabled, with default value or user-defined value.
Click here to see the description of the registry settings available with the agent.
Deploying the agent
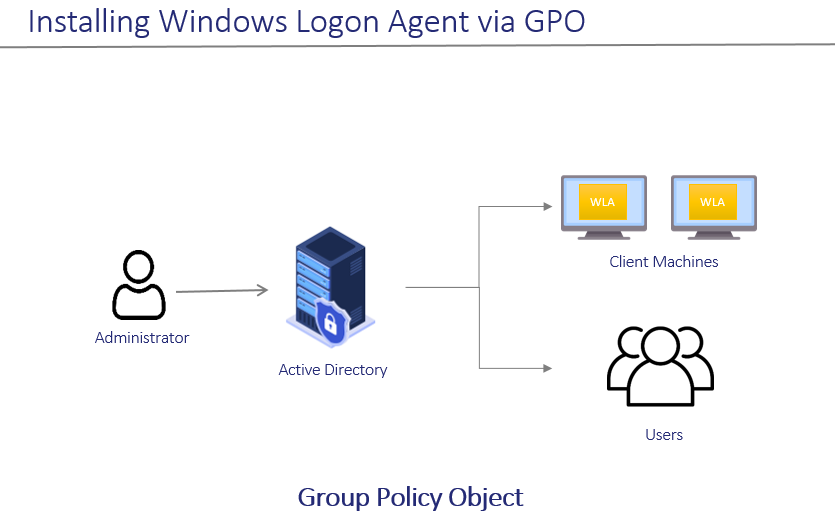
Deploying SafeNet Agent for Windows Logon via GPO requires:
- Creating a Distribution Point
- Creating a Group Policy Object
- Adding ADMX and ADML File to Group Policy Object Editor
- Deploying the MSI
Creating a distribution point
To deploy an MSI through GPO, perform the following steps to create a distribution point on the Publishing Server:
-
Log in to the server as an administrator.
-
Create a shared network folder.
Note
The shared network folder contains the MSI package and Agent file.
-
Set permissions on this folder to allow access to the distribution package.
-
Copy and paste the SafeNet Agent for Windows Logon MSI file (SafeNet Authentication Service Agent for Win 8-10-2012-2016 x64.msi) and Agent file in the previously created shared network folder.
Creating a Group Policy Object
An MSI package is deployed/distributed through GPO. To create and enforce a new GPO, perform the following steps:
-
From the Windows taskbar, select Start > All Programs > Accessories > Run.
-
Enter
gpmc.mscand click OK. The Group Policy Management window is displayed. -
Expand Forest (your forest) > Domains (your domain).
-
Right-click the Group Policy Objects and select New.
-
Enter a name for your policy and leave Source Starter GPO as none.
-
Right-click the domain name and select Link an Existing GPO.
-
In Select GPO pop-up window, select newly created GPO and click OK.
-
Click the newly created GPO. In the right pane, right-click the linked domain name and select enforce. The GPO will be linked with the domain.
Adding ADMX and ADML File to Group Policy Object Editor
To add the ADMX and ADML file to the GPO Editor, perform the following steps:
-
Copy the Local Group Policy definition (
C:\Windows\PolicyDefinitions) to Domain Group Policy (C:\Windows\SYSVOL\sysvol\<domain_name>\Policies). -
Copy the ADMX file (SafeNetAgentForWindowsLogon.admx) from the package and paste it to the following location:
C:\Windows\SYSVOL\sysvol\<domain_name>\Policies\PolicyDefinitions -
Copy the appropriate ADML language file (SafeNetAgentForWindowsLogon.adml) to a language folder under the \PolicyDefinitions.
For example, in Windows Server 2019, the English language file provided should be written to:
C:\Windows\SYSVOL\sysvol\<domain_name>\Policies\PolicyDefinitions\en-US
Deploying the MSI
To deploy the WLA MSI to the client machines, perform the following steps:
-
Open and right-click the GPO and select Edit.
-
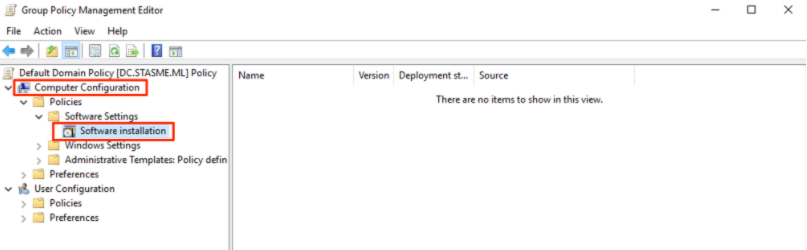
In the Group Policy Management Editor, navigate to Computer Configuration > Policies > Software Settings > Software Installation.
-
Right-click the Software Installation, and select New > Package.
-
Select the SafeNet Agent for Windows Logon MSI file (SafeNet Authentication Service Agent for Win 8-10-2012-2016 x64.msi) from the previously created shared folder.
-
Select the deployment Method – Assigned and click OK.
-
Double-click MSI and under Deployment tab, click Advanced. Select Ignore language checkbox.
-
On Security tab, select the client machine, give the required permission and click OK.
-
Now, the GPO will have the MSI Installation package. Next time, if the GPO is updated on the client computer, it will silently install the MSI. To apply the changes instantly, use the following command
gpupdate /force.
Note
Restart might be required after executing the above command.
-
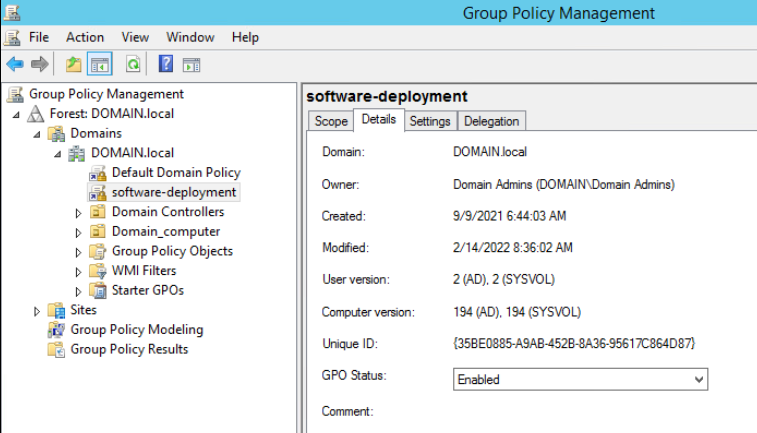
Under Details tab, Enabled status displays for the created GPO.
Upgrading the agent
Perform the following steps to upgrade the existing WLA package with a new package:
-
Perform Step 1 to Step 4 in Deploying the MSI section.
-
In the Deploy Software pop-up window, select Advanced and click OK.
-
Go to the Upgrades tab and click Add.
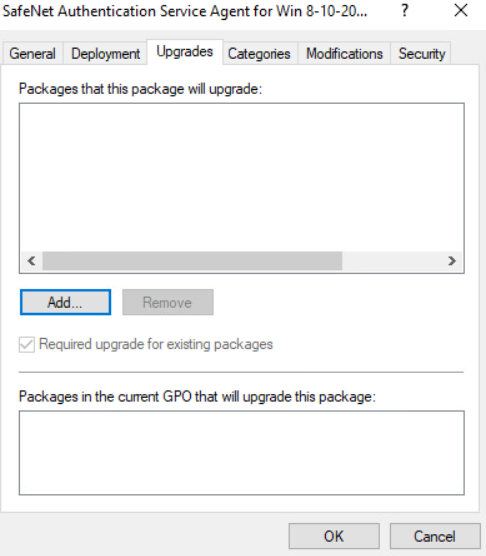
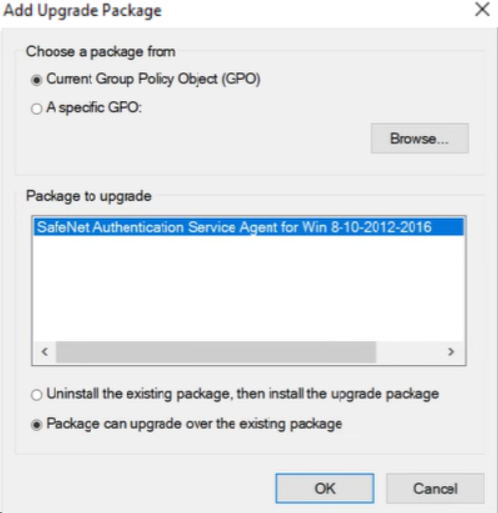
The Add Upgrade Package window is displayed.
-
Under Choose a package from, select Current Group Policy Object (GPO) or click Browse to select a specific GPO.
-
Under Package to upgrade, select the desired package from the list, and then select Package can upgrade over the existing package.
-
Click OK.
Uninstalling the agent
Perform the following steps to uninstall the agent:
-
Perform Step 1 to Step 3 in Creating a Group Policy Object section.
-
Select Group Policy Objects, right-click the desired group policy, and then click Edit.
-
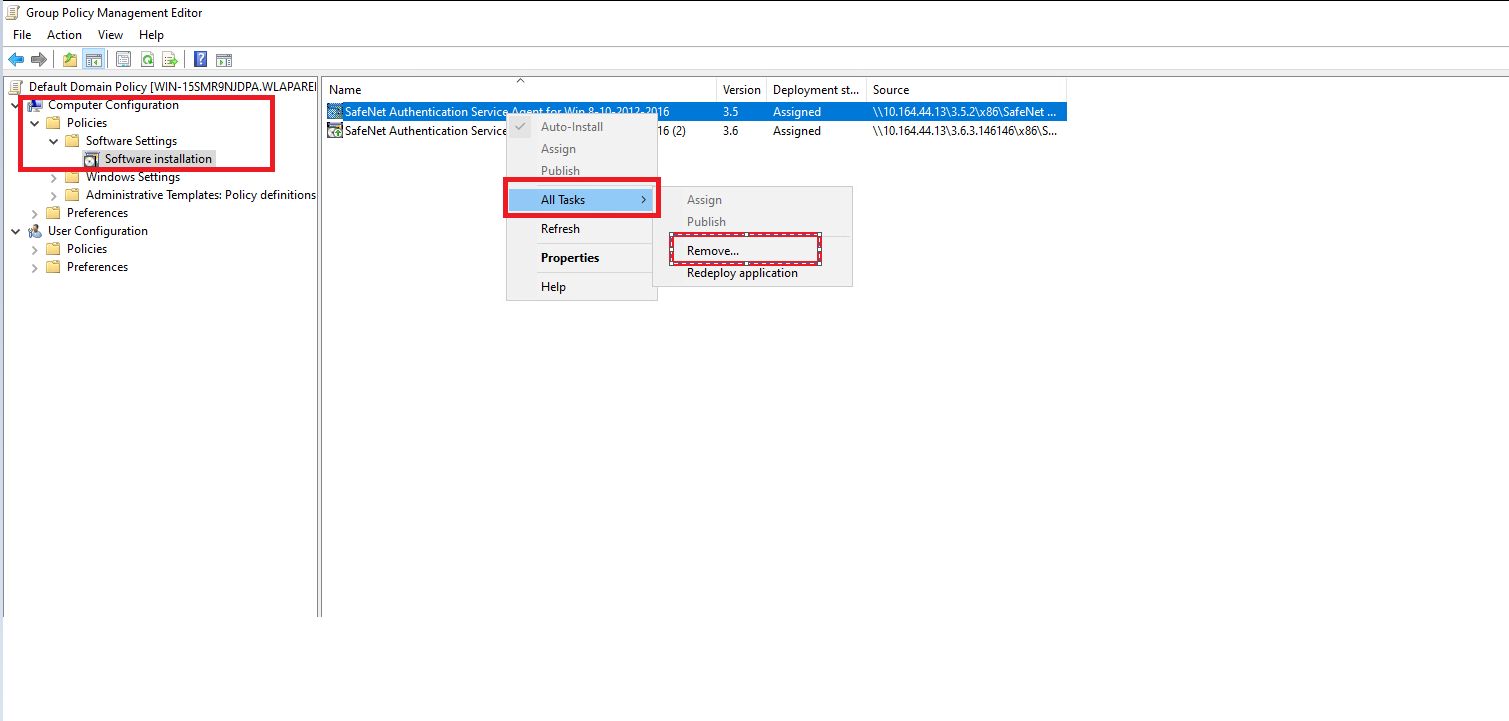
In the left pane, go to Computer Configuration > Policies > Software Settings > Software installation.
-
In the right pane, right-click the software package that you want to uninstall, hover on All Tasks, and then click Remove.
-
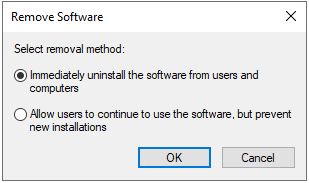
On the Remove Software window, select Immediately uninstall the software from users and computer, and then click OK.
Registry settings
The management console configurations exist as a registry setting at HKEY_LOCAL_MACHINE\SOFTWARE\CRYPTOCard\AuthGINA. The registry settings that are mapped to the WLA management console and can be configured on a need basis by the administrator are listed below:
Note
While using RegEditCount, it is recommended to push other configured registry entries as well.

| Setting | Description | Accepted values |
|---|---|---|
| UseProxy | Used to configure the proxy server to connect with SafeNet server via proxy. For example, Token Validation Proxy. Note: If you enable this setting, you must configure Proxy Server. |
1: Enable the proxy server 0 (Default): Proxy server is not used |
| StripNetBIOS | Determines if a NETBIOS name (DOMAIN\USERNAME) is sent to the authentication server as-is, or if the portion prefixing the username is removed (stripped). | 1: Strips the DOMAIN\ portion from the username when authenticating with SafeNet server 0 (Default): The agent will not sanitize the username |
| EnableSSLCertCheck | Used to validate the SafeNet server certificate or Proxy server certificate (if used). | 1 (Default): The agent will validate the server certificate 0: The agent will not validate the server certificate |
| ProxyServer | Used to configure the proxy server IP address or FQDN and its port number. Note: Must be used with setting 'UseProxy' or 'UseProxyForSPS'. |
'1.2.3.4:567' or 'host.domain.name:port' |
| ExemptAdmins | Used to exclude the local and domain administrators from strong authentication (OTP). | 1 (Default): Local and Domain Administrators are exempted from strong authentication 0: All users must use strong authentication |
| ProxyPassword | Used to configure the proxy server password. WARNING: The agent uses the SafeNet server key file to encrypt and decrypt the proxy password during operation and thus assumes the password is propagated from the GPO in encrypted form (!). To set the password with the GPO, configure this setting in the client machine using the management console, and then retrieve its value from the registry. |
|
| LocalUserOrGroup_Ex | Used to exclude the Local Groups from the SafeNet authentication. When any group is added to this setting through GPO, DomainUserOrGroup_In needs to be set to "*". | COMPUTERNAME\groupname, COMPUTERNAME\group2: multiple values are separated by a comma (,) %COMPUTERNAME%\groupname: In this case, when the GPO settings are pushed to the client machines, the variable (%COMPUTERNAME%) will be automatically set to the computer name of the respective client machine. [ ]: Default |
| PrimaryServiceURL | Used to configure the Primary SafeNet server (or the Token Validation Proxy). | * Protocol followed by IP address and port, for example, http://1.2.3.4:8080* Protocol followed by FQDN and port, for example, https://server.domain.com |
| WindowsPasswordCaching | If enabled, WLA will cache the Microsoft password on first successful user authentication until password expiration or change. Note: This configuration is not applicable for domain administrators. |
1: Users are prompted for OTP only 0 (Default): Users are prompted for OTP, then domain password |
| EncryptionKeyFile | It is used to set the key file location. | Default: C:\Program Files\SafeNet\Windows Logon\KeyFile\Agent.bsidkey |
| GrIDsureTokens | Used to enable the GrIDsure authentication link in the logon screen. | 1 (Default): Display the GrIDsure authentication link 0: Hide the GrIDsure authentication link |
| WrapCredentialProvider | Specify the GUID of the credential provider that the agent will use to wrap for the two-factor authentication. | |
| LogLevel | Used to configure the client side log level. | 1: Critical 2: Error 3: Warning (default) 4: Info 5: Debug |
| PingPrimaryServiceAfterMinutes | Used to configure the time (in minutes) after which the agent will attempt to return to its Primary SafeNet server. | Default: 10 minutes |
| AllowRDPWithoutOTP | Used to exclude the outgoing RDP (remote desktop) from SafeNet authentication. | 1 (Default): SafeNet authentication is not enforced for outgoing RDP 0: SafeNet authentication is required for outgoing RDP |
| DomainUserOrGroup_In | Used to include the Domain Groups for the SafeNet authentication. Note: If you define a group or multiple groups in this setting you must also set DomainUserOrGroup_Ex and LocalUserOrGroup_Ex with a value of '*'. |
[ ]: Not configured DomainName.com\Group Name: Only the provided group must use strong authentication *: All users must use strong authentication |
| AllowNetworkPathWithoutOTP | Used to exclude the SafeNet authentication while accessing network resources over Windows Explorer. | 1: SafeNet authentication is not enforced while accessing the network resource 0 (Default): SafeNet authentication is required while accessing the network resource for outgoing Windows Explorer |
| TileFilter | Used to configure the appearance of credential provider tiles during Windows Logon. | 0 (Default): All credential tiles presented to the user will enforce SafeNet authentication. 1: Authentication can be performed using SafeNet or third-party credentials, but the Microsoft credential tile is hidden. 2: Authentication can be performed with third-party or Microsoft credentials, but the SafeNet credential tile is hidden. |
| LocalUserOrGroup_In | Used to include the local users to use strong authentication (OTP). Note: If you define a group or multiple groups in this setting, you must also set DomainUserOrGroup_Ex with a value of '*'. |
[ ]: Not configured ComputerName\Group Name: Only the provided group must use strong authentication %COMPUTERNAME%\groupname: In this case, when the GPO settings are pushed to the client machines, the variable (%COMPUTERNAME%) will be automatically set to the computer name of the respective client machine |
| ThirdPartyFilter | Some third-party credential provider software may conflict with the working of the agent. So, you can restrict their access with this registry key and only allow certain supported software to work with the agent. | 0 (Default): Allow all applications 1: Allow SafeNet compliant applications |
| InternetCallTimeOutInSeconds | Specifies the maximum timeout value for authentication requests sent to the SafeNet server. | Default: 10 seconds |
| UseProxyForSPS | Used to connect to the Service Provider Server via proxy server. | |
| NestedDomainGroups | Enable it to improve logon performance if domain groups are not nested inside local groups. | 1: Improves the agent performance when domain groups are not nested in local groups 0 (Default): Used when domain groups are nested in local groups |
| OptionalSecondaryServiceURL | Used to configure the secondary (failover) SafeNet server (or the Token Validation Proxy). | * Protocol followed by IP address and port, for example, http://1.2.3.4:8080* Protocol followed by FQDN and port, for example, https://server.domain.com |
| LogFile | Used to configure the client log file path. | Default: C:\Program Files\SafeNet\Windows Logon\Log\AuthGINA-{date}.log |
| DomainUserOrGroup_Ex | Used to exclude the Domain Groups from the SafeNet authentication. Note: When any group is added to this setting, then the DomainUserOrGroup_In entry remains empty. You need to set LocalUserOrGroup_In to "*". |
[ ]: Not configured DomainName.com\Group Name: Only the provided group is excluded from strong authentication |
| ProxyUser | Used to configure the proxy server username that is used to authenticate the defined proxy server. Note: Setting 'ProxyUser' assumes setting 'ProxyServer' and 'Password', and may also require setting 'UseProxyForSPS' (if applicable). |
|
| StripUPN | Determines if a UPN (username@domain.com) is sent to the authentication server as-is, or if the portion following the username is removed (stripped). | 1: Strips the @domain.com portion from the UPN when authenticating with the SafeNet server 0 (Default): The agent will not sanitize the username |
| CustomLogoBMP | Allows to set a custom image in the logon screen for compatible credential providers. The customization is not compatible with the Windows V2 credential provider. Note: The custom logo must be a bitmap (.bmp) of 110 x 110 pixels and must be available locally on the client. |
Example syntax: C:\Program Files\SafeNet\Windows Logon\customLogo.bmp |
| AgentStatus | Used to enable or disable the agent. | 1 (Default): The agent will be enabled and displayed at logon 0: The agent will be disabled (remains installed and configured but is not used) |
| EmergencyPassword | Used to enable or disable the emergency password feature. This is applicable when the Windows machine is unable to communicate with the SafeNet server at the time of authentication. |
1 (Default): Emergency Password can be used for authentication 0: Emergency Password cannot be used |
| SkipOTPOnUnlock | Used to exclude the SafeNet authentication for last logged on user on system unlock. The functionality extends to sleep and hibernate mode, which means the agent will not prompt for an OTP, and instead logs in successfully using only the AD credentials. |
1: SafeNet authentication is skipped during unlock 0 (Default): SafeNet authentication is required during unlock |
| RegEditCount [Optional] | Prerequisite: To use this feature, auditing of the registry must be enabled in the client machine. For reference, see here. Specifies the maximum logins any user can use with the modified registry entries locally. To restrict the local changes after the agent installation and upgrade, its value must be pushed via MDM (GPO, Intune, or SCCM). For any issues, see the Troubleshooting section. The registry settings that are reverted if any change is done locally on the WLA installed machine once the RegEditCount setting is reached are: AgentStatus, SkipOTPOnUnlock, ExemptAdmins, WrapCredentialProvider, DomainUserOrGroup_Ex, DomainUserOrGroup_In, LocalUserOrGroup_Ex, LocalUserOrGroup_In, GroupIndex, TileFilter. Note: If this setting is enabled, only MDM Push will be treated as a valid registry entry modification. Any other method will not be considered a valid push. |
-1 (Default): Depicts that the setting is disabled and the feature does not exist in the system. Any user with admin rights can make the local changes. 0: Enabled. Specifies that the admin user is not allowed to make any changes in the registry settings, and any local change will be immediately reverted. >0: Remaining attempts. Admin user can perform the local changes, but the change will persist till the logon attempt count is less than RegEditCount count. Once the logon attempt count matches the RegEditCount, all the local changes to the settings will be reverted to the original values. Maximum threshold: 10 |
| PreferredLanguage | Used to apply the language, including English (Default), French, German, and more, to be displayed for the agent as per the user's preference. | Default: en.json |
Following are some of the registry settings that are not configurable using Windows Logon Agent Manager. You need to create it manually in the registry at the following location:
HKEY_LOCAL_MACHINE\SOFTWARE\Cryptocard\AuthGINA
| Setting | Description | Accepted values |
|---|---|---|
| DoNotFilter | Allows a view where third-party credential providers can also be displayed. By default, the agent filters out (do not display) other credential provider. | |
| CompatibleFilters | Prevents the management console from displaying an Incompatible Filter message. This setting can only be added if a third-party credential provider is compatible with the agent and can be wrapped successfully. For example, if SpecOps credential provider is installed on a client machine along with the agent, then the management console may display Incompatible Filter message. To exclude SpecOps Credential Filter, add its GUID to the CompatibleFilters list. To add multiple filters, use comma (,) for separation. |
|
| FilterProcess | Allows to exclude applications from applying the SafeNet authentication. This setting can only be added when the agent is installed with default options. To exclude: Outlook from using OTP to authenticate, add its executable (outlook.exe) to the FilterProcess list. All the applications from SafeNet authentication, add an asterisk (*) in the FilterProcess list. |
|
| SetCachingToCurrentUser | Augments the secured storage of a user's cached Microsoft password. This is mostly relevant for shared machine scenarios and is effective only when Enable Microsoft Password Caching is selected in the SafeNet Windows Logon Agent Manager > Policy tab. If SetCachingToCurrentUser is set to 1, the password caching will not work in the following scenarios: Access to a network path/resource Outgoing RDP connections from a WLA protected machine * Run as a different user to access applications, such as command prompt For such cases, Microsoft password must be provided by the user. All other use cases supported for Microsoft password caching will function as expected. This setting will be applicable on next logon. |
0 (Default) 1 |