
Identity Provider (SafeNet Access Exchange) Setup
Configuring the Identity Provider (for example, SafeNet Access Exchange) requires creating a client in SafeNet Access Exchange.
Perform the following steps:
-
Log into SafeNet Access Exchange as an administrator.
-
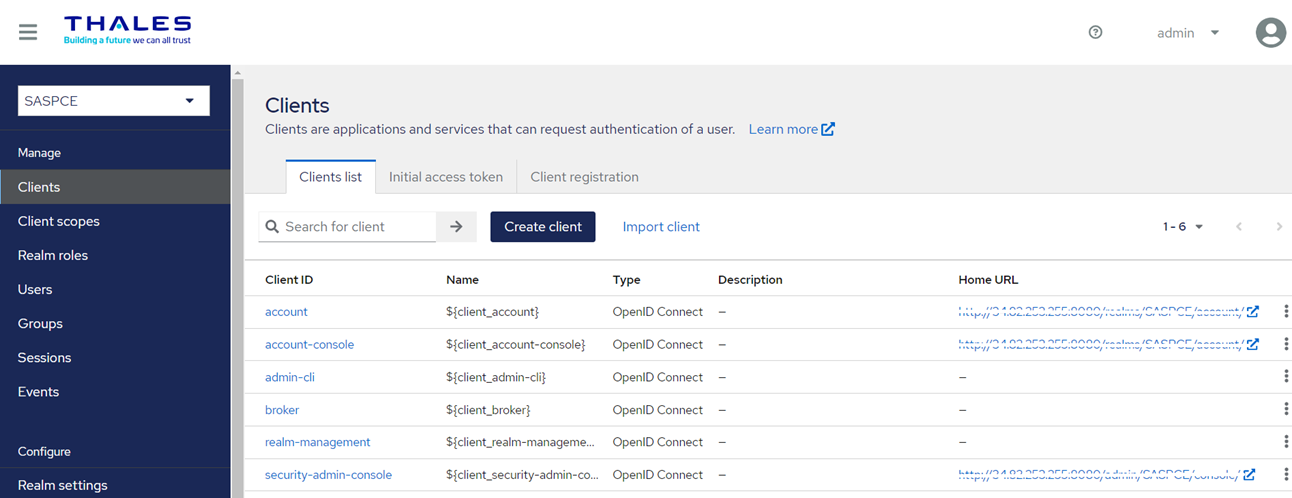
On the administrator console, select your realm (for example, SAS PCE).
-
In the left pane, under Manage, click Clients, and in the right pane, click Create client.
-
Under Create client, perform the following steps:
-
On the General Settings tab, perform the following steps:
-
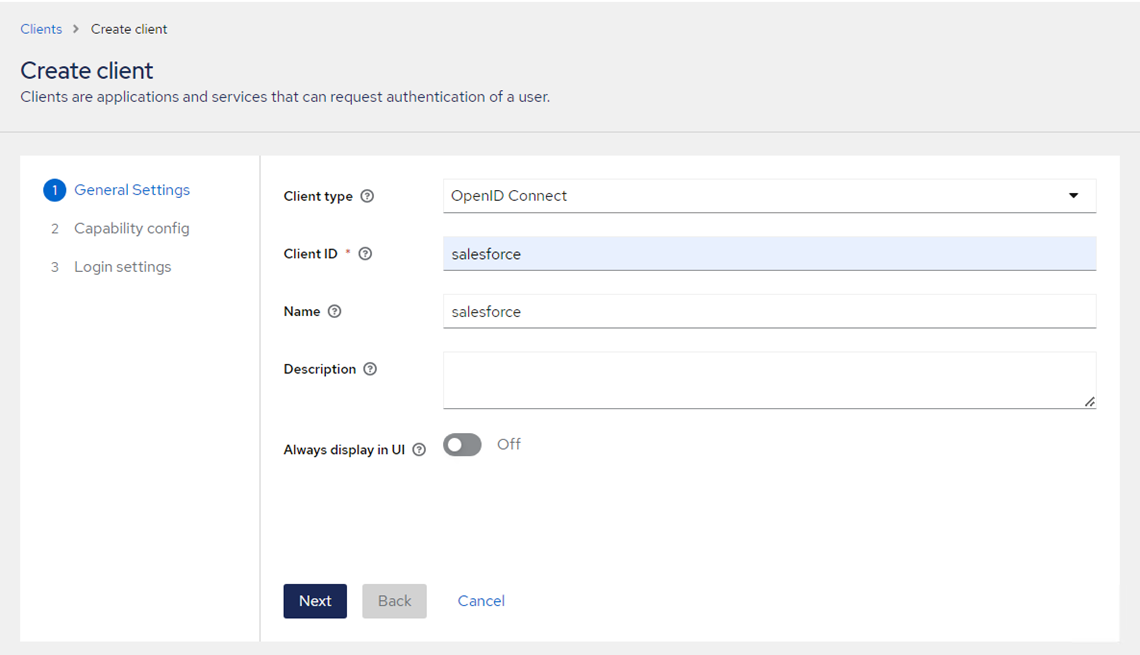
In the Client type field, select OpenID Connect.
-
In the Client ID field, enter a client ID (for example, salesforce). This ID is an alpha-numeric string that is used to identify the client in OIDC requests.
-
(Optional) In the Name field, enter a name of your choice (for example, salesforce).
-
Click Next.
-
-
On the Capability config tab, perform the following steps:
-
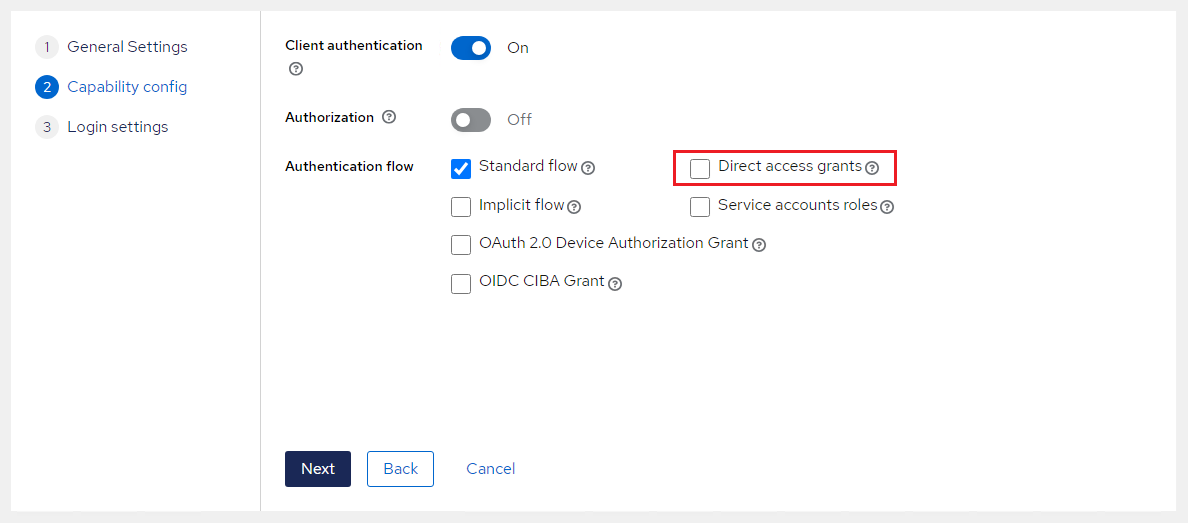
Turn on the Client authentication toggle.
-
Under Authentication flow field, clear the Direct access grants check box.
-
Click Next.
-
-
On the Login settings tab, perform the following steps:
-
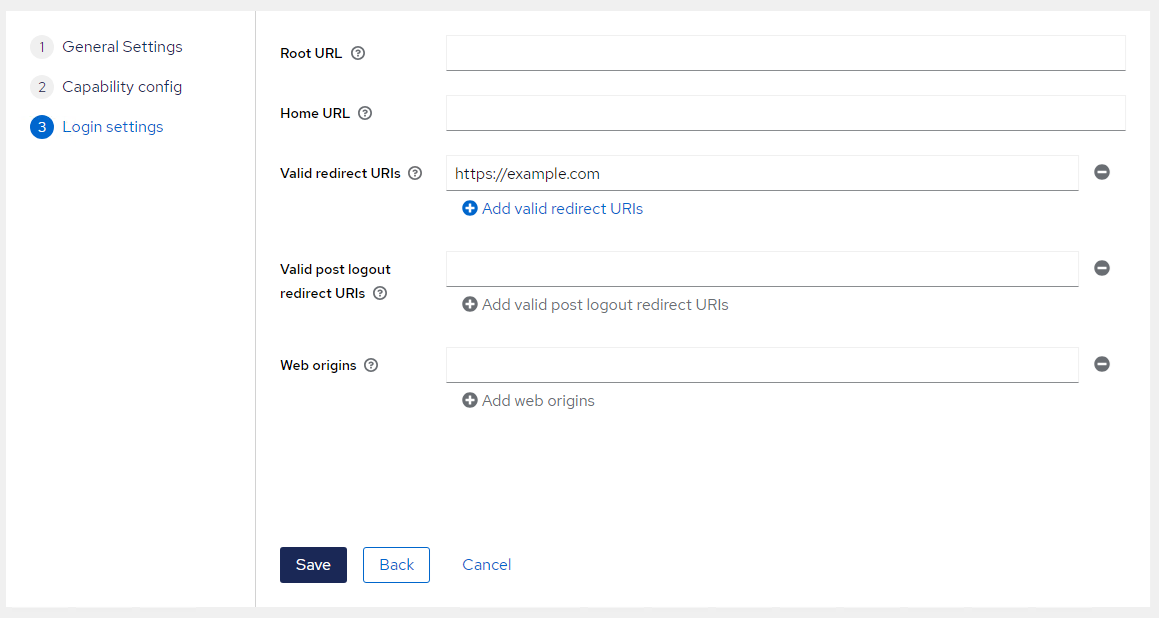
In the Valid Redirect URIs field, enter a dummy value for now (for example, https://example.com). This is required to save the configuration and enable the Credentials tab.
-
Click Save to complete the client configuration.
-
-
-
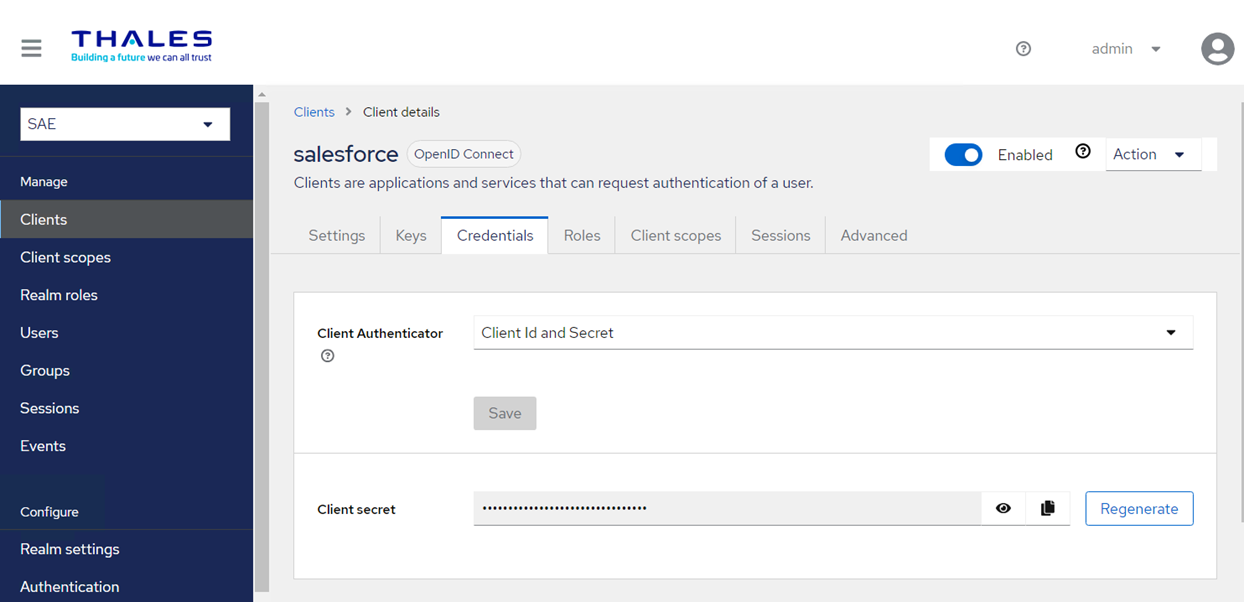
On the Credentials tab, copy the value of Client secret and paste it into a text editor. You will need the client secret while configuring Salesforce.
-
Go to the Salesforce Configuration section and perform steps 1 to 5, to generate the Callback URL.
-
Go to the Settings tab and in the Valid Redirect URI field, enter the Callback URL value that you obtained in the previous step.

-
Click Save to complete the configuration.

-
Go to step 6, to complete the Service Provider configuration.