
Salesforce Configuration
Perform the following steps to configure SafeNet Access Exchange (SAE) as your OIDC Provider in Salesforce:
-
Log into Salesforce as an administrator.
-
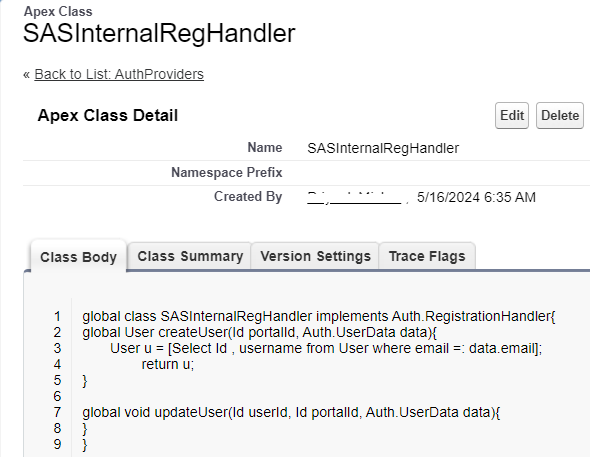
Create an Apex class to set up single sign-on to implement Auth.RegistrationHandler.
A Registration handler class is required to use Authentication Providers for single sign-on flow.
Perform the following steps:
-
Go to Setup, in the left pane, under PLATFORM TOOLS > navigate to Custom Code and click Apex Classes.
-
Click New and copy below into the Create Apex Class window.
global class SASInternalRegHandler implements Auth.RegistrationHandler{ global User createUser(Id portalId, Auth.UserData data){ User u = [Select Id , username from User where email =: data.email]; return u; } global void updateUser(Id userId, Id portalId, Auth.UserData data){ } } -
Click Save.
-
Ensure that the Apex Class name appears as SASInternalRegHandler.
-
-
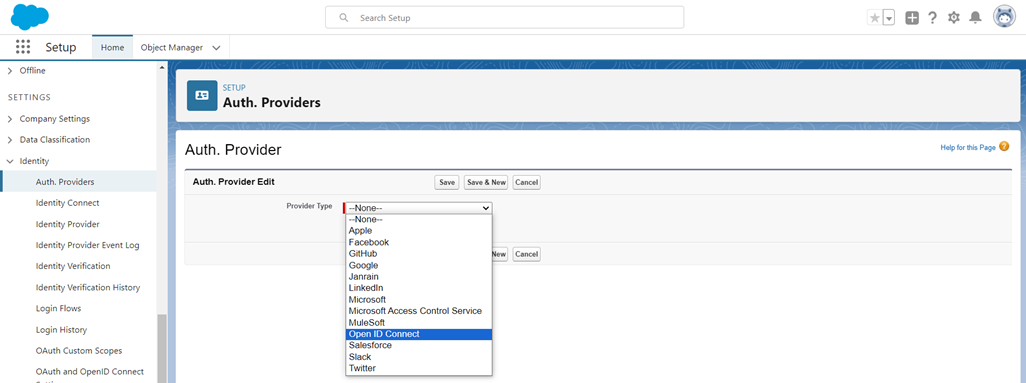
Go to Setup, in the left pane, under SETTINGS, click Identity > Auth. Providers.
-
In the right pane, click New and in the Provider Type field, select Open ID Connect.
-
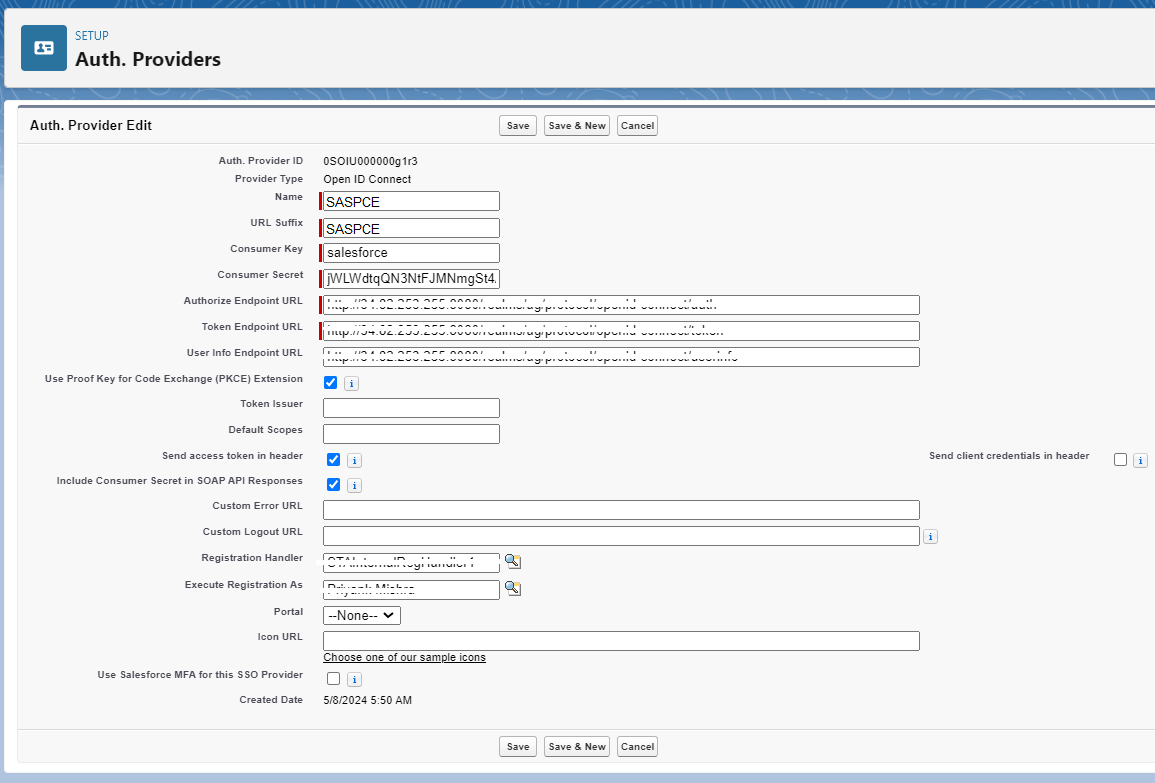
On the Auth. Providers window, perform the below steps:
-
In the Name field, enter any name to identify OIDC Provider (for example, SASPCE).
-
Click in URL Suffix field and ensure that you find auto-populated value (for example, SASPCE).
-
In the Consumer Key field, enter client ID of the provider, you can copy the CLIENT ID from Clients in SAE.
-
In the Consumer Secret, enter the value of Secret, which you copied in step 5 of Identity Provider Setup.
-
Enter the values of URLs, which you copied earlier as a prerequisite.
-
In the Authentication Endpoint URL field, enter the value of authorization_endpoint URL.
-
In the Token Endpoint URL field, enter the value of token_endpoint URL.
-
In the User Info Endpoint URL field, enter the value of userinfo_endpoint URL.
-
-
In the Registration Handler field, click the Handler Lookup symbol
 , click Go in the newly opened window, and select SASInternalRegHandler that you created in step 2(d).
 -
In the Execute Registration As, select the user that runs the Apex handler class (usually your admin account).
-
Click Save.
-
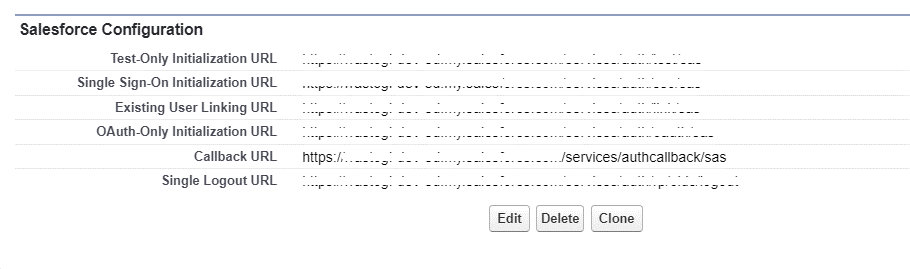
Under Salesforce Configuration, copy and save the value of Callback URL. Then go to step 7 of Identity Provider (SafeNet Access Exchange) Setup and complete the Identity Provider configuration.
-
-
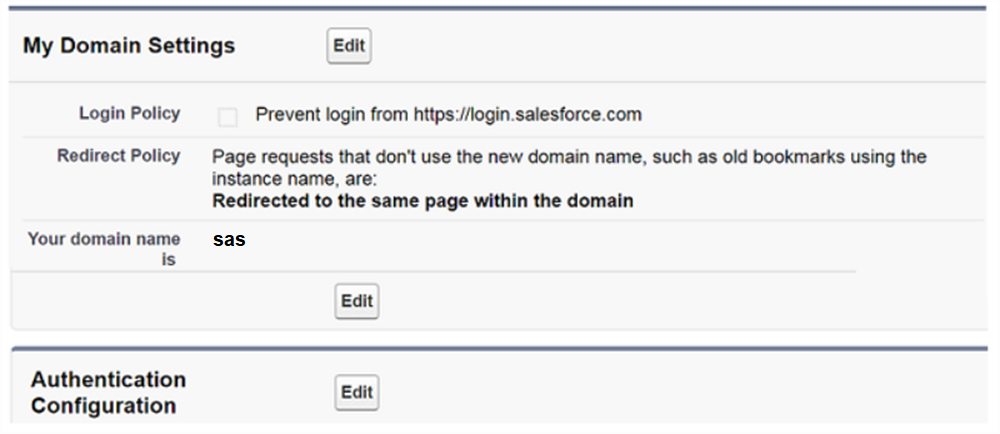
In the left pane, under Company Settings, click My Domain.
-
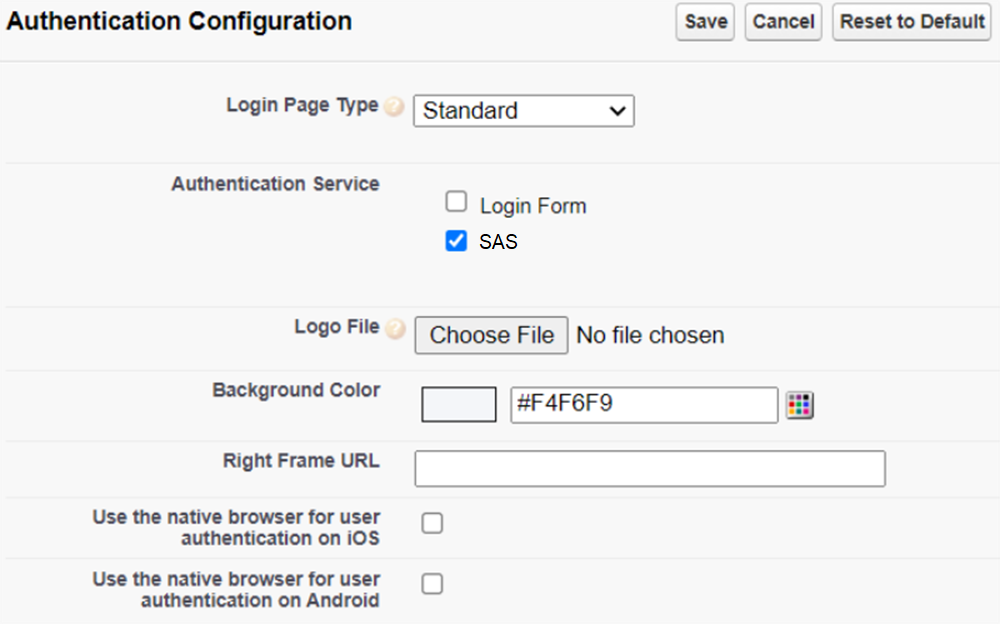
On the My Domain page, under Authentication Configuration, click Edit.
-
On the Authentication Configuration page, under Authentication Service, select the Identity Provider (for example, SASPCE) that was created in step 5.
-
Click Save.
It is required to create users in Salesforce.