
Configuring Policies on the CipherTrust Manager
This section covers the following topics:
Creating Protection Policy
To create a protection policy:
Open Application Data Protection.
In the left pane, click Protection Policies.
On the Protection Policies screen, click Add Protection Policy.
On the Create Protection Policy screen, enter/select the following fields.
Field Description Name Unique name for the protection policy. Do not use % in the protection policy name.
Algorithm Algorithm to be used in the cryptographic operations. You can view the list of supported algorithms here. Key Key to be used in the cryptographic operations. Character Set Name of the character set. For more details, click here. Access Policy Access policy to be associated with the protection policy. Access policies are set of rules that define how the decrypted data will be revealed to the application users. For more details, click here. Masking Format Masking format to be associated with the protection policy. For more details, click here. Tweak Algorithm Tweak algorithm to be used in the cryptographic operations. It is only applicable for the FPE algorithms.
Possible options are:
• SHA1
• SHA256
• NONE
• NULLFor FF3, Tweak Algorithm cannot be NULL. For the remaining FPE algorithms, Tweak Algorithm can be NULL.
Tweak Tweak data to be used in the cryptographic operations. This field is mandatory if tweak algorithm is specified.
If tweak algorithm isNONE, specify a 16-character HEX encoded string.
If tweak algorithm isNULL, this field is not required.IV Initialization vector to be used in the cryptographic operations. This field will appear on the UI if FPE/AESorAES/CBCalgorithm is selected.
• ForFPE/AES, IV is derived based on the character set length. To know how to calculate the required IV, click here.
• ForAES/CBCmodes, a 16-byte IV is required. The value must be a HEX encoded string.Disable Versioning If selected, the protection policy cannot be updated and only the ciphertext is returned in the response. Version Header Determines the location of version bytes.
Possible options are:
• Internal: version bytes are prepended to the ciphertext.
• External: version bytes are stored in a separate field. For more details, click here.Click Create. A message stating Protection policy created successfully is displayed and the newly created policy is listed on the Protection Policies page.
Important Notes
Note
When a protection policy is created, Version 1 is assigned to that policy. The version is incremented with each updation.
If versioning is disabled, the protection policy cannot be modified.
For disabled versioning, only version "0" of a key can be used in the cryptographic operations.
The versioning type, selected while creating a protection policy cannot be modified.
Creating Access Policy
To create an access policy:
Open Application Data Protection.
In the left pane, click Access Policies.
On the Access Policies screen, click Add Access Policy. The Add Access Policy wizard is displayed. Follow the steps below to complete the setup:
Add General Info
Specify a unique name for the access policy.
Describe the access policy.
Click Next to go to the User Set Rules tab.
Configure User Set Rules
On the User Set Rules tab, click Add User Set Rule.
Under the Select User Set(s) section, select the user set for which you want to define the access policy.
From the Select Reveal Format drop-down list, select the reveal format for the user set. You can select any of these reveal formats:
Plaintext: Plaintext is revealed to the application users.
Ciphertext: Ciphertext is revealed to the application users.
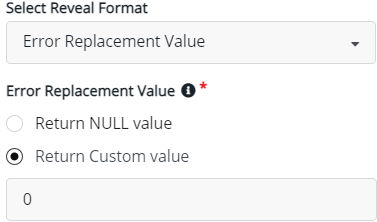
Error Replacement Value: Error replacement value is returned to the application users. To return error replacement value, you must configure one of the following settings:
Select Return NULL value to specify NULL as the Error Replacement Value.
Select Return Custom value and specify custom value as the Error Replacement Value.
Masked Value: Masked value is returned to the application users. When selecting the Masked Value, select Masking Format. To know more about masking, click here.
Click Save.
To configure another user set rule, click Add User Set Rule and repeat steps 2 to 5 else, click Next to go to the Default Reveal Format tab.
Select Default Reveal Format
On the Default Reveal Format tab, select any of the following format from the drop-down list. This selection is configured for the users who are not part of any user set rule.
Plaintext: Plaintext is revealed to the application users.
Ciphertext: Ciphertext is revealed to the application users.
Error Replacement Value: Error replacement value is returned to the application users. To return error replacement value, you must configure one of the following settings:
Select Return NULL value to specify NULL as the Error Replacement Value.
Select Return Custom value and specify custom value as the Error Replacement Value.
Masked Value: When selecting the Masked Value, select Masking Format. To know more about masking, click here.
Click Next to go to the Confirmation screen.
Confirmation
On the Confirmation tab, verify the access policy details. The Confirmation screen displays general info, user set rules, and default reveal format.
To modify any detail, click Edit and update the details.
Click Save to create an access policy. A message stating Access policy created successfully is displayed. The newly created Access Policy is added to the list of access policies.
Using Access Policy
Once the access policy is created, you must map the access policy to the protection policy for reveal operations. Refer to Creating Protection Policy for details.
Creating User Sets
To create a user set:
Open Application Data Protection.
In the left pane, click User Sets.
Click Add User Set. The Add User Set wizard is displayed. Follow the steps below to complete the setup:
Add General Info
On the General Info tab, enter/select the following fields.
Enter a unique Name for the user set.
Provide a Description for the user set.
Click Next. The Add User Set screen is displayed.
Add Users
On the Add Users tab, enter/select the following details.
Under Users, click Add User.
Under Add User, enter the Username in all uppercase and click Add. Similarly, you can add any number of users.
Click Next. The Confirmation screen is displayed.
Confirmation
On the confirmation screen, verify the user set details.
If you want to modify any detail, click Edit and update the details.
Click Save. A message User Set created successfully is displayed.
Creating Masking Formats
To create a masking format:
Open Application Data Protection.
In the left pane, click Masking Formats.
On the Masking Formats screen, click Create Masking Format.
You can create:
Create Dynamic Masking Format
On the Create Masking Format screen:
Enter a unique name for the masking format.
Enter a description for the masking format.
Select Masking Format Type as Dynamic.
Select either Show or Hide.
Show Select, if you want to show the starting and ending characters. Mask Select, if you want to mask the starting and ending characters. In the First Characters field, select the numbers of characters to be shown or masked.
In the Last Characters field, select the numbers of characters to be shown or masked.
Enter the Masking Character. The default masking character is
X.
Click Create. A message Masking format created successfully is displayed. The newly created masking format is listed on the Masking Format page.
Tip
The value of starting and ending characters must be greater than or equal to 0.
Create Static Masking Format
On the Create Masking Format screen:
Enter a unique name for the masking format.
Enter a description for the masking format.
Select Masking Format Type as Static.
In the First Characters field, select the numbers of characters to be preserved.
In the Last Characters field, select the numbers of characters to be preserved.
The remaining characters will be encrypted based on the selected algorithm.
Click Create. A message Masking format created successfully is displayed. The newly created masking format is listed on the Masking Format page.
Viewing Registration Token
To view a registration token:
Sign in to the CipherTrust Manager GUI as administrator.
Open Application Data Protection.
In the left pane, click Applications. The list of applications is displayed on the screen.
On the Applications page, under Name, click the application for which you want to view the registration token.
Copy the Registration token.
