|
Home > |
Installation Guide > SafeNet Enterprise HSM Hardware Installation > Installing the SafeNet Enterprise HSM Hardware
|
|---|
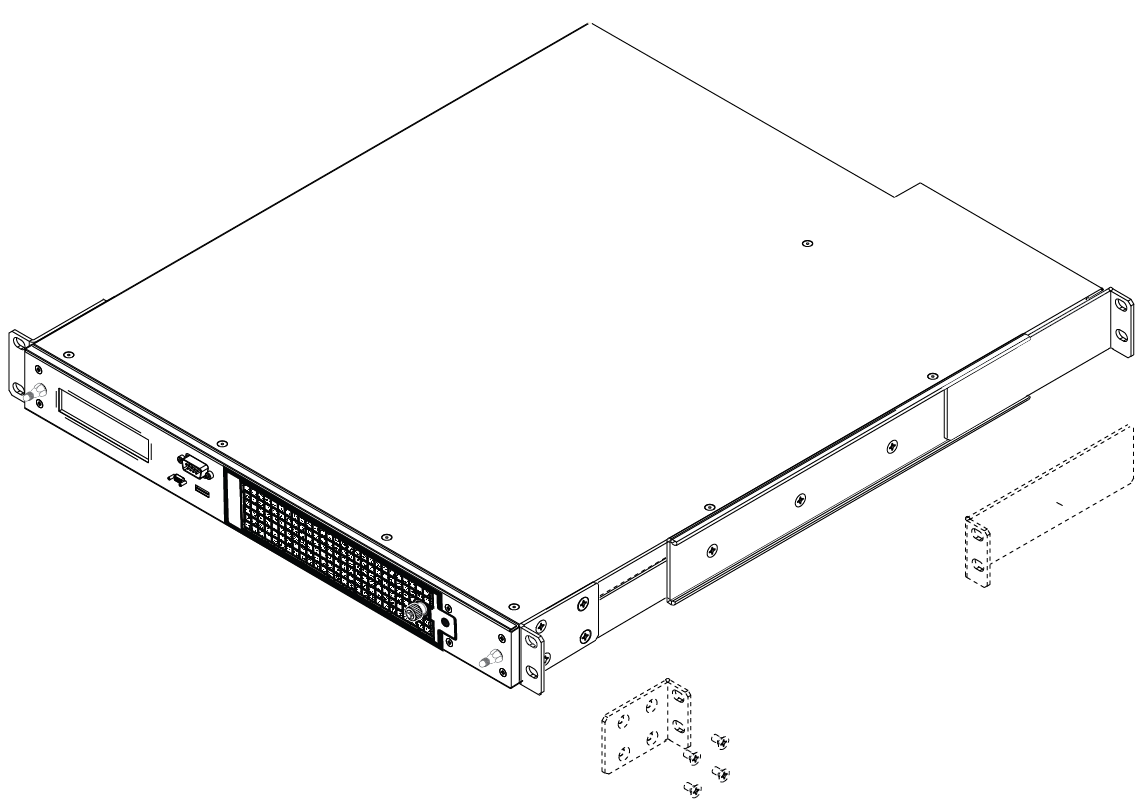
This section provides basic SafeNet Network HSM hardware installation instructions (mounting in a rack, connecting cables, etc.). The SafeNet Network HSM appliance comes with front brackets and side-rails and sliders for the rear brackets, packed separately in the carton.
1.Any computer that is to act as a client to the SafeNet Network HSM appliance must have the Client software installed. Windows users should log in to your computer as a user with Administrator privileges.
2.A computer that is to be used only for administering the SafeNet Network HSM does not need the Client software – only an SSH client such as the PuTTY program that we have provided for Windows, or the SSH utilities that come standard with most Linux and UNIX platforms.
3.A computer that is to be used for Remote PED workstation operation against a SafeNet Network HSM must have the PEDServer software and PED 2 USB driver installed. Applies to select Windows platforms only.
4.All three tasks (Client, administration, and Remote PED) can be performed on a single computer, but in normal practice they are often separate tasks for separate computers.
5.See the Remote PED section if you will be using Remote PED.
You can optionally install the brackets if they suit your equipment rack. The front brackets can be installed with their tabs forward (for flush-mount of the appliance) or reversed, to allow the front of the appliance to stand out from the rack. The rear brackets install in either direction – as appropriate for your rack post spacing – with the brackets simply sliding into the rails on each side of the appliance.
The supplied brackets are designed and intended for 4-point support of the appliance, in racks with rear-post depth up to 22 inches.
CAUTION: Do not attempt to mount the appliance using only the front brackets – damage can occur.
Note: The standard SafeNet PED 2 is capable of local operation only.
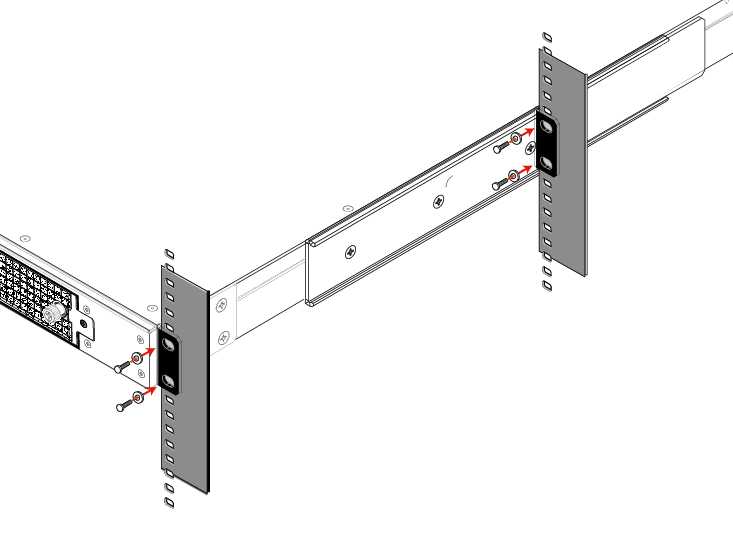
1.Install and adjust rails and brackets to suit your equipment rack.
2.Mount the appliance in your equipment rack. Alternatively, ignore the rails and mounting tabs, and rest the SafeNet Network HSM appliance on a mounting tray or shelf suitable for your specific style and brand of equipment rack.
CAUTION: Support the weight of the appliance until all four brackets are secured.
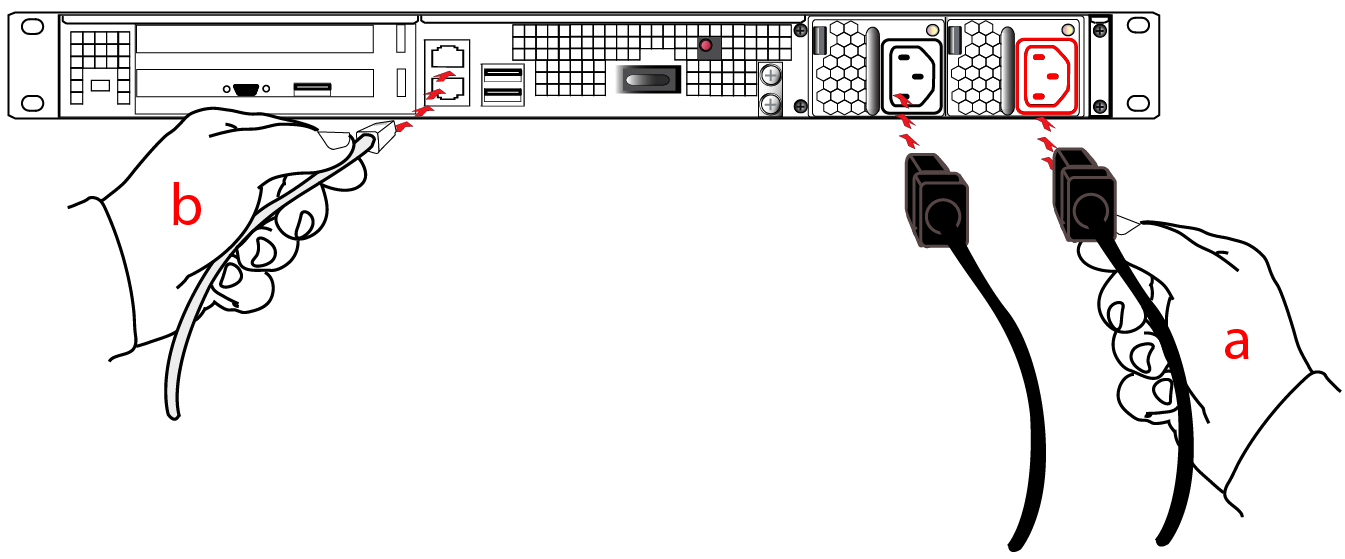
3.Insert the power (a) and network (b) cables at the rear panel.
For proper redundancy and best reliability, the power cables should connect to two completely independent power sources.
4.Connect the PED at the front panel, using the provided local PED cable – applies only for PED-authenticated HSM, otherwise skip to the next step.

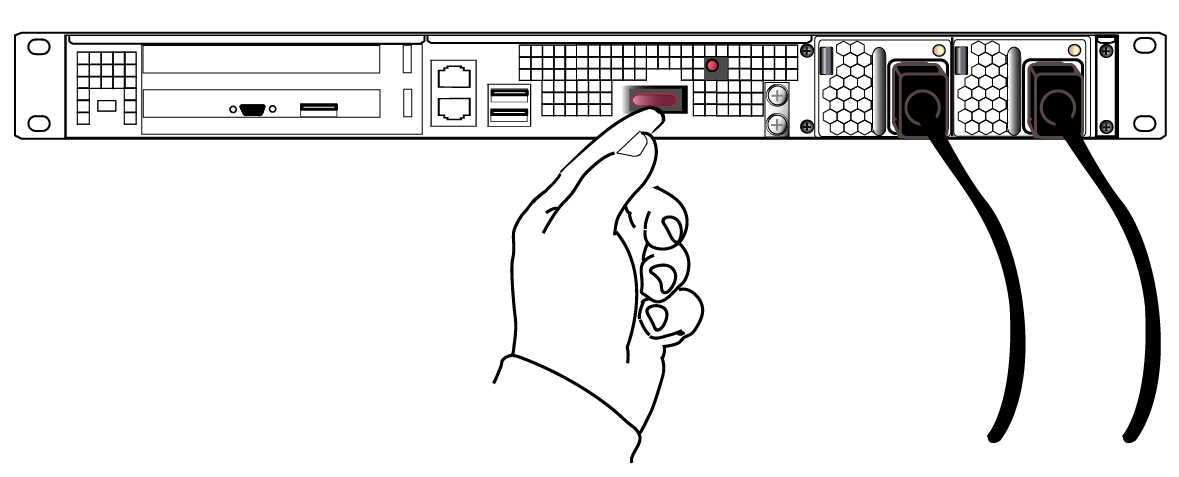
5.Press and release the Start/Stop switch, on the rear panel.
6.Connect a terminal to the serial connector on the front panel.

7.If you have already installed SafeNet Client software, go to the Configuration Guide, to configure your SafeNet HSM and peripheral devices, if appropriate.