![]()
![]()
In this section, you initialize the HSM portion of the Luna appliance, and set any policies that you require. In normal operation, you would perform these actions just once, when first commissioning your Luna appliance.
Perform initialization only after you have set the system-level , and configured network and IP settings to work with your network.
Initialization prepares the HSM for use by setting up the necessary identities, ownership and authentication that are to be associated with the HSM. You must initialize an HSM one time before you can generate or store objects, allow clients to connect, or perform cryptographic operations.
[ PED Keys: If you have not used Luna HSMs and PED Keys before, please read the sub-section "Managing PED Keys" in the Administration & Maintenance section of this Help, before you start initializing.]
Once you have initialized an HSM, you would return to this section only to clear an entire HSM and all its contents and HSM Partitions, by re-initializing.
The last thing that the production workers do, before placing your Luna SA into its shipping carton, is to press the "Decommission" button on the back of the appliance. This sets the HSM in Factory Reset mode, ensuring that when you receive it, it does not contain left-over objects and settings from factory burn-in and final-test. Depending on the options that you chose when ordering, your Luna SA HSM might also arrive in “Secure Transport Mode”. If the HSM is in Factory Reset mode only, then it is ready to be initialized by you. If the HSM is also in Secure Transport Mode, then you must run the hsm srk transportMode recover command.
After making an SSH or serial connection, and logging on as 'admin', show the Secure Recovery State :
[myluna] lunash:>hsm srk show
| Secure Recovery State flags: =============================== |
|
| External split enabled: | yes |
| SRK resplit required: | no |
| Hardware tampered: | no |
| Transport mode: | no |
Command Result : 0 (Success)
[myluna] lunash:>
Show other HSM status info :
[myluna] lunash:>hsm show
Appliance Details:
==================
Software Version: 5.1.0-25
| HSM Details: ============ |
|
| HSM Label: | [none] |
| Serial #: | 700022 |
| Firmware: | 6.2.1 |
| Hardware Model: | Luna K6 |
| Authentication Method: | PED keys |
| HSM Admin login status: | Not Logged In |
| HSM Admin login attempts left: | 3 before HSM zeroization! |
| RPV Initialized: | Yes |
| Manually Zeroized: | No |
| Partitions created on HSM: ========================== |
|
| Partition: 700022012, | Name: mypar1 |
| Partition: 700022013, | Name: mypar2 |
| Partition: 700022016, | Name: mypar3 |
FIPS 140-2 Operation:
=====================
The HSM is NOT in FIPS 140-2 approved operation mode.
| HSM Storage Informaton: ======================= |
|
| Maximum HSM Storage Space (Bytes): | 2097152 |
| Space In Use (Bytes): | 2097152 |
| Free Space Left (Bytes): | 0 |
Command Result : 0 (Success)
[myluna] lunash:>
“Transport Mode” refers to a user-invoked tamper event, which preserves all contents of the HSM, but protects them behind encryption until you run the recovery command. In addition, whether or not the HSM contains useful secrets, Transport Mode assures you that nobody has interfered with the HSM while it was in storage or in transit.
"Hardware tampered" refers to a state where a hardware intrusion or failure has been detected, such as tripping of a detector. Similar to the user-invoked Transport Mode, "Hardware tampered" requires you to unlock the HSM with hsm srk transportMode recover, before you can resume using it. On a PED-authenticated HSM (with SRK enabled), that requirement takes the HSM out of service and forces you to acknowledge that the tamper has occurred before the HSM can go back into service. On a password-authenticated HSM - or a PED-authenticated HSM without SRK enabled - a tamper event is just a logged event that does not take the HSM out of service, even temporarily.
“Zeroized” state is different, and results from any of:
This renders any .
The above states are addressed by configuring and initializing your Luna SA HSM. Instructions start on this page.
If you requested Secure Transport Mode shipment from SafeNet, then a couple of additional steps are required (also included in these instructions).
Before you can make use of it, the HSM must be initialized. This establishes your ownership for current and future HSM administration. Initialization assigns a meaningful label, as well as Security Officer authentication (PED Key) and Domain (another PED Key), and places the HSM in a state ready to use.
Use the instructions on this page if you have Luna SA with PED (Trusted Path) authentication.
Some HSM Policy changes are destructive. A destructive policy change is one that requires the HSM to be initialized again, before it can be used. Thus if you intend to perform a destructive HSM Policy change, you might need to perform this initialization step again, after the Policy change.
bash#: ssh 192.20.10.203
login as: admin
admin@172.20.10.202's password:________
Last login: Fri Dec 2 20:16:54 2011 from 192.17.153.225
Luna SA 5.1.0-22 Command Line Shell - Copyright (c) 2001-2011 SafeNet, Inc. All rights reserved.
[myluna] lunash:>
The following is an example of initialization dialog, with PED interactions inserted to show the sequence of events.
lunash:> hsm init -label myLunaHSM
The following warning appears:
CAUTION: Are you sure you wish to re-initialize this HSM?
All partitions and data will be erased.
Type 'proceed' to initialize the HSM, or 'quit'
to quit now.
>
Please attend to the PED.

See THIS PAGE for additional information and a summary of the options you might choose or encounter during this process - this procedure (below) assumes a relatively straightforward process.
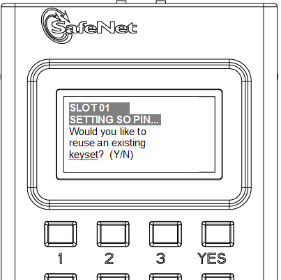
Luna PED asks the HSM and PED need to know, prior to imprinting the first SO PED Key.
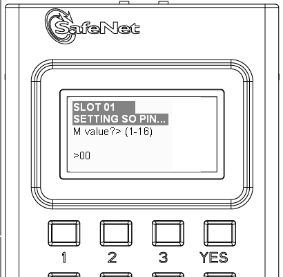
If you say [ NO ] (on the PED keypad), then you are indicating there is nothing of value on your PED Keys to preserve. On the assumption that you will now be writing onto a new blank PED Key, or onto one that contains old unwanted authentication, Luna PED asks you to set M of N values.
and
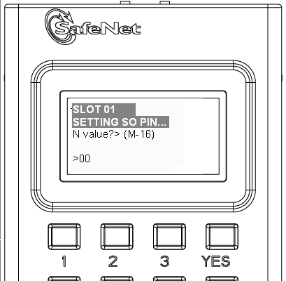
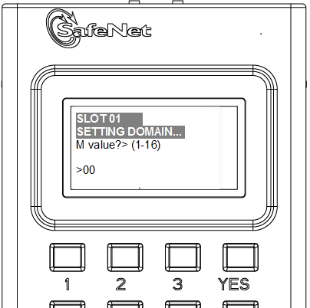
Setting M and N equal to "1" means that the authentication is not to be split, and only a single PED Key will be necessary when the authentication is called for in future.
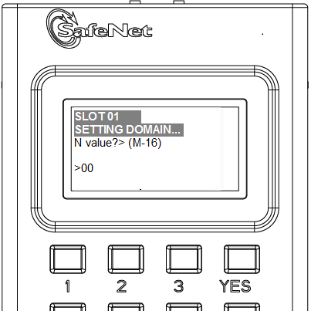
Setting M and N larger than "1" means that the authentication is split into N different "splits", of which quantity M of them must be presented each time you are required to authenticate. M of N allows you to enforce multi-person access control - no single person can access the HSM without cooperation of other holders.
If you say [ YES ], you indicate that you have a PED Key (or set of PED Keys) from another HSM and you wish your current/new HSM to share the authentication with that other HSM. Authentication will be read from the PED Key that you present and imprinted onto the current HSM.
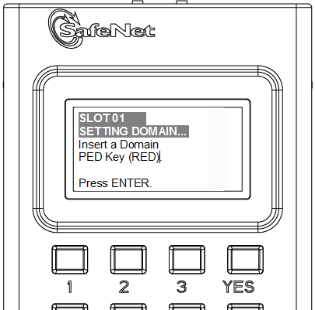
Luna PED now asks you to provide the appropriate PED Key - a fresh blank key, or a previously used key that you intend to overwrite, or a previously used key that you intend to preserve and share with this HSM.
Insert a and press [Enter].
![]()
OR
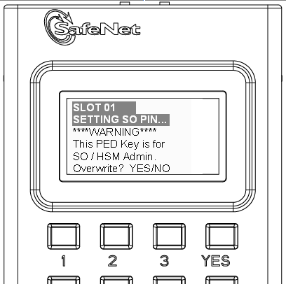
Answer (press the appropriate button on the PED keypad)
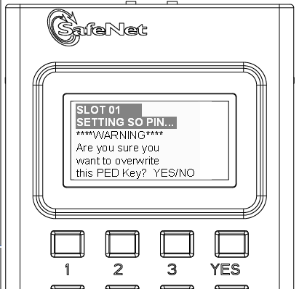
Luna PED makes very sure that you wish to overwrite, by asking again.
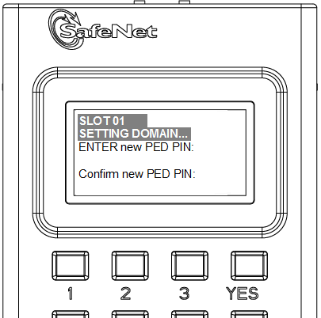
For any situation other than reusing a keyset, Luna PED now prompts for you to set a PED PIN. For multi-factor authentication security, the physical PED Key is "something you have". You can choose to associate that with "something you know", in the form of a multi-digit PIN code that must always be supplied along with the PED Key for all future HSM access attempts.
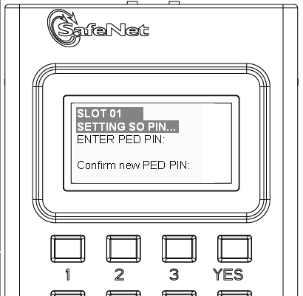
Type a numeric password on the PED keypad, if you wish. Otherwise, just press [Enter] twice to indicate that no PED PIN is desired.
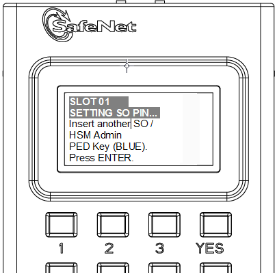
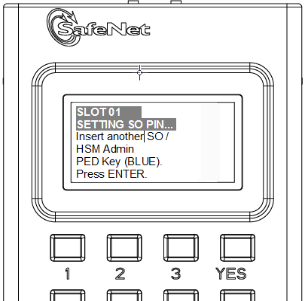
Luna PED imprints the PED Key, or the HSM, or both, as appropriate, and then prompts the final question for this key:
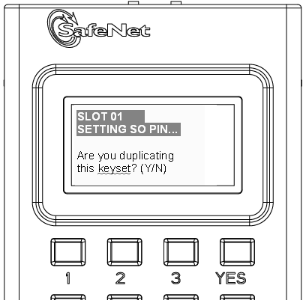
You can respond [ YES ] and present one or more blank keys, all of which will be imprinted with exact copies of the current PED Key's authentication, or you can say [ NO ], telling the PED to move on to the next part of the initialization sequence. (You should always have backups of your imprinted PED Keys, to guard against loss or damage.)
To begin imprinting a Cloning Domain (red PED Key), you must first log into the HSM, so in this case you can simply leave the blue PED Key in place.
Luna PED passes the authentication along to the HSM and then asks the first question toward imprinting a cloning domain:
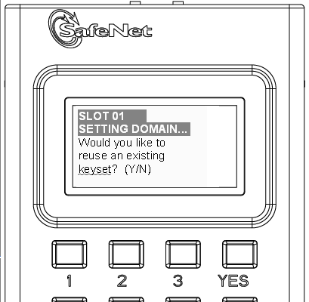
If this is your first Luna HSM, or if this HSM will not be cloning objects with other HSMs that are already initialized, then answer [ NO ]. Luna PED prompts for values of M and N.
If you have another HSM and wish that HSM and the current HSM to share their cloning Domain, then you must answer [ YES ]. In that case, Luna PED does not prompt for M and N.
Luna PED goes through the same sequence that occurred for the blue SO PED Key, except it is now dealing with a red Domain PED Key.
Insert a and press [Enter].
![]()
OR

Just as with the blue SO PED Key, the next message is:
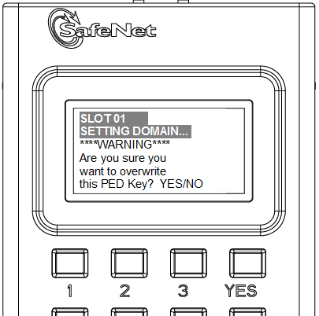
When you confirm that you do wish to overwrite whatever is (or is not) on the currently inserted key, with a Cloning Domain generated by the PED, the PED asks:
And finally:
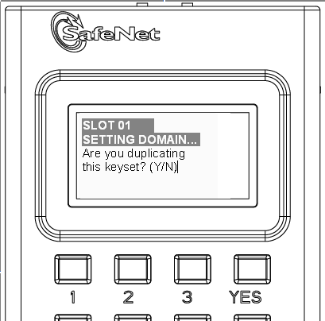
Once you stop duplicating the Domain key, or you indicate that you do not wish to make any duplicates (you should have backups of all your imprinted PED Keys...), Luna PED goes back to "Awaiting command...".
Lunash says:
Command Result : No Error
lunash:>
lmyluna] lunash:>hsm show
Appliance Details:
==================
Software Version: 5.1.0-25
HSM Details:
============
HSM Label: mylunahsm
Serial #: 700022
Firmware: 6.2.1
Hardware Model: Luna K6
Authentication Method: PED keys
HSM Admin login status: Logged In
HSM Admin login attempts left: 3 before HSM zeroization!
RPV Initialized: Yes
Manually Zeroized: No
Partitions created on HSM:
==========================
FIPS 140-2 Operation:
=====================
The HSM is NOT in FIPS 140-2 approved operation mode.
HSM Storage Information:
========================
Maximum HSM Storage Space (Bytes): 2097152
Space In Use (Bytes): 0
Free Space Left (Bytes): 2097152
Command Result : 0 (Success)
[myluna] lunash:>
Notice that the HSM now has a label.
The next step is to create a Partition on the HSM.