Luna Backup HSM (G7) Hardware Installation
The following topics describe how to install and connect a Luna Backup HSM (G7). To ensure a successful installation, perform the following tasks in the order indicated:
1.Ensure that you have all of the required components, as listed in Luna Backup HSM Received Items
2.Install and connect the hardware, as described in Installing the Luna Backup HSM Hardware
CAUTION! To ensure the security and integrity of your new device, refer to Verifying the Integrity of Your Shipment before unpacking your new Luna Backup HSM.
The Luna Backup HSM (G7) complies with the following:

Luna Backup HSM Received Items
This section provides a list of the components you should have received with your order.
Included Items
The following items are included with your new backup HSM.
| Quantity | Item |
|---|---|
| 1 |
Luna Backup HSM
|
| 1 |
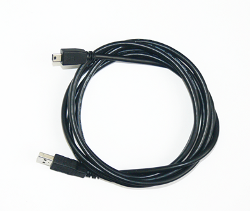
USB 3.0 Cable: Type A to Type C
|
| 1 |
5V Power Supply with replaceable plug modules for international use. NOTE On most workstations, the USB connection provides adequate power to the backup HSM. If you are using a low-power workstation, such as a netbook, the USB connection may not provide adequate power, in which case you will also need to connect the external power supply.
|

Installing the Luna Backup HSM Hardware
The backup HSM is a USB device. To install the backup HSM, connect it to a Luna HSM Client workstation using the included USB cable. The workstation must be running Luna HSM Client software that supports the backup HSM and provides the required drivers. Refer to the release notes and see Backup and Restore Using a Luna Backup HSM (G7) for more information.
NOTE On most workstations, the USB connection provides adequate power to the Backup HSM and it will begin the boot sequence. If you are using a low-power workstation, such as a netbook, the USB connection may not provide adequate power, in which case you will also need to connect the external power supply.