Managing Upgrade Entitlements with ECP
Access ECP with Entitlement Identifier
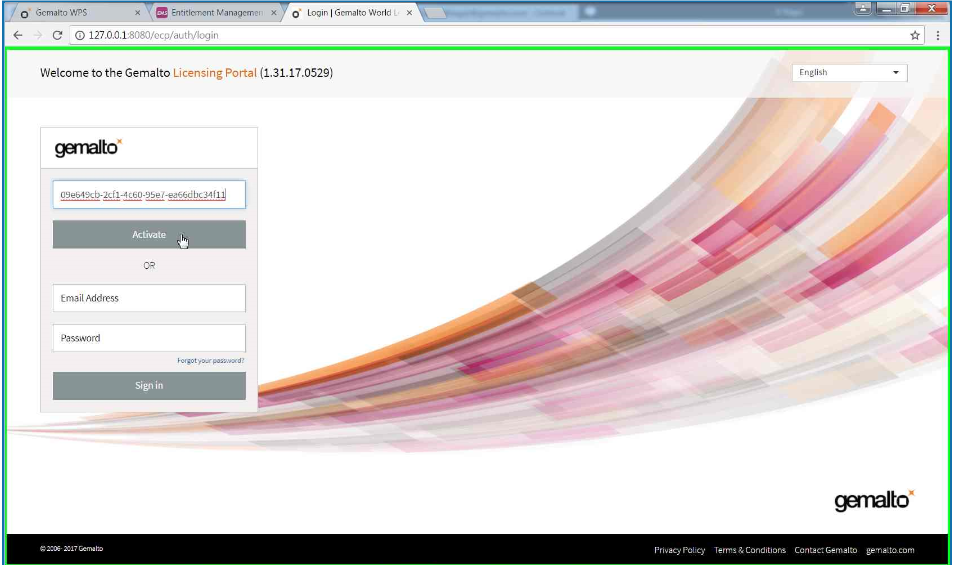
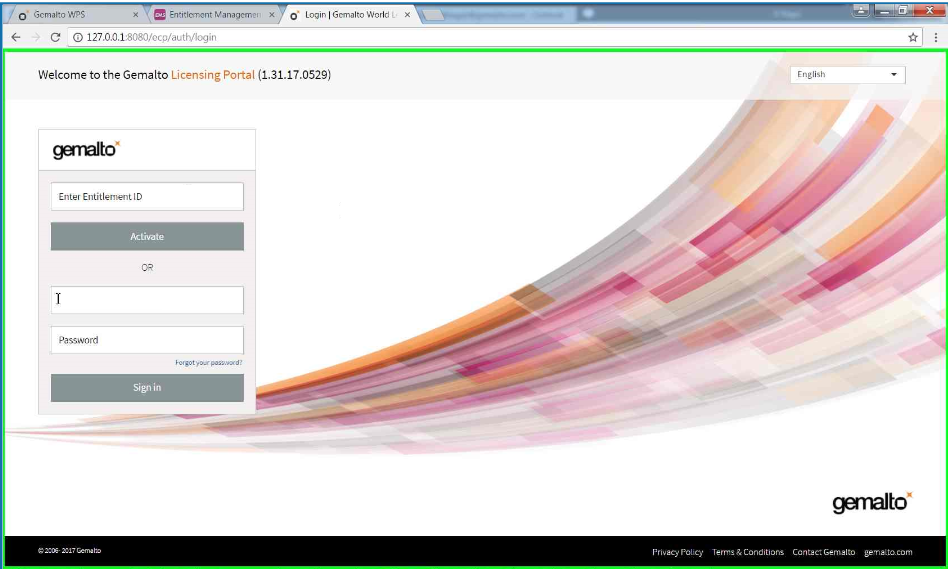
On the ECP portal Welcome screen ( https://safenetbelcamp.prod.sentinelcloud.com/ecp/), enter the entitlement identifier provided to you in an email from Thales’s order entry system in the Enter Entitlement ID window box and click the Activate button. Note that for field upgrades, you must always use any new EID you receive to access ECP (versus login with user name and password).
On your first logon to the ECP portal, you must complete the user registration process. This registration makes subsequent logons to the ECP portal more convenient.
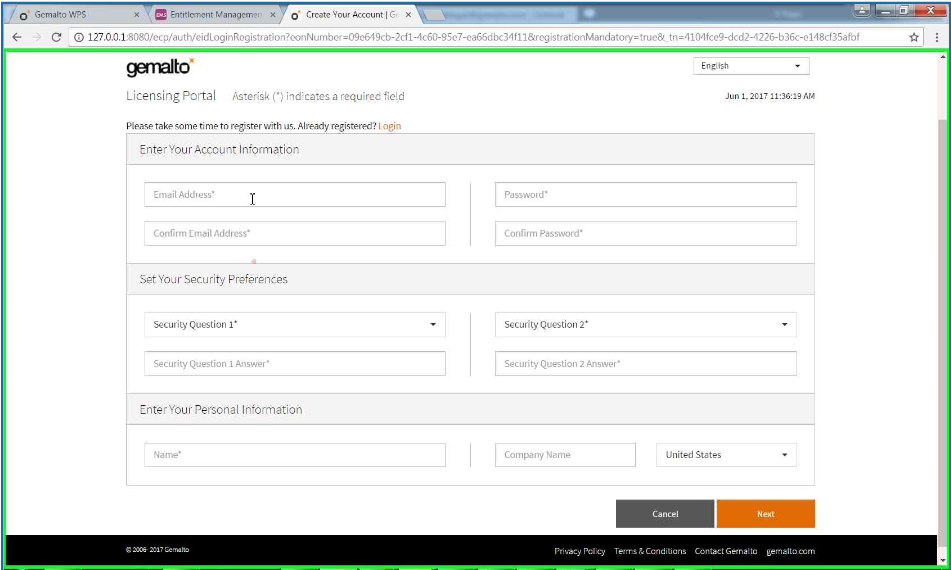
After completing a few mandatory fields, you can subsequently access the ECP portal with an email address and password.
If you previously registered and are now activating a new entitlement, you can access the login page from the Login link.

Points to remember
ECP is a company login page. All email addresses associated with a company are able to see all purchases by that company. The association between a purchased item and your company is enacted by registration and login using the Entitlement ID.
You can have multiple email addresses associated with your company in ECP. There is no limit.
Currently, there is no association between ECP accounts and Service Portal accounts, but that might change in future.
If a registered ECP user leaves your company, contact the Thales Technical Support team to make the adjustment.
Login to ECP with Email Address and Password
On the ECP portal Welcome screen, enter the credentials you created when you registered with ECP.
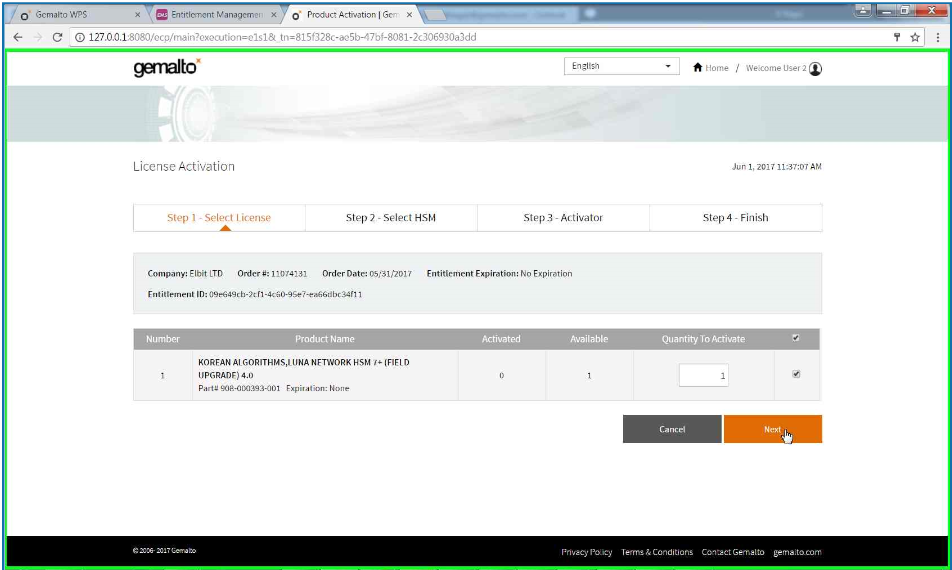
Select License
After registering to the ECP portal, you see a screen similar to the next example. Enter the desired quantity of five-pack partitions to activate in the Quantity to Activate field. Click Next to continue the process.
Select HSM
You have two options to select the HSM. If you are visiting ECP for the first time or you have a new HSM to activate, select the Enter New HSM SN check box and enter the HSM serial number in the window to the right of HSM SN: in the bottom, right of the Step 2 – Select HSM screen.
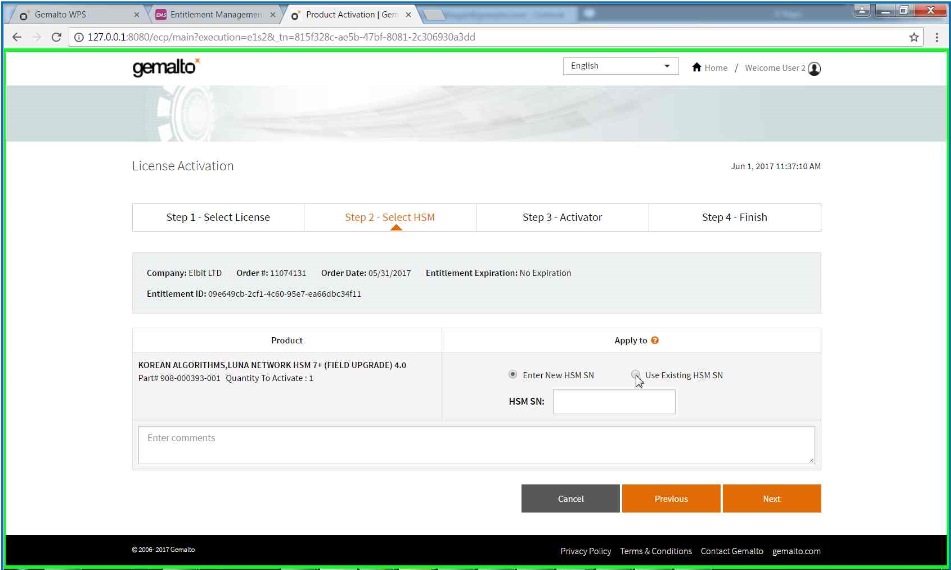
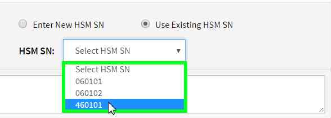
In you want to activate an entitlement for an HSM previously identified to ECP, select the Use Existing HSM SN check box and choose the HSM from the drop-down menu.
Click Next to continue.
Who Is Activating?
ECP is a common portal used by you, our customer, as well as by Thales personnel to activate entitlements on behalf of customers (factory-activated entitlements). In most cases, you select the I am activating for myself check box. Only if you are activating for someone else do you need to enter the email address in the field provided for this purpose.
NOTE For the current release, only the first option I am activating for myself is available. The person activating must log in using her/his own e-mail identity.
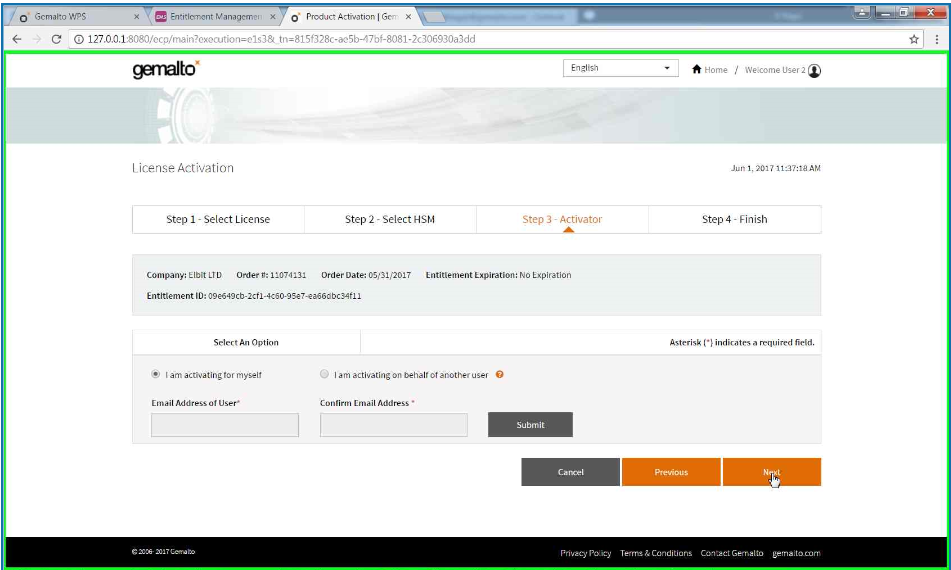
After selecting the activator and entering the email address if activating for someone else, click Next to continue.
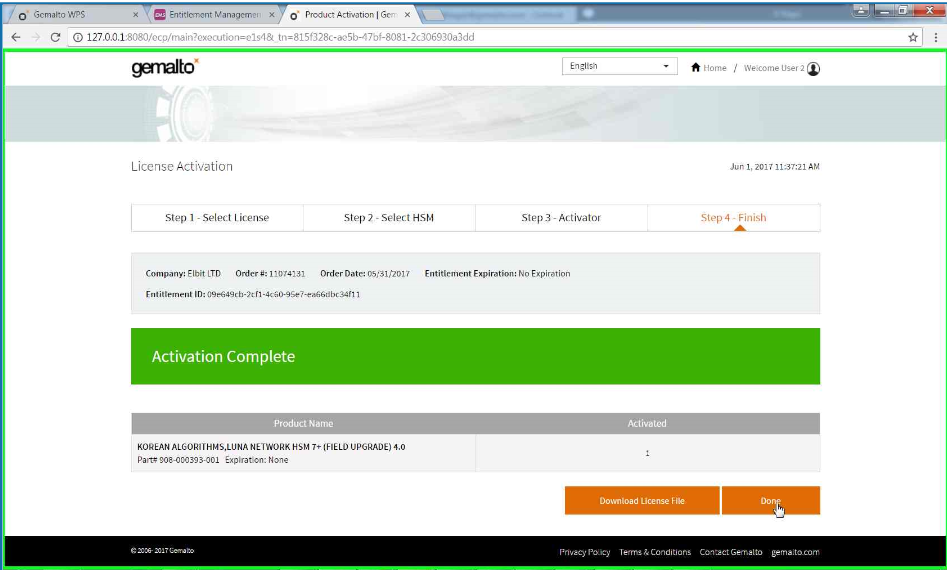
Complete Activation
The final step to complete activation is the Step 4 – Finish screen. Here, you get confirmation that the activation process succeeded. Additionally, you can click on the Download License File button to have ECP display the license string.
Save License String
When you complete activation of an entitlement, ECP generates a license string. This license string is what the SafeNet Luna Network HSM uses to validate an upgrade and subsequently apply it. Thus, you save this license string to a file so that you can transfer it to the HSM in a subsequent step.

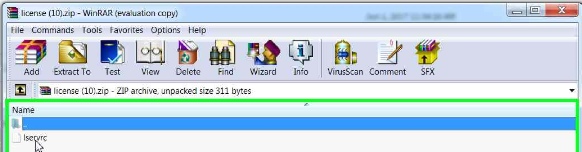
The default filename for the file is lservrc. You should rename this file to something more meaningful, especially when you have multiple upgrades to manage. One suggestion is to name the file by the upgrade and quantity: N_partitions_S.lic, where N is the number of partitions the entitlement enables and S is a sequence number to create unique filenames. For example, 5_partitions_1.lic, 5_partitions_2.lic, 10_partitions_3.lic If you have a fleet of HSMs, you might want to include the HSM serial number in the filename as a means to organize upgrades (e.g., 5_partitions_567250_1.lic where 567250 is the HSM serial number).
Use secure copy to transfer the saved license string file to the HSM appliance.
NOTE The default License String format provided by ECP is a ZIP file. Extract the License String before transferring.
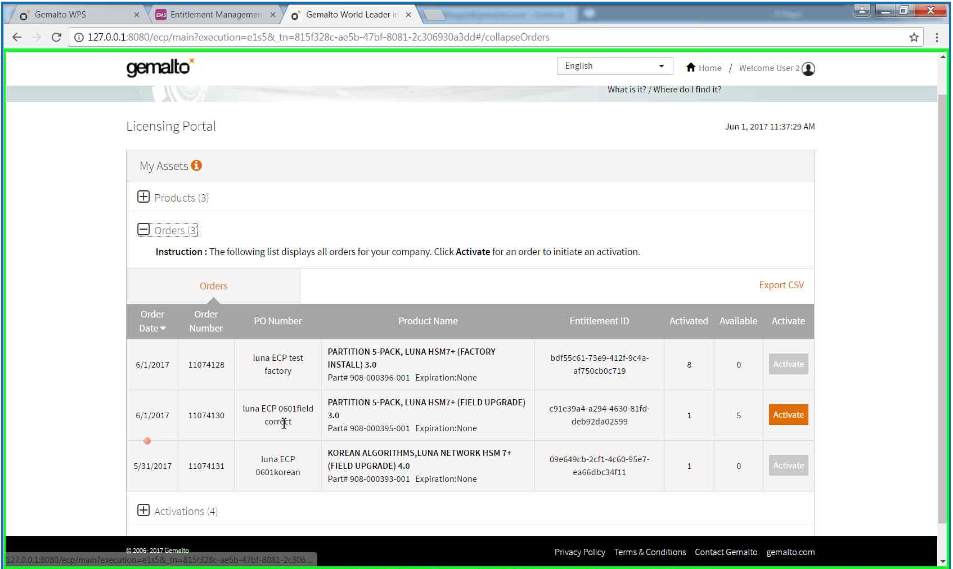
Purchased Products
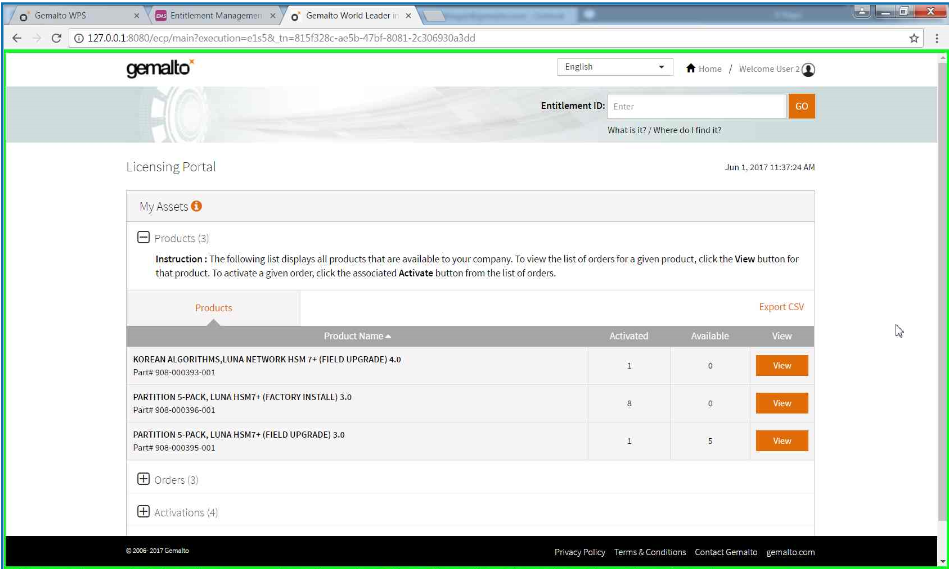
After you have logged into ECP, you have the ability to view information about the products you purchased, the activations you performed and the devices in your inventory. The My Assets page is the link to this information. To see the products you have purchased, expand the Products view. This page is a summary of upgrades and shows a quantity available and how many are activated.
Listing Orders
The Orders option from the main page of the ECP gives you details for each order you purchased.
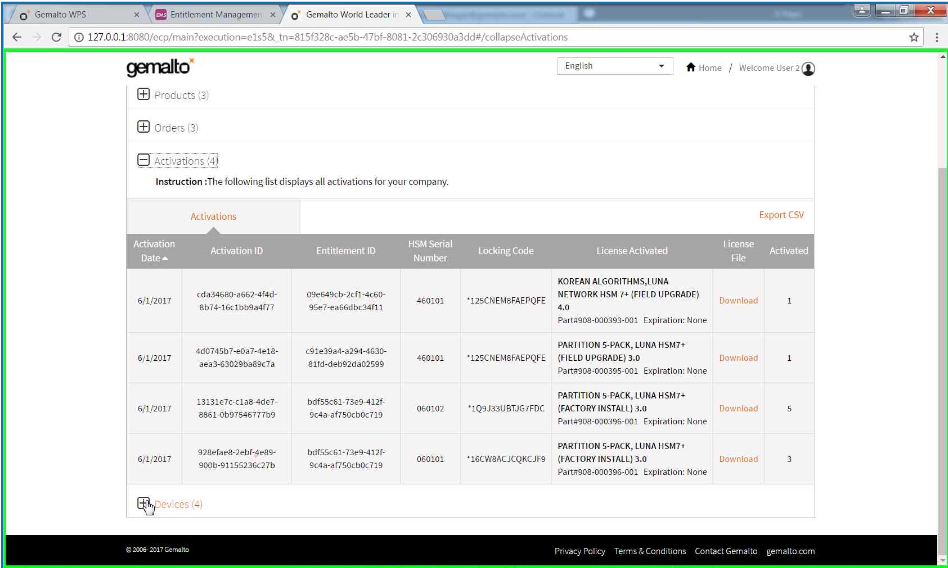
Listing Activations
The Activations view lists the entitlements that you have activated. From this list, you can get a corresponding license string (Download button).
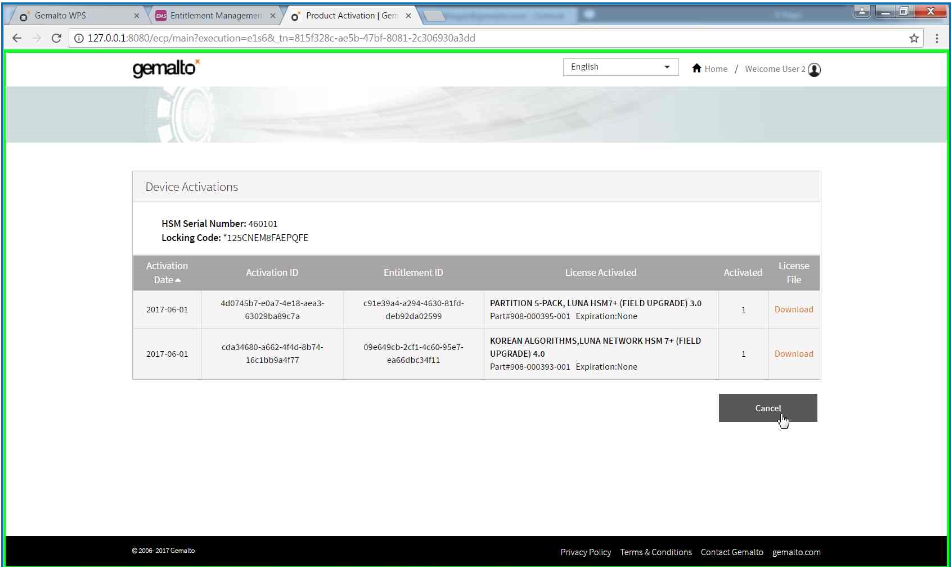
Listing Device Activations
The Devices view lets you see what HSMs you have registered with ECP.
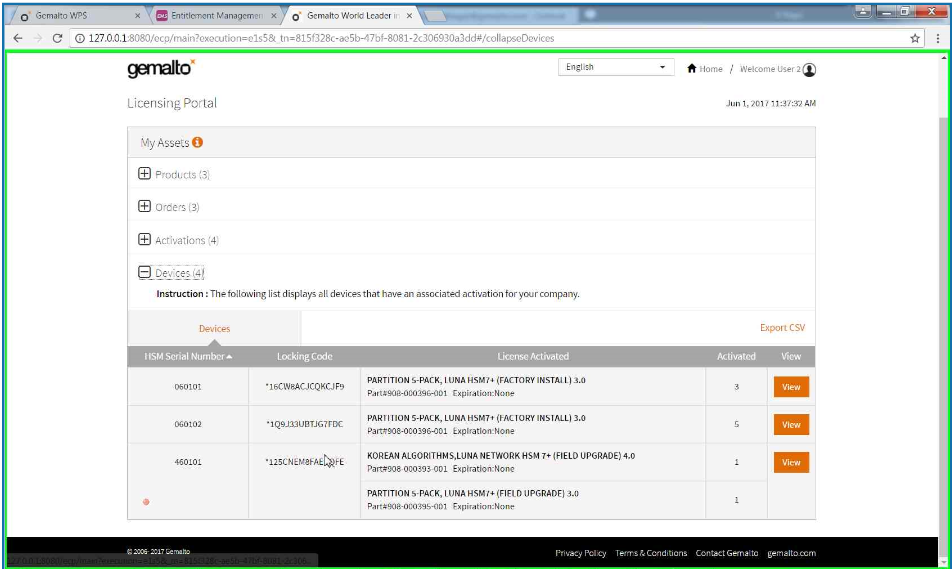
The View button enables you to get a more detailed summary for a specific device: what feature(s) you have activated, when, and the corresponding license file (Download button).