|
Home > |
Installation Guide > SafeNet Remote PED Installation and Configuration
|
|---|
This chapter describes how to install, connect, and configure a SafeNet Luna Remote PED.
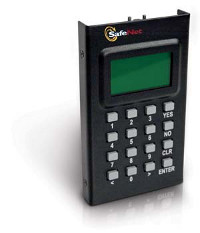
The standard PED is intended to connect directly to the HSM, and receives its power, as well as instructions and data via that connection. The Remote PED can act as a local PED, when needed, and connects as described above. When used in Remote PED mode, the PED connects to a computer via USB, and therefore requires some additional hardware.
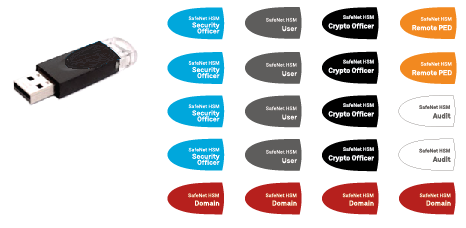
Remote PED can be distinguished from local PED by:
• An orange label PED Remote to the right of the SafeNet logo
• Availability of menu item 7 Remote PED from the PED's main menu
The following items are included with your Remote PED. All are required for a successful installation.
| Quantity | Item |
|---|---|
| 1 |
PED (Remote PED Capable and with firmware 2.7.1 or newer)
|
| 1 |
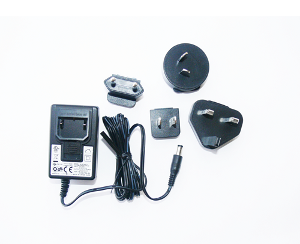
PED Power Supply kit with replaceable mains plug modules for international use (required when the PED is operated in Remote PED mode)
|
| 1 |
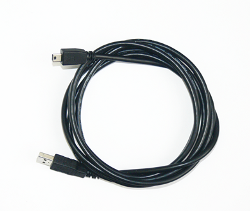
Cable, USB 2.0, Type A to Mini B connectors (for Remote PED operation).
|
| 1 |
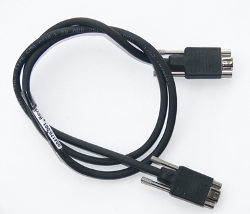
Cable, Data, 9-pin, Micro-D to Micro-D connectors (for local PED operation prior to HSM firmware versions 7.x.).
|
| 1 |
Ten-pack of iKey 1000 PED keys, and sheets of peel-and-stick labels
|
The Remote-Capable PED can be used either locally, connected directly to a SafeNet Luna HSM (exactly as for the standard PED), or remotely when connected to a suitable workstation. The Remote PED must be connected to the electrical main power supply.
The normal local use of a PED with Remote PED capability is to use it in Local mode to prepare an HSM. This is done by imprinting an RPV (remote PED vector) onto the HSM and also onto an RPK (the orange Remote PED Key) before shipping the HSM to its remote location. Then the PED can be switched to Remote PED mode, to serve any HSM that has an appropriate RPV.
To use your HSM appliance and PED for local operation only, refer to the instructions in the Configuration Guide and the HSM Administration Guide.
To prepare an HSM for Remote PED operation, it needs a minimum of preparation as described in this section, below.
1.From the software media (DVD or downloaded, un-tarred archive file), install the SafeNet Luna HSM Client software onto the selected Windows computer that will act as the PED Server to your remotely located SafeNet Luna HSM, ensuring that the Remote PED option is selected. Let the Windows "Found New Hardware" dialog install it. The PedServer.exe and PedClient.exe applications are installed in SafeNet Luna HSM Client folder along with any other SafeNet tools.
2.For SafeNet Luna Network HSM, configure your HSM appliance for your network. Refer to the relevant Configuration Guide sections.
3.Imprint the HSM with a Remote PED key (orange). Your must use a local connection for the first orange PED key imprint.
a.Connect the PED directly to the HSM that you will later be using remotely. Connect the PED to the power supply.
Note: To operate in Local PED-USB mode, the PED must be connected directly to the HSM card's USB port, and not one of the other USB connection ports on the 
On power-up, the Luna PED automatically detects the active interface that it is plugged into, and defaults to the appropriate mode after the first command is sent to it. The Luna PED waits in either Remote PED-USB mode (if the PED is connected to a USB port) or in its Scanning state (if the PED is connected to an SCP port) until a command is received from the HSM.
–If the PED is directly connected to the HSM via USB port, it enters Local PED-USB mode.
–If the PED is directly connected to the HSM via SCP port, it enters Local PED-SCP mode.
b. For SafeNet Luna Network HSM only, log in as "admin" to the appliance (SSH session or local serial connection).
c.For SafeNet Luna Network HSM, issue the LunaSH command hsm ped vector init; or for SafeNet PCIe HSM or SafeNet USB HSM, issue the LunaCM command ped vector init.
d.When prompted, insert a blank (orange-labelled) PED key into the PED for imprinting; or re-use an already-imprinted orange PED key.
e.Bring the imprinted (orange) Remote PED key to your workstation, along with a Remote-capable PED.
The HSM can now be shipped to its remote locale.
You can perform other maintenance at this time, if convenient, but only the foregoing steps were required to be done locally - all future configuration and administration can be performed remotely.
Once an HSM has been imprinted with a Remote PED Key (RPK) vector, you can begin administering remotely, while also authenticating remotely from any workstation that has PED Server software and driver, a remote-capable PED, and an orange PED Key with the correct RPK (that you just imprinted in the previous steps).
1.On the PED power supply, slide the release catch as shown by the heavy arrow, and lift the pin protector (thinner arrow) from the power supply:
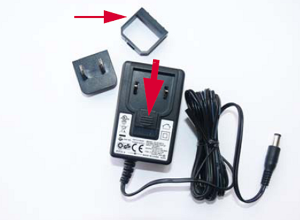
2.Choose a plug style that is appropriate for your country and place it in the power supply, top end first, then snap the bottom end in the direction indicated by the arrow: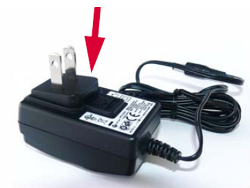
3.For remote PED operation:
–Connect the power supply to the AC mains
–Connect the DC power plug of the power supply to the DC power receptable on the top of the PED: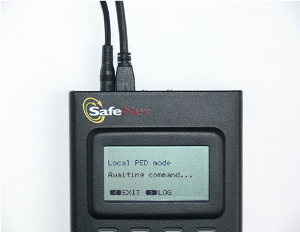
–Connect the USB cable between the USB micro connector on the PED and a USB socket on your computer.
4.At the workstation-connected PED, press < on the PED keypad to navigate to the main menu, and then press 7 to enter Remote PED mode.
5.In a command-prompt window on the workstation, start the PED Server program in its listening mode:
c:\<yourRemotePed-directory>\pedserver -m start
6.Run the command pedserver -m show to verify that the PED is detected, and the system is ready for remote connection.
7.Start the PED Client - the Remote PED enabling process on the HSM host:
lunash:> hsm ped connect -ip <workstation_ip_address> -port 1503
or
lunacm:> ped connect -ip <workstation_ip_address> -port 1503
8.Perform an hsm login or role login -name SO (as appropriate). The PED prompts for the Remote PED key. Insert the imprinted Remote PED key associated with the connecting HSM appliance, and press Enter.
The PED then prompts for the HSM SO's blue PED key. Insert it and press Enter. A successful login confirms that the Remote PED connection is running properly.
Begin using and administering the remotely located SafeNet Luna HSM appliance via SSH session, and providing PED key authentication via the workstation-connected Remote PED whenever requested. Review the SafeNet Network HSM Help for information about timeouts with respect to Remote PED.
Note: Remote PED is served from a host computer running SafeNet Luna Client PED Server software. A Remote PED session is called by an instance of PED Client running on the computer hosting the SafeNet Luna HSM. In some cases, such as SafeNet Luna Network HSMs behind strict firewalls, the HSM host is not allowed to initiate the connection. In that case, you can initiate a Remote PED session from the PED Server side, providing that the computer hosting the PED has obtained and registered the SafeNet Luna Network HSM's server.pem certificate.