|
Home > |
Installation Guide > SafeNet PCIe HSM Hardware Installation > Installing the SafeNet PCIe HSM Hardware
|
|---|
This section describes how to perform the following tasks:
•install the SafeNet PCIe HSM card into the host computer. See Installing the SafeNet PCIe HSM Card Into the Host Computer.
•connect a local PED, if necessary. See Connecting a Local PED
•connect a remote PED, if necessary. See Connecting a Remote PED
You install the SafeNet PCIe HSM card into an open PCIe slot on the host computer.
1.Open your computer, and remove the slot-cover bracket from an available PCIe slot. If the bracket is secured by a screw, retain that screw.
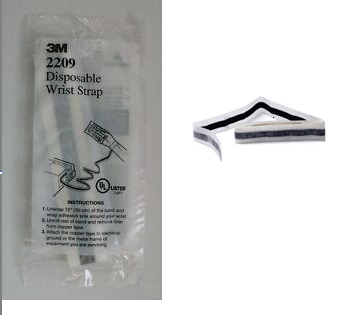
2.Use the provided anti-static wrist-strap to ground yourself to an exposed metal part of the computer chassis.
3.Remove the SafeNet PCIe HSM 7000 or SafeNet PCIe HSM 1700 from its anti-static packaging and prepare to insert the card into your computer.
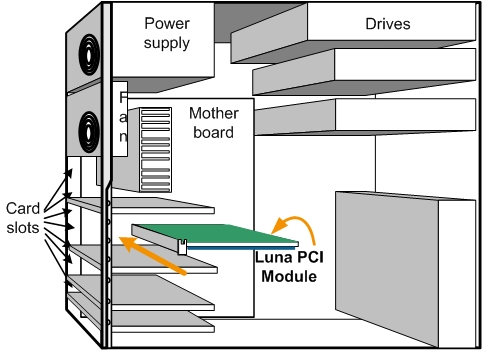
4.Align the SafeNet PCIe HSM card with the vacant slot. You might need to introduce the tip of the card-hold-down bracket first (the silver-metal part along the back edge of the card), in order to properly align the card with the connector. You can use a PCIe X4 or larger slot, as long as it is wired for at least four PCI express channels, and not reserved for a dedicated function. For example, we do not recommend that you use your SafeNet PCIe HSM card in a designated PCI-express video slot - different models of computer and their BIOS firmware can differ in how faithfully they support the PCIe standard.
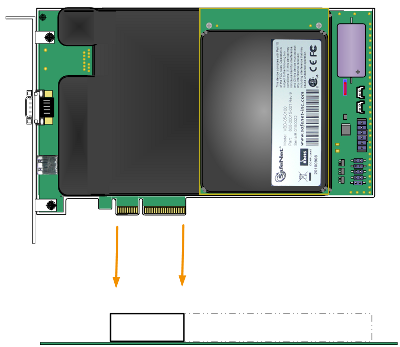
5.Insert the SafeNet PCIe HSM card, gently but firmly, into the connector. It should go straight in – angling the card might cause it to bind. The card is properly seated when no portion of the gold-colored contacts of the card protrudes above the connector socket.
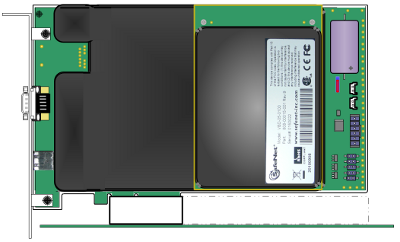
6.Secure the card-hold-down bracket with a screw.
7.Close the computer.
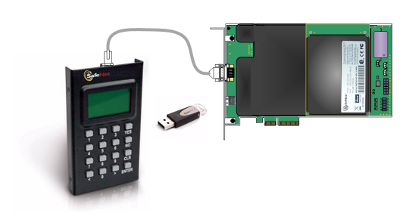
The local SafeNet PED (or a SafeNet PED Remote used locally) connects directly to the 9-pin Micro-D connector on the SafeNet PCIe HSM card.
1.Use the SafeNet PED local cable (mini-D-shell 9-pin connectors at both ends) to connect the SafeNet PED to the SafeNet PCIe HSM card.
The Remote-Capable PED can be used either locally, connected directly to a SafeNet HSM (exactly as for the standard PED), or remotely when connected to a suitable workstation and to the electrical main power supply. The normal local use of a PED with Remote PED capability is to use it in local mode to prepare an HSM (imprint an RPK – the orange key with a Remote PED Vector) before shipping it to its remote location. Then you would switch to Remote PED mode.
To prepare an HSM for Remote PED operation you need to connect it locally and imprint the HSM with a Remote PED Key (orange). Once the HSM can be reached via remote desktop connection, and the HSM is associated with an orange PED Key, all further configuration and administration can be performed remotely.
1.Use the SafeNet PED local cable to connect the SafeNet PED to the SafeNet PCIe HSM card. This step is required to imprint the HSM with a Remote PED Vector (RPV) using the orange PED key (RPK). This should be the only time you need to connect a PED locally to the HSM. Once the orange PED Key is imprinted with the same RPV as the HSM, all future PED operations can be performed remotely.
2.Follow the instructions in the Administration Guide to configure the remote PED. Note that you must install at least the Remote PED optional component of the SafeNet Client software before you can configure the remote PED. See SafeNet HSM Client Software Installation .