Administration & Maintenance - Backup & Restore
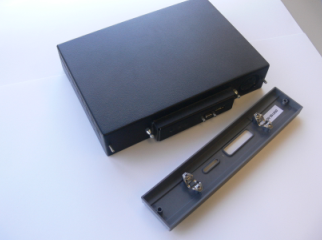
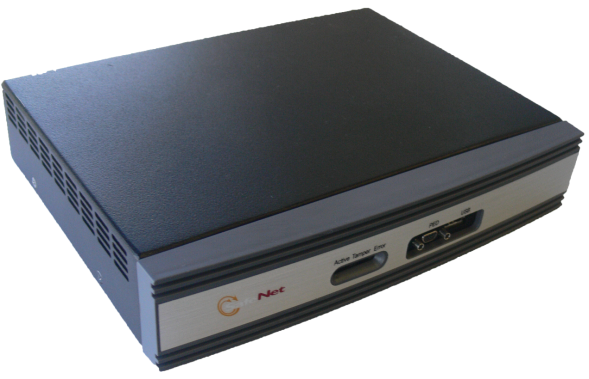
The Luna Remote Backup HSM (for backing up and restoring HSM and partition contents) and the Luna G5 HSM (for PKI options) are physically very similar. You could optionally have either, or both, to connect and use with your Luna SA.
The battery that powers the NVRAM and RTC in either device is shipped in the packaging, but outside the Luna Backup HSM or Luna G5 HSM.This preserves the battery in case the unit spends a long time in transit or is stored in your warehouse as a spare - with the battery not inserted, the Real Time Clock and NVRAM are not depleting its charge to no purpose. If you are preparing a fresh-from-the-factory external HSM to place it into service, then you must install the battery before using the device. Here are the instructions (as also seen in the Luna SA Quick Start Guide).
| 1 |
Begin by removing the front face-plate. It is held in place by two spring clips. Grasp the face-plate firmly and pull to disengage the clips. Set the face-plate aside. |
| 2 |
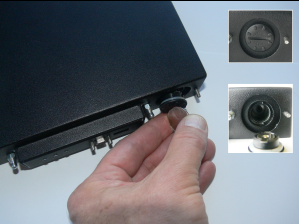
The battery compartment is to the right as you face the unit. The compartment cover is circular and has both raised dots and a recessed slot. Use finger-pressure against the dots, or the edge of a coin in the slot, to twist the battery compartment cover ¼ turn in a counter-clockwise direction. The cover should fall out easily. |
| 3 |
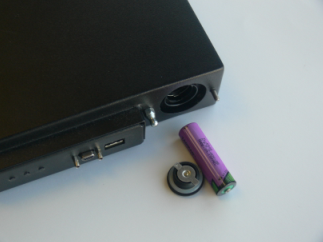
Remove the battery from its packaging and align it at the opening of the Luna G5 battery compartment. The battery has a “+” sign near the end with the raised nub/bump. The flat end of the battery is the negative pole (-). |
| 4 |
Insert the battery, negative end first. The positive end (+) should protrude. The compartment is spring-loaded. |
| 5 |
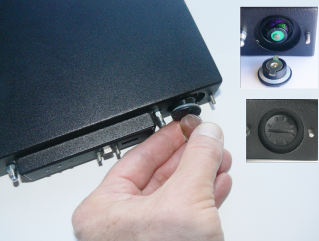
Use the battery compartment cover to push the battery into the compartment, against the spring tension. Maintaining the pressure, align the two tabs on the inside of the cover with the two recessed indentations at the top and bottom of the compartment opening. With a little jiggling and a few trial pushes, the tabs should settle into those recesses, allowing the cover to seat flush with the front of the Luna G5 or Luna Remote Backup HSM. Maintain the inward pressure and twist the cover ¼ turn clockwise to lock it in place. The battery is installed. |
| 6 |
Replace the front-panel cover by aligning the clips with their respective posts and pushing until the clips grab the posts and the cover snaps in place. See the main product documentation to connect and use your external HSM with Luna SA.
|
.